42
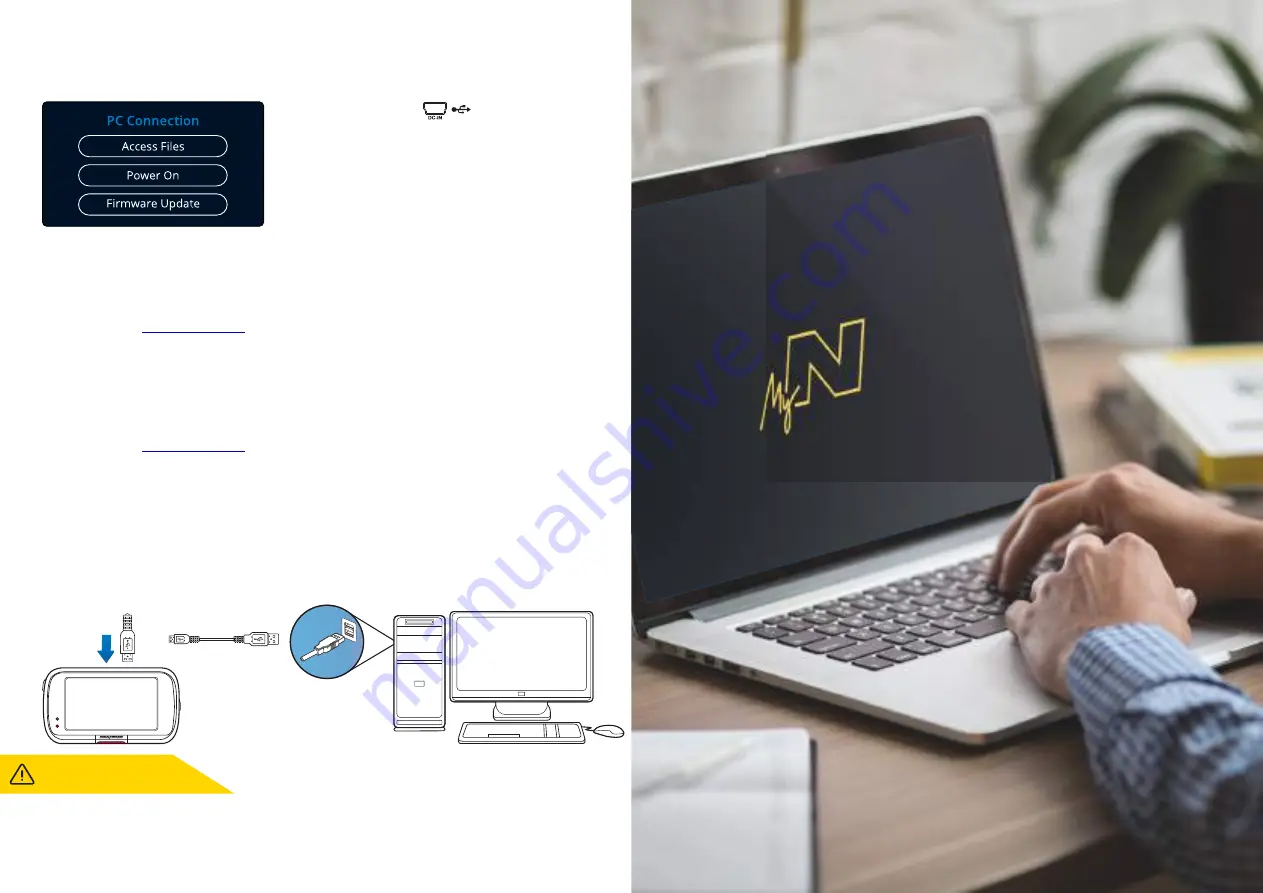
PC Connection
Use the supplied USB cable to connect the Dash Cam
directly to your PC via the socket;
do NOT connect the USB cable to the Powered Mount.
Once connected the Dash Cam will turn on with three options
available; ‘
Access Files
’, ‘
Power On
’, and ‘
Update Firmware
’, as
described below. Firmware Update information can be found
on the next page.
Access Files (Windows)
When this option is selected, the Dash Cam will function as a card reader for your PC. An extra drive will
appear, and you will be able to view / manage the stored files upon the MicroSD card within the Dash Cam.
You will be able to view your files using MyNextbase Player™, a free editing and sharing software available
to download from
. The Dash Cam is a ‘read-only’ device, therefore uploading files to
www.nextbase.com
the SD card when in Access Files mode is not possible.
Access Files (Mac)
When this option is selected, the Dash Cam will function as a card reader for your MAC. The 'Nextbase’
external USB disk icon will appear on your MAC and you will be able to view and/or manage stored files.
You will be able to view your files using MyNextbase Player, a free editing and sharing software available
to download from
.
www.nextbase.com
The Dash Cam is a ‘read-only’ device, therefore uploading files to the SD card when in Access Files mode
is not possible. When the Dash Cam is connected to either a Windows or Mac system you will see a pop
up on the Dash Cam that will read ‘
Use MyNextbase Player to review, edit, save, and share recordings’
.
Power On (Windows & Mac)
When this option is selected, the Dash Cam will power on with all functions available. This includes
charging of the internal battery, a full charge will take approximately 2 hours.
ALWAYS turn OFF the Dash Cam
before disconnecting from your PC/Mac.
Summary of Contents for 622GW
Page 1: ...User Manual...
Page 52: ...NBDVR622GW ENG R1...


