9.
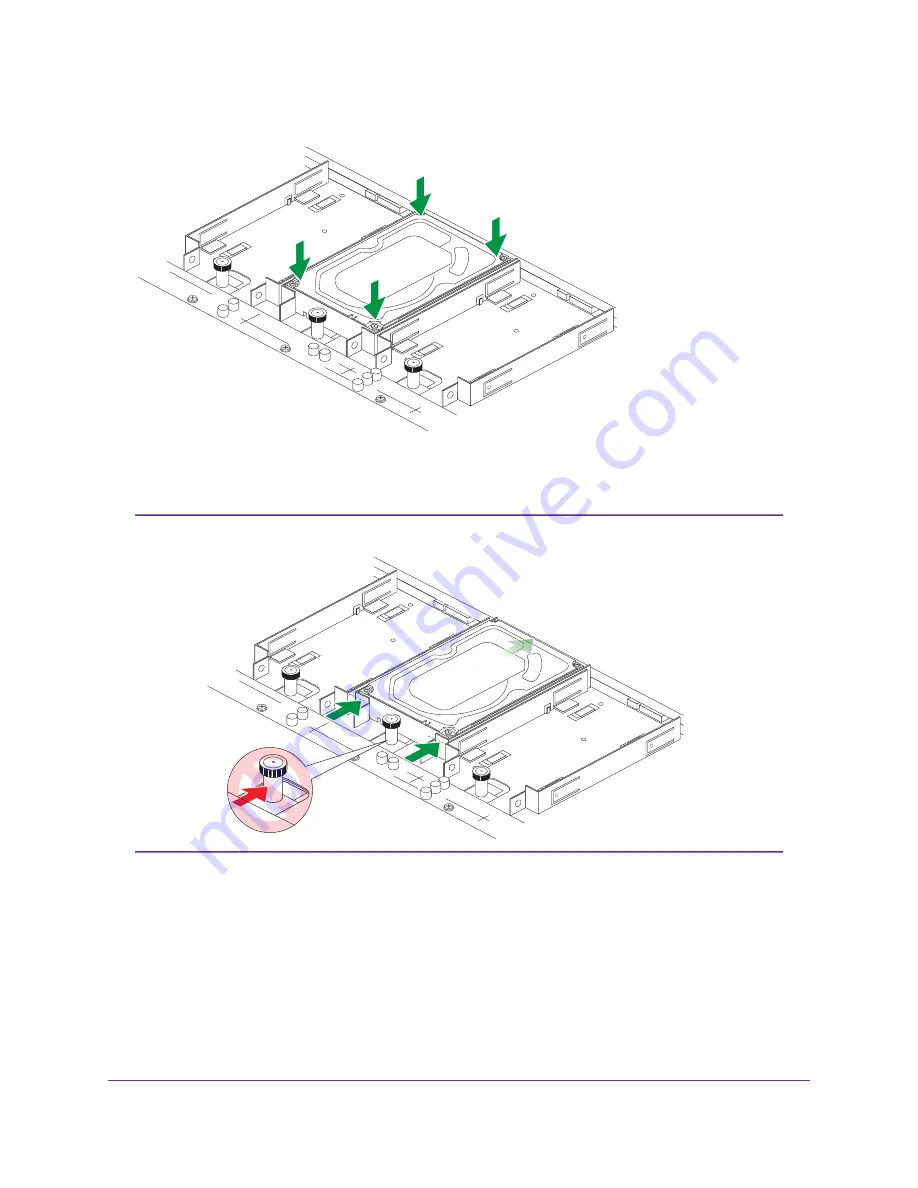
Gently push the drive down into the tray, pushing on the corners.
10.
Push the drive into the rear connector until the thumb knob locks.
The thumb knob clicks when it locks.
Do not push on the lock post.
Note
11.
Repeat for any additional drives.
12.
Replace the chassis cover.
13.
Tighten the front thumb screws.
14.
Slide the chassis back into the rack.
15.
Screw two M5 bolts through the chassis tabs into the center of the rails.
16.
If necessary, turn on your system by pressing the Power button.
For more information about X-RAID, Flex-RAID, and using the local admin page, see the ReadyNAS
OS 6 Software Manual, which is available at
http://support.netgear.com/product/ReadyNAS-OS6.
Disks
26
ReadyNAS OS 6


