6.
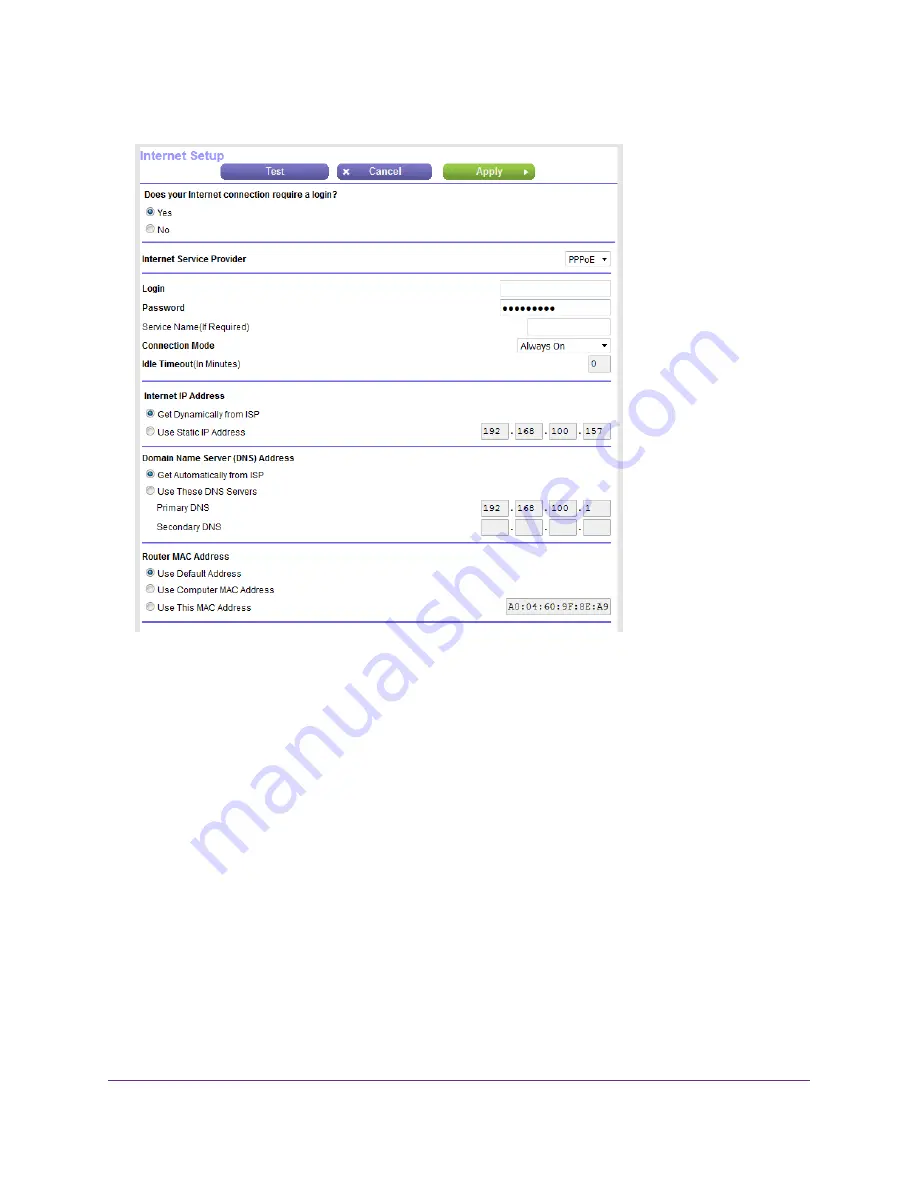
From the Internet Service Provider menu, select PPPoE as the encapsulation method.
7.
In the Login field, enter the login name that your ISP gave you.
This login name is often an email address.
8.
In the Password field, type the password that you use to log in to your Internet service.
9.
If your ISP requires a service name, type it in the Service Name (if Required) field.
10.
From the Connection Mode menu, select Always On, Dial on Demand, or Manually Connect.
11.
To change the number of minutes until the Internet login times out, in the Idle Timeout (In minutes)
field, type the number of minutes.
This is how long the router keeps the Internet connection active when no one on the network is using
the Internet connection. A value of 0 (zero) means never log out.
12.
Select an Internet IP Address radio button:
•
Get Dynamically from ISP. Your ISP uses DHCP to assign your IP address. Your ISP automatically
assigns these addresses.
•
Use Static IP Address. Enter the IP address, IP subnet mask, and the gateway IP address that
your ISP assigned. The gateway is the ISP router to which your router connects.
13.
Select a Domain Name Server (DNS) Address radio button:
•
Get Automatically from ISP. Your ISP uses DHCP to assign your DNS servers. Your ISP
automatically assigns this address.
Specify Your Internet Settings
27
Nighthawk AC1750 Smart WiFi Router Model R6700v2


