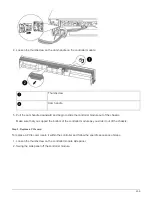
2. Align the end of the controller module with the opening in the chassis, and then gently push the controller
module halfway into the system.
Do not completely insert the controller module in the chassis until instructed to do so.
3. Recable the system, as needed.
If you removed the media converters (QSFPs or SFPs), remember to reinstall them if you are using fiber
optic cables.
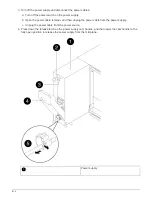
4. If the power supplies were unplugged, plug them back in and reinstall the power cable retainers.
5. Complete the reinstallation of the controller module:
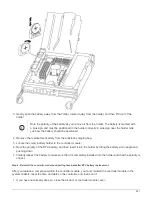
a. With the cam handle in the open position, firmly push the controller module in until it meets the
midplane and is fully seated, and then close the cam handle to the locked position.
Tighten the thumbscrew on the cam handle on back of the controller module.
Do not use excessive force when sliding the controller module into the chassis to avoid
damaging the connectors.
b. If you have not already done so, reinstall the cable management device.
c. Bind the cables to the cable management device with the hook and loop strap.
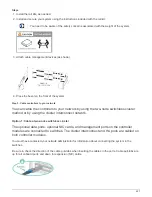
d. Reconnect the power cables to the power supplies and to the power sources, and then turn on the
power to start the boot process.
e. Halt the controller at the LOADER prompt.
6. Reset the time and date on the controller:
a. Check the date and time on the healthy controller with the
show date
command.
b. At the LOADER prompt on the target controller, check the time and date.
c. If necessary, modify the date with the
set date mm/dd/yyyy
command.
d. If necessary, set the time, in GMT, using the
set time hh:mm:ss
command.
e. Confirm the date and time on the target controller.
7. At the LOADER prompt, enter
bye
to reinitialize the PCIe cards and other components and let the
controller reboot.
8. Return the controller to normal operation by giving back its storage:
storage failover giveback
-ofnode
impaired_node_name
9. If automatic giveback was disabled, reenable it:
storage failover modify -node local -auto
-giveback true
Step 5: Switch back aggregates in a two-node MetroCluster configuration
After you have completed the FRU replacement in a two-node MetroCluster configuration, you can perform the
MetroCluster switchback operation. This returns the configuration to its normal operating state, with the sync-
source storage virtual machines (SVMs) on the formerly impaired site now active and serving data from the
local disk pools.
This task only applies to two-node MetroCluster configurations.
422


