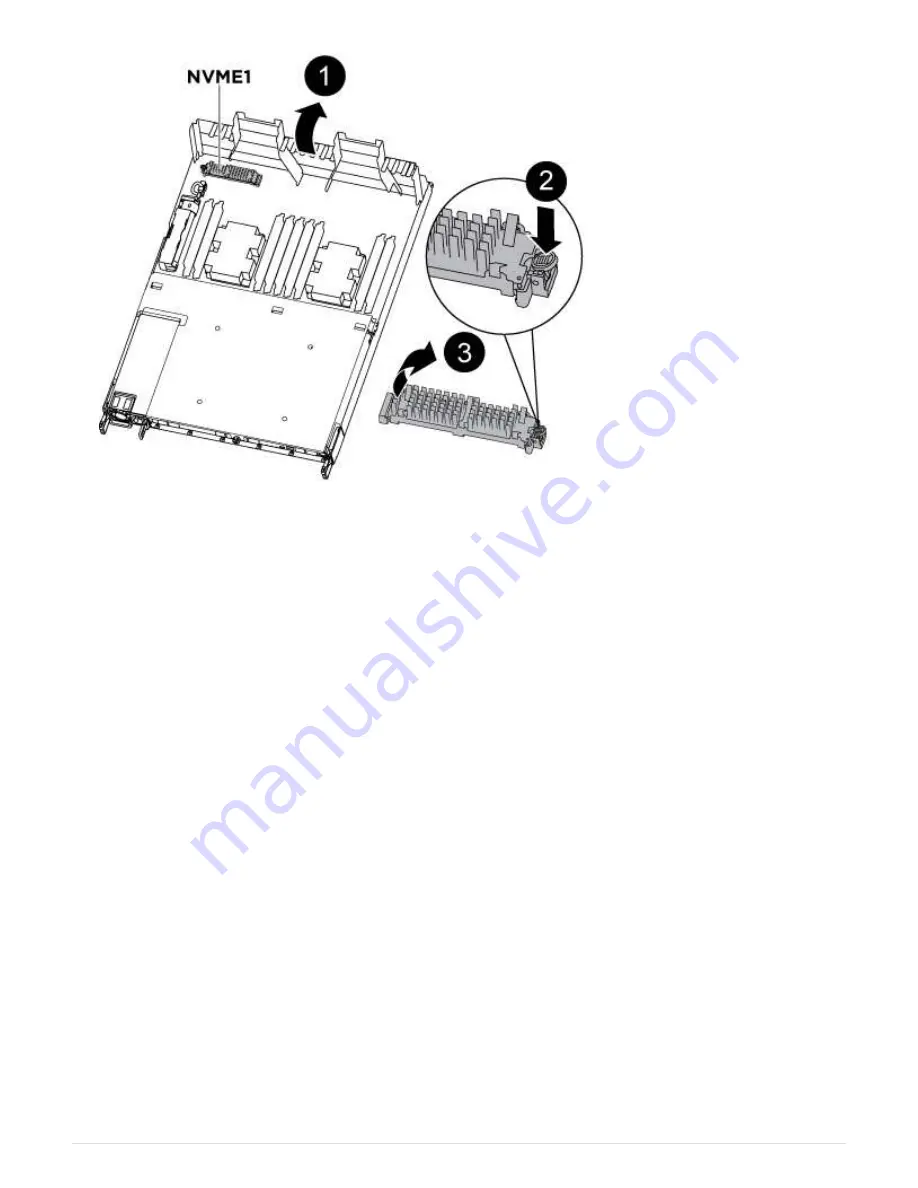
a. Press the blue button at the end of the boot media until the lip on the boot media clears the blue button.
b. Rotate the boot media up and gently pull the boot media out of the socket.
1. Check the boot media to make sure that it is seated squarely and completely in the socket.
If necessary, remove the boot media and reseat it into the socket.
3. Lock the boot media in place:
a. Rotate the boot media down toward the motherboard.
b. Placing a finger at the end of the boot media by the blue button, push down on the boot media end to
engage the blue locking button.
c. While pushing down on the boot media, lift the blue locking button to lock the boot media in place.
4. Close the air duct.
Step 3: Transfer the boot image to the boot media using a USB flash drive
The replacement boot media that you installed does not have a boot image, so you need
to transfer a boot image using a USB flash drive.
• You must have a USB flash drive, formatted to MBR/FAT32, with at least 4GB capacity
• A copy of the same image version of ONTAP as what the impaired controller was running. You can
download the appropriate image from the Downloads section on the NetApp Support Site
◦
If NVE is enabled, download the image with NetApp Volume Encryption, as indicated in the download
button.
◦
If NVE is not enabled, download the image without NetApp Volume Encryption, as indicated in the
download button.
• If your system is an HA pair, you must have a network connection.
22


