


NESS - M1 Installation and Programming Manual
Page 19
9-Installation
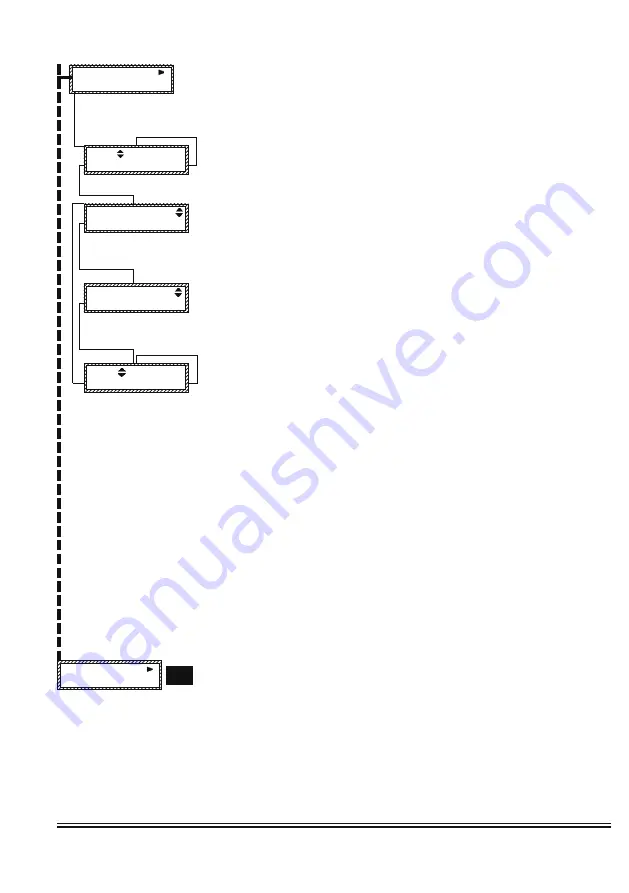
Programming (0)
87-Custom
Message Record
This option is used in conjuction with a house telephone (microphone) to record up to 10
custom voice messages. Each message occupies a 6 second block. Two or more
consecutive blocks may be linked together for longer times. Total record time cannot exceed
60 seconds. These messages require the Ness-RP software, which utilize these messages
together with the built-in 500+ word vocabulary to construct voice phrases for many uses,
including the voice dialer. Press the RIGHT arrow key to begin custom message record.
Selects any one of the custom messages (VM01-VM10) for playback or recording. Press the
UP or DOWN arrow keys to select. To Play the selected message press the RIGHT arrow key.
The message will play through Output 1 speakers. To record a new message press the LEFT
arrow key. To exit press the * key.
This sets the number of consecutive 6 sec. record blocks. The default is 01 blocks which is
normally long enough for most applications. However, to create a longer message press the
RIGHT arrow key and enter the number 01 to 02, etc. NOTE: Creating longer messages
reduces the total number of custom messages. This screen also allows all messages to be
played “PlayAll” by pressing the RIGHT arrow key. When ready to record press the LEFT arrow
key.
This is the prerecord screen. To begin recording: 1) lift the house phone (off hook), 2) press
the LEFT arrow key, 3) start speaking. To stop recording press the “0” key. If stop is not
pressed, recording will automatically end after 6 sec. (or the total number of blocks times 6
seconds).
NOTE: A local house phone is used as the microphone. Installer programming menu 07,
option 1, must be set to a 1 in order for the local phone to be recognized by the control.
This will display as soon as recording has stopped. To play the new message press the
RIGHT arrow key. To record the message again press the LEFT arrow key and follow the
same procedures again. To exit press the * key.
VM01
1 Block(s)
Record<
Play>
6 Sec Blocks=01
Record< PlayAll>
6 Sec Blocks=01
Rec<
LiftPhone!
VM01
1 Block(s)
Record<
Play>
Step by step summary of procedures for recording a custom message:
1) Verify that a house telephone is connected to the control’s T1 and R1 terminals and that Installer menu 07, option 1
is set to a 1. This allows the control to recognize the telephone and allow it to be used as a microphone.
2) Go to the user menu 8-System Settings by pressing the ELK key and entering 8. Press the
r
key and enter a valid
user code. Press 87 to reach the custom message record screen.
3) Using the Up/Down arrow keys, select the voice message to record VM01 to VM10. There are 10 custom
messages.
4) Press the
l
key and select the number of 6 second blocks for your message. Hint-rehearse and time the message,
if it is greater than 6 seconds then increase the number of consecutive blocks as required.
5) Lift the telephone handset and press the
l
key to begin the recording. The recording will not start until the handset
is off-hook and the
l
key is pressed.
6) Record your message by speaking into the handset. If the message is shorter than the amount of time selected
then press 0 to stop recording. Otherwise, recording will stop when the number of blocks is reached.
7) Press the Right arrow key to play the message. The message will be heard through the telephone handset if it is
still off-hook. Otherwise the message will be directed to the amplifier connected to output 1.
Requires
Installer
Code
From this menu you may press the RIGHT arrow to enter Installation Level Programming. If
the Installer Programming Code has not already been entered it will be required at this time.
REFER TO PAGE 22 FOR PROGRAMMING INSTRUCTIONS
NOTE: The Remote Programming RP software can be used to lockout certain local program
capabilities for “anti-takeover” purposes. The number in the lower right corner of this menu will
indicate the level of lockout as follows:
(0) = No lockout,
(1)=Lockout Telephone number programming - view everything,
(2)=Lockout ALL programming - view everything,
(3)=Lockout ALL Programming and Viewing. This can only be set or removed from the Ness-
RP Remote Programming Software.


