Disassembly and Reassembly 3-21
Main Board
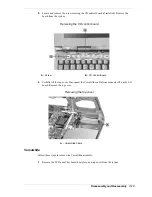
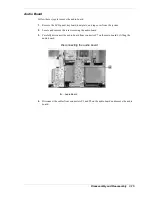
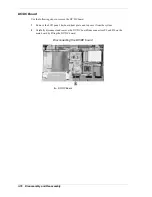
Follow these steps to remove the main board.
1.
Remove the LCD panel, keyboard, heat plate, top cover, audio board, I/O board, diskette
drive, and Kensington lock latch from the system. Remove any mini-PCI option, if
installed.
2.
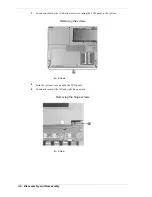
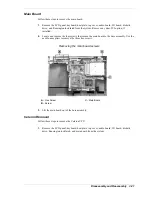
Locate and remove the four screws that secure the main board to the base assembly. Use the
needle-nose pliers to remove the three hex screws.
Removing the main board screws
A – Hex Screw
C – Main Board
B – Screw
3.
Lift the main board out of the base assembly.
Celeron Removal
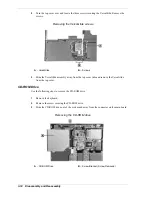
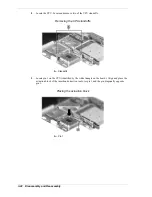
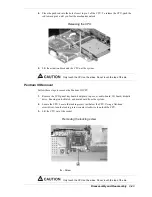
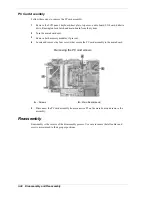
Follow these steps to remove the Celeron CPU.
1.
Remove the LCD panel, keyboard, heat plate, top cover, audio board, I/O board, diskette
drive, Kensington lock latch, and main board from the system.
Summary of Contents for VXI Series
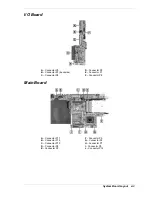
Page 43: ...3 Disassembly and Reassembly Required Tools and Equipment Disassembly Reassembly...
Page 67: ...4 System Board Layout Audio Board DC DC Board I O Board Main Board...
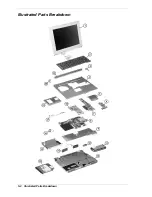
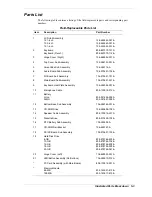
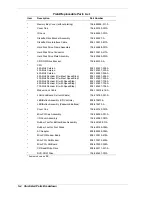
Page 70: ...5 Illustrated Parts Breakdown Illustrated Parts Breakdown Parts List...
Page 71: ...5 2 Illustrated Parts Breakdown Illustrated Parts Breakdown...
Page 77: ...7 Troubleshooting Quick Troubleshooting Helpful Questions...
Page 86: ...9 Specifications System Components Connector Locations Memory Map Interrupt Controllers...


