2-4 System Configuration and Setup
Low Battery Power
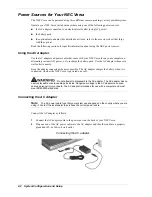
When battery power gets low, connect your system to the AC adapter. If an AC adapter is not
available, change the battery using the battery replacement procedure. See the section,
“Replacing the Battery.”
Returning the Battery to its Normal State
To return the battery to its normal state, try the following:
!
remove and then reinstall the battery
!
reinstall the battery in your NEC Versa and fully recharge the battery (to 100%).
Extending Battery Life
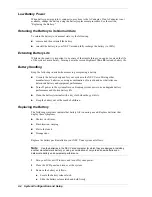
While on the road, it is important to be aware of the simple things you can do to extend the life
of the system’s main battery. Turning down the screen brightness (
Fn + F9
)
extends battery life.
Battery Handling
Keep the following in mind when removing or replacing a battery.
!
Use only the battery designed for your system in the NEC Versa. Mixing other
manufacturers’ batteries, or using a combination of very old and new batteries can
deteriorate battery and equipment performance.
!
Turn off power to the system after use. Keeping system power on can degrade battery
performance and shorten battery life.
!
Clean the battery terminals with a dry cloth when they get dirty.
!
Keep the battery out of the reach of children.
Replacing the Battery
The following symptoms indicate that battery life is nearing an end. Replace batteries that
display these symptoms.
!
Shorter work times.
!
Discoloration, warping.
!
Hot to the touch.
!
Strange odor.
Replace the battery pack installed in your NEC Versa system as follows.
Note
Use the batteries in the NEC Versa computer for which they are designed. Installing
another manufacturer’s battery, or using a combination of very old and new batteries can
deteriorate battery and equipment performance.
1.
Save your files, exit Windows, and turn off system power.
2.
Close the LCD panel and turn over the system.
3.
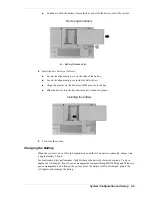
Remove the battery as follows:
!
Locate the battery release latch.
!
Slide the battery release latch and hold firmly.
Summary of Contents for VXI Series
Page 43: ...3 Disassembly and Reassembly Required Tools and Equipment Disassembly Reassembly...
Page 67: ...4 System Board Layout Audio Board DC DC Board I O Board Main Board...
Page 70: ...5 Illustrated Parts Breakdown Illustrated Parts Breakdown Parts List...
Page 71: ...5 2 Illustrated Parts Breakdown Illustrated Parts Breakdown...
Page 77: ...7 Troubleshooting Quick Troubleshooting Helpful Questions...
Page 86: ...9 Specifications System Components Connector Locations Memory Map Interrupt Controllers...

