


1-12 Introducing the NEC Versa
Around the Back of the System
You’ll find system ports for connecting your NEC Versa E120 DayLite to AC power
and optional devices (like a printer, a storage device, or external monitor) on the back
of your NEC Versa. The ports are described after the figure.
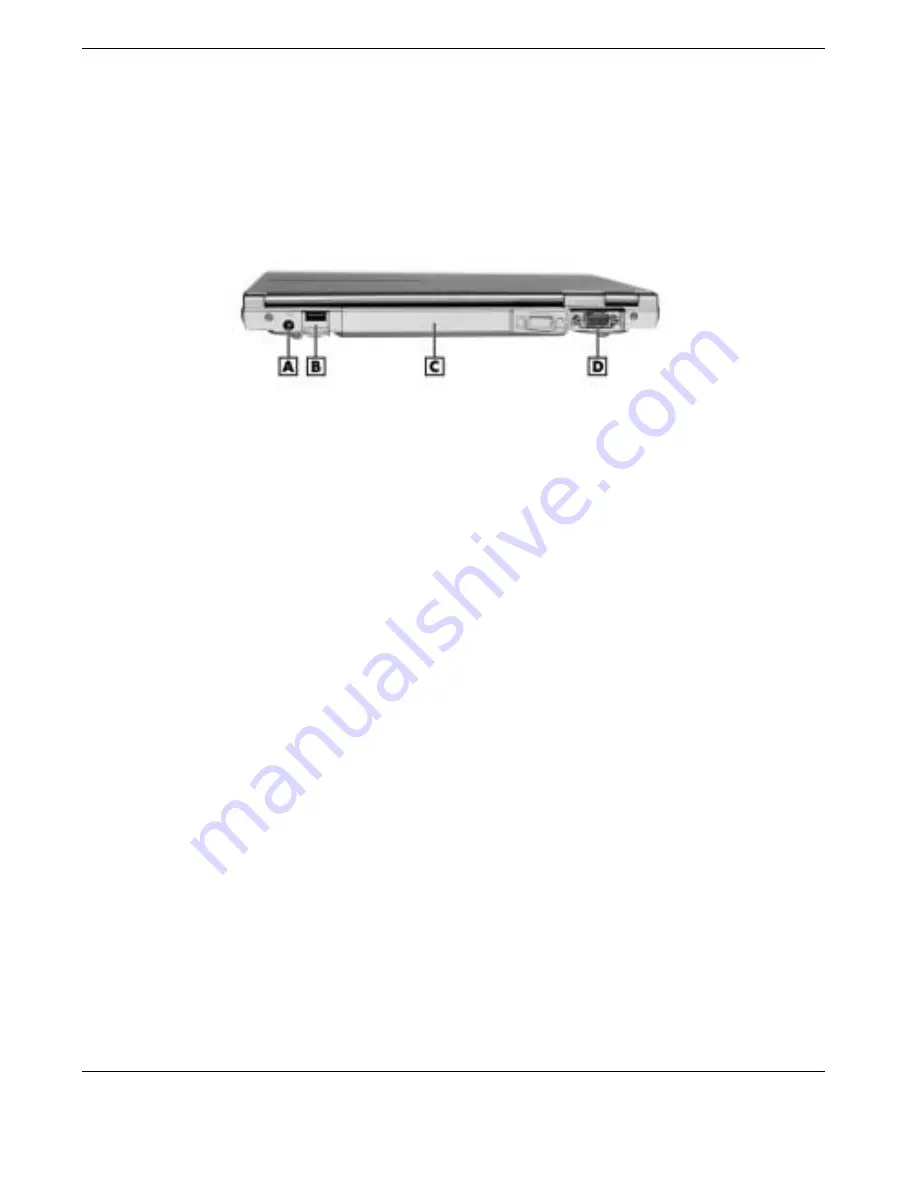
Back features
A – DC Power Port
C – Battery Bay
B – USB Port
D – VGA Port
DC Power Port — Lets you attach the NEC Versa notebook to a DC power source,
such as the AC power adapter that comes with your system. The AC power adapter
plugs into an AC power source and into the DC power port on the rear of the NEC
Versa notebook.
The AC power adapter uses a standard 115-Vac or 230-Vac grounded power
source. Keep the system connected to the AC power adapter and an AC power
source whenever possible to keep the battery pack and internal CMOS battery
charged.
USB Port — Allows you to easily and conveniently connect a USB-equipped
peripheral device to the NEC Versa. There are many USB devices available (for
example, storage devices, printers, keyboards, mouse, monitors, scanners, and
digital cameras) to expand system capabilities. The NEC Versa E120 DayLite has
two additional USB ports on the right side of the system (see “Around the Right
Side of the System”).
Connect your external USB CD-ROM drive to one of the USB ports. See “USB
Devices” in Chapter 5 for additional information about adding USB devices to the
NEC Versa notebook.
Battery Bay — Contains the system’s standard Lithium-Ion (Li-Ion) primary
battery.
VGA Port — Use this 15-pin port to attach an external monitor to your NEC Versa
notebook. With an external monitor attached, use the keyboard function key
combination
Fn-F3
to toggle between LCD, CRT, and Simultaneous LCD/CRT
video modes (see “Keyboard Panel”).


