background image

38

5. Using On-Screen Menu

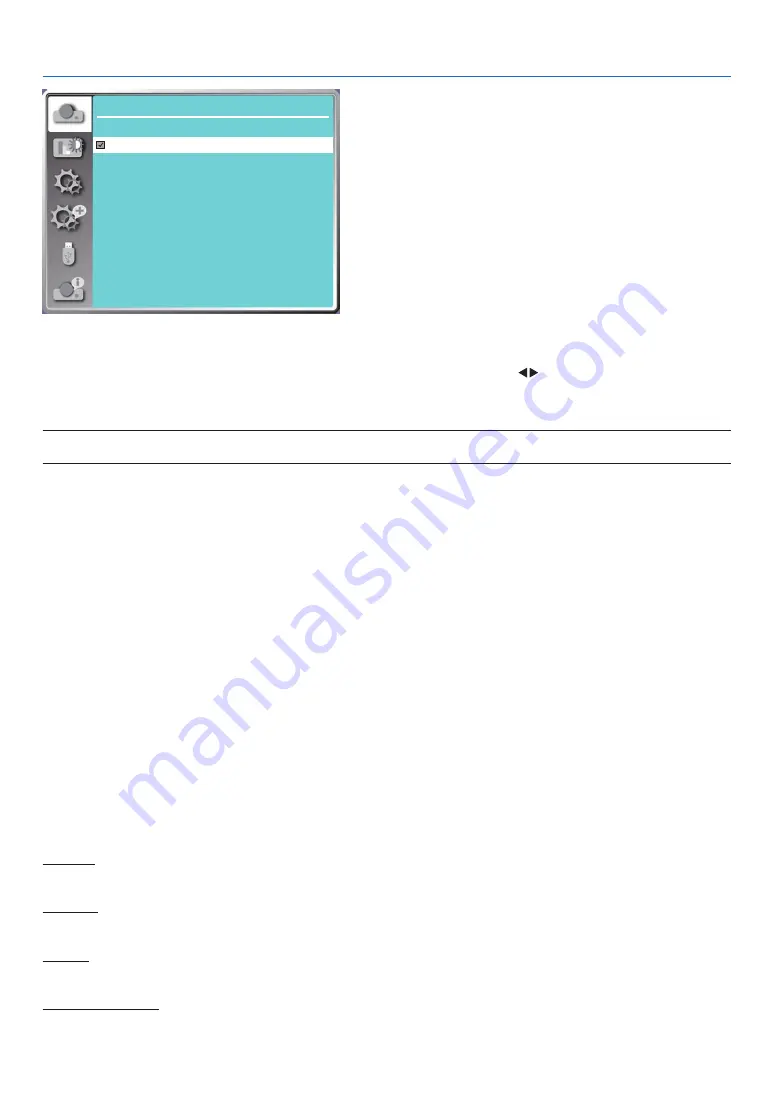
Display

Signal format

1024 x 768 , 60 HZ

1920 x 1080 , 60 HZ

-    -    -    -

-    -    -    -

1280 x 800 , 60 HZ


• The selected Signal format displays in the Signal format menu. 

Select the computer Signal format manually. 

1.  Press the MENU button on remote control and the On-Screen displays. Press 

 button to point to the Input icon, 

press 

▲ ▼ 

button or the ENTER button and the Input menu displays. 

2. Press 

▲ ▼ 

button to select Signal format, then press ENTER button.

NOTE: 
•  The computer Signal format menu will be disabled once HDMI 1, HDMI 2, USB-A, LAN has been selected. 

 Menu Descriptions & Functions [Color adjust]

Select color adjustment to set the image mode and adjust the quality of the projected image.

Menu operation

Press the MENU button on the remote control or on the top control panel to display the On-Screen menu. Press 

▲ 

▼ 

button to select the Color adjust menu, then press the ENTER or  

▶ 

button.

1) Press 


 button to select reqiured item.

2) Press the ENTER button.
3) Press 


 button to select adjust setpoint. 

[Image mode]

Direct operation


Press the PICTURE select button on remote control to select required image mode. 

Menu operation

Press the MENU button on the remote control or on the top control panel to display the On-Screen menu. Press 

▲ 

▼ 

button to select the color adjust menu, then press the ENTER or  

▶ 

button.

1) Press 

▲ ▼ 

button to select [Image mode] menu.

2) Press the ENTER button.
3) Press 

▲ ▼ 

button to select reqiured item. 

Dynamic
An image mode suitable for viewing in bright room. 

Standard
The default mode of your projector, can come to natural color. 

Cinema
Enriched gray scale for viewing movies. 

Blackboard (Green)
An image mode designed for displaying on a blackboard (Green). It boosts quality of image projected on blackboard 

Summary of Contents for PE506UL

Page 1: ...Projector PE506UL PE506WL User s Manual Please visit our web site for User s Manual in the latest version https www sharp nec displays com dl en pj_manual lineup html Model No NP PE506UL NP PE506WL...

Page 2: ...r countries and areas Blu ray is a trademark of Blu ray Disc Association CRESTRON and ROOMVIEW are registered trademarks of Crestron Electronics Inc in the United States and other countries Other prod...

Page 3: ...images being temporarily sustained on the surface of the LCD panel If this should happen continue to use your projector The static background from previous images will disappear Disposing of your used...

Page 4: ...ing interference that may cause undesired operation U S Responsible Party Sharp NEC Display Solutions of America Inc Address 3250 Lacey Rd Ste 500 Downers Grove IL 60515 Telephone Number 630 467 3000...

Page 5: ...e Fire and Shock Precautions Ensure that there is sufficient ventilation and that vents are unobstructed to prevent the build up of heat inside your projector Allow at least 4 inches 10 cm of space be...

Page 6: ...t has been damaged If the projector exhibits a distinct change in performance indicating a need for service Disconnect the power cord and any other cables before carrying the projector Turn off the pr...

Page 7: ...of your country in relation to the installation and management of the device Outline of laser emitted from the built in light module Wave length 449 461nm Maximum power 105W Radiation pattern from th...

Page 8: ...bel 1 For USA only NP PE506UL LABEL Warning 520084000 SONG SONG WARNING MOUNT ABOVE THE HEADS OF CHILDREN Additional warning against eye exposure for close exposures less than 1m 520084000 I 520084000...

Page 9: ...light Horizontal angle unit degree Zoom Lens position Right most Center Reference value Left most HR HC HL Wide 33 0 22 3 33 0 Tele 21 8 14 2 21 8 Zoom Lens position Upper most Center Reference value...

Page 10: ...y shut off the power 20 cm 8 or greater Exhaust vent Wall NOTE In the above figure it is assumed that there is sufficient space above the projector There is also an intake vent in the front Leave abou...

Page 11: ...NDBY MODE NOTE When NORMAL is selected for STANDBY MODE the following terminals and functions will not work MONITOR OUT terminal AUDIO OUT terminal LAN functions Please refer to page 39 about details...

Page 12: ...Connecting the Power Cord 11 Turning on the Projector 12 Change the On Screen menu language 13 5 Selecting a Source 14 Selecting the computer source 14 6 Adjusting the Picture Size and Position 15 Ad...

Page 13: ...t 39 Brightness 39 Color temp 39 Red 39 Green 39 Blue 39 Sharpness 39 6 Menu Descriptions Functions Setting 40 On start 40 Standby mode 41 High altitude 41 Cooling fast 42 Key lock 42 Contrast optimiz...

Page 14: ...ignal 73 Connecting an External Monitor 74 Connecting Component Input 75 Connecting HDMI Input 76 Connecting to a Wired LAN 77 Connecting to a Wireless LAN 77 8 Connecting with MultiPresenter app 80 1...

Page 15: ...Table of Contents PC Control Codes and Cable Connection 98 Troubleshooting Check List 100 REGISTER YOUR PROJECTOR for residents in the United States Canada and Mexico 102...

Page 16: ...net show examples of the PE506UL Projector Lens cap 1 440165300 Only for PE506UL Remote control 393004710 Batteries AAA 2 391003200 Power cord US 310004900 EU 310003100 Computer cable VGA 310002200 NE...

Page 17: ...i Farsi Romania Convenient Maintenance Functions Filter maintenance functions provide for better and proper maintenance of the projector Security Function The Security function helps you to ensure sec...

Page 18: ...ust Vent Heated air is exhausted from here Indicators page 5 Zoom Lever page 17 Focus Ring page 17 Adjustable Tilt Foot page 16 Lens Unless otherwise described in the user s manual the drawings for th...

Page 19: ...urity wires or chains up to 0 18 inch 4 6 mm in diameter Rear Remote Sensor page 8 Built in Security Slot Use for the theft and dropping off prevention measure AC Input Connect the supplied power cord...

Page 20: ...tton page 12 23 2 LIGHT Indicator page 88 3 STATUS Indicator page 88 4 POWER Indicator page 12 23 24 88 5 INPUT Button page 14 6 MENU Button page 29 7 EXIT Button 8 Volume Buttons Keystone Button page...

Page 21: ...b 15 Pin page 11 72 75 7 MONITOR OUT Terminal Mini D Sub 15 Pin page 74 8 PC CONTROL Port D Sub 9 Pin page 98 Use this port to connect a PC or control system This enables you to control the projector...

Page 22: ...This button does not work on this series of projectors 14 APPS Button page 14 80 15 ID SET Button page 55 16 Numeric Keypad Button CLEAR Button page 55 17 PIP Button PIP button does not work on this...

Page 23: ...the remote control for a long time remove the batteries Ensure that you have the batteries polarity aligned correctly Do not use new and old batteries together or use different types of batteries toge...

Page 24: ...Auto ceiling Rear as projection way the projector will be judged as the front projection automatically When selecting Auto ceiling Front or Auto ceiling Rear as projection way the projector will be j...

Page 25: ...On Screen menu language page 13 Step 3 Selecting a source page 14 Step 4 Adjusting the picture size and position page 15 Correcting keystone distortion KEYSTONE page 20 Step 5 Adjusting a picture and...

Page 26: ...e supplied power cord s three pin plug to the AC IN terminal of the projector and then connect another plug of the supplied power cord directly in the wall outlet Do not use any plug converter The pro...

Page 27: ...r cabinet or the POWER ON button on the remote control The POWER indicator will blink and the projector will become ready to use TIP When the message PIN code is displayed it means that the SECURITY f...

Page 28: ...press the EN TER or button to select the Language option 3 Then press button to select the required language page 46 Expand Language Auto setup Keystone Security Power management Test pattern Network...

Page 29: ...utton The projector will search for the available input source and display it The input source will change as follows Computer HDMI1 HDMI2 USB A LAN With the INPUT screen displayed you can press the b...

Page 30: ...height of an image Tilt foot page 16 A B C Finely adjusting the size of an image Zoom lever page 17 A B C Adjusting the focus Focus ring page 17 A B C A B C Adjusting the projected image s vertical a...

Page 31: ...make adjust ments to the desired height Rotate the tilt clockwise to raise the projector and counterclock wise to lower the projector or retract the adjustable foot The tilt foot can be extended up to...

Page 32: ...17 2 Projecting an Image Basic Operation Zoom Use the ZOOM lever to adjust the image size on the screen Focus Use the FOCUS ring to obtain the best focus Focus Ring B C A B Zoom Lever A B C...

Page 33: ...r range of the image Len shift V Rotate dial then you can move rightward and leftward the image with a distance up to 26 26 PE506WL and 29 29 PE506UL of the width of the image Len shift H TIP The diag...

Page 34: ...asic Operation PE506WL Width of projected image 26 H 26 H 100 H 55 V 100 V Height of projected image Description of symbols V indicates vertical height of the projected image H indicates horizontal wi...

Page 35: ...jector is keystone distortion of four corners 6 Corner correction Adjust the projected image when the projector is keystone distortion of six corners Curved correction Adjust the projected image when...

Page 36: ...in existence The arrow mark indicating the adjustment direction turns red The arrow mark disappears when the maximum adjustment limit reaches The keystone prompt box will disappear if you press the ke...

Page 37: ...ration cannot optimize the computer signal try to adjust Fine sync H position V position and H size manually page 34 35 9 Turning Up or Down Volume Sound level from the speaker or audio output can be...

Page 38: ...or will turn off when Normal is selected for STANDBY MODE Power On Steady blue light Standby Blinking orange light CAUTION Parts of the projector may become temporarily heated if the projector is turn...

Page 39: ...Projector Preparation Make sure that the projector is turned off 1 Put on the lens cap For PE506UL only 2 Unplug the power cord 3 Disconnect any other cables Remove the USB memory or the USB Wireless...

Page 40: ...ze a picture Press again to resume motion NOTE The image is frozen but the original video is still playing back This feature can not be used when LAN and USB A is selected as the input terminal Magnif...

Page 41: ...ed image will be moved 3 Press the D ZOOM button to magnify the picture Each time the D ZOOM button is prlessed the image is reduced NOTE The image will be magnified or demagnified at the center of th...

Page 42: ...ft corner of the screen When the USB memory is independent of the partition it will display more than one USB icon 3 Press button to switch required items The root directory of the USB memory is displ...

Page 43: ...e close its browse function on and turn off the projector then remove the USB memory c Do not insert and remove USB memory frequently Then remove it after the installation of at least 5 seconds After...

Page 44: ...le system signal format with input source 2 Color adjust menu Available options in the Image mode menu are Dynamic Standard Cinema Blackboard Green Color board or User image The available color adjust...

Page 45: ...nt Ceiling Rear Auto ceiling Front Auto ceiling Rear Menu position Upper left Upper right Center Lower left Lower right Background display Black Blue Logo Signal format The selected Signal format disp...

Page 46: ...0 1023 Sound HDMI Computer Expand Language Projector provides multiple language support English Auto setup Input search On Off Auto PC adj On Off Auto keystone On Off Keystone Keystone Store Reset H...

Page 47: ...ateway DNS Wireless LAN Setting On Off Control ID Control ID On Off Control ID number 1 254 1 Factory default USB A Set slide Slide transition effect Slide down Slide right Sort order Extend order Nam...

Page 48: ...signal NOTE When the component input signal is connected to the COMPUTER IN terminal select Computer HDMI1 and HDMI2 Selects the HDMI compatible equipment connected to your HDMI1 or 2 IN terminal USB...

Page 49: ...to PC adj function may fail to work if computer models is not compatible with the input signal Auto PC adj function may fail to work if you select the following system signal format 480i 576i 480p 576...

Page 50: ...button to adjust H size level Adjustment range is from 15 to 15 Aspect Adjust the image to fit the screen size while keeping aspect of input signal s unchanged Press the MENU button on the remote con...

Page 51: ...page 9 Auto ceiling Rear When the projector is projected in front of the screen The built in angle sensor detects the angle of the projector automatically and then switches to Rear or Ceiling Rear Wh...

Page 52: ...Logo The entire projection area display NEC PROJECTOR background NOTE This function will be invalid once you select input signal as USB A and LAN H size Display Auto PC adj Fine sync 0 0 0 0 H positi...

Page 53: ...e top control panel to display the On Screen menu Press button to select the Color adjust menu then press the ENTER or button 1 Press button to select reqiured item 2 Press the ENTER button 3 Press bu...

Page 54: ...0 63 Press button to increase contrast range from 0 63 Brightness Press button to decrease brightness range from 0 63 Press button to increase brightness range from 0 63 Color temp Press button to se...

Page 55: ...tting menu then press the ENTER or button 1 Press button to select reqiured item 2 Press the ENTER button 3 Press button to set options Setting On start Standby mode High altitude Key lock Contrast op...

Page 56: ...as WoL via LAN Consult your network administrator for more information about WoL Sleep Although the power consumption on this mode is higher than on the Network standby mode this mode spends less time...

Page 57: ...ress button to switch required menu 60 Sec Cooling down in 60 seconds after the projector is turned off 30 Sec Cooling down in 30 seconds after the projector is turned off And the cooling fan will run...

Page 58: ...timize and compensate signal automatically on the basis of the image to get the best contrast image 1 Press button to select Contrast optimization menu 2 Press the ENTER button 3 Press button to adjus...

Page 59: ...ely you can be adjust from 50 100 Default is 100 ECO 1 ECO 2 Lower the brightness and reduce energy consumption thus prolonging the light source service life Full normal The brightness is the same as...

Page 60: ...inal of the projector and the images can not be projected normally please switch on the image or sound setting Press the MENU button on the remote control or on the top control panel to display the On...

Page 61: ...d be output according the connection of AUDIO IN terminal Menu Descriptions Functions Expand The projector has expand function you can select other functions as described below Menu operation Press th...

Page 62: ...ress button to select Auto setup menu 2 Press the ENTER button 3 Press button to select required items Input search Select this function to detect the signal then project images automatically Auto PC...

Page 63: ...cord Reset Keystone function will be cancelled after turning off the projector or unplugging the AC power Expand Language Auto setup Keystone Security Power management Test pattern Network setup Cont...

Page 64: ...in Press The lines on the left and right sides shrink inward Curved cerrection X Y gain Press The top and bottom lines expand outward Curved cerrection X Y gain Press The top and bottom lines shrink i...

Page 65: ...sides Extend the vertical lines on the left and right sides of the bottom while maintaining the top area Curved cerrection Y Offset Press Correct the vertical lines on the left and right sides Extend...

Page 66: ...actory default 1 Press button to select Reset option 2 Press the ENTER button Release keystone mode Security Set a PIN code to lock the usage of the projector to prevent unauthorized personnel from op...

Page 67: ...The power light indicator turns steady green when the light source is fully cooled down The light source turns on again if an input signal is connected or any button except the power button on the to...

Page 68: ...plays the filter usage time Timer Set the time to display a warning icon Filter counter reset Reset filter counter NOTE The screen will display the icon Filter warning Please change the filter when th...

Page 69: ...ashing after turn on the projector NOTE It is recommended that users use a Category 5 or higher LAN cable Operation steps 1 Turn on your projector 2 Acquire the IP address with DHCP set to on and auto...

Page 70: ...Control ID Number Select a number from 1 to 254 you wish to assign to your projector NOTE When On is selected for Control ID the projector cannot be operated by using the remote control that does not...

Page 71: ...pecified ID with batteries removed Expand Language Auto setup Keystone Security Power management Test pattern Network setup Control ID Factory default Filter Expand Control ID Control ID Control ID Nu...

Page 72: ...fect Sort order Rotate Best fit Repeat Apply Slide right Name order No rotate Off On Set slide Select this function to play slides 1 Press button to select a file 2 Press button to select Set slide me...

Page 73: ...screen 1 Press button to select Best fit menu 2 Press the ENTER button 3 Press button to switch required item On Display images by the aspect ratio of the screen Off Display image by the normal pixels...

Page 74: ...H sync freq of input signal in unit of KHz Show KHz when no signals are in existence V sync freq Display V sync freq of input signal in unit of KHz Show Hz when no signals are in existence Light count...

Page 75: ...nd press the ENTER button to enter MAC address Display the MAC address of wired LAN IP address Display the IP address of wired LAN 3 Press button select Network setting and press the ENTER button to e...

Page 76: ...lish Japanese Traditional Chinese Simplified Chinese Do not start multiple Web browser settings or control Do not use more than one computer set or control the projector Please change your password If...

Page 77: ...atus 4 General setup page Enter old password Enter the password for the configuration Enter new password Enter a new password Confirm new password Re enter the new password to confirm Power source Upd...

Page 78: ...he phase of the projected image H position Adjust the horizontal position of the projected image V position Adjust the vertical position of the projected image H size Adjust the horizontal dimension o...

Page 79: ...NS Please enter the DNS address when you do not use the DHCP server Available characters digital 0 9 a period For example 192 168 0 253 Apply Update settings Crestron control Connect Crestron tool by...

Page 80: ...wide With tilt feet tilted 4 when set to wide inch m m m Projection distance Screen center line wide Projector lens center Screen size Screen height from thecenterof theprojector lens The figures ind...

Page 81: ...s center Screen size Screen height from thecenterof theprojector lens The figures indicated for height of screen from projector lens center on the projection distance table are for a lens shift of 55...

Page 82: ...e inches Screen width Screen height cm inches cm inches 30 64 6 25 4 40 4 15 9 40 86 2 33 9 53 8 21 2 50 107 7 42 4 67 3 26 5 60 129 2 50 9 80 8 31 8 80 172 3 67 8 107 7 42 4 100 215 4 84 8 134 6 53 0...

Page 83: ...n with tilt feet screwed in Screen size inches Throw distance L Height H m inches cm inches Wide Tele Wide Tele 0 V 60 V 0 V 60 V 30 0 77 1 26 30 1 49 5 20 2 4 0 7 9 1 6 40 1 03 1 69 40 6 66 5 26 9 5...

Page 84: ...5 V 30 0 78 1 32 41 4 52 0 20 2 2 0 7 9 0 8 40 1 05 1 77 41 4 69 8 26 9 2 7 10 6 1 1 60 1 60 2 68 62 9 105 5 40 4 4 0 15 9 1 6 80 2 14 3 59 84 4 141 1 53 8 5 4 21 2 2 1 90 2 42 4 04 95 2 159 0 60 6 6...

Page 85: ...0 Horizontal direction 29 DESKTOP FRONT DESKTOP REAR Width of projected image 29 H 29 H 100 H 60 V 100 V Height of projected image CEILING FRONT CEILING REAR 29 H 29 H 100 H 60 V 100 V Width of proje...

Page 86: ...Example When using to project on a 150 screen According to the Table of screen sizes and dimensions page 67 H 127 2 323 1 cm V 79 5 201 9 cm Adjustment range in the vertical direction the projected i...

Page 87: ...g on the projector Input terminal INPUT button on the projector cabinet Button on the remote control COMPUTER IN COMPUTER COMPUTER HDMI 1 IN HDMI1 HDMI 1 HDMI 2 IN HDMI2 HDMI 2 HDMI 1 IN HDMI 2 IN COM...

Page 88: ...sing a DVI signal When the computer has a DVI output terminal use a commercially available converter cable to connect the com puter to the projector s HDMI 1 or HDMI 2 input terminal only digital vide...

Page 89: ...you re projecting NOTE The AUDIO OUT mini jack does not support earphone headphone terminal When audio equipment is connected the projector speaker is disabled The signal output from the MONITOR OUT o...

Page 90: ...CA 3 cable not supplied Audio cable not supplied DVD player Audio Equipment Select the source name for its appropriate input terminal after turning on the projector Input terminal INPUT button on the...

Page 91: ...PC to the HDMI IN terminal of your projector Select the source name for its appropriate input terminal after turning on the projector Input terminal INPUT button on the projector cabinet Button on th...

Page 92: ...g Your computer s wireless LAN adapter or unit must be complied with IEEE802 11b g n standard Attaching the USB Wireless LAN Unit NOTE The USB Wireless LAN Unit must be inserted into the USB Wireless...

Page 93: ...TE Do not force to insert the USB Wireless LAN Unit To remove the USB Wireless LAN Unit disconnect the power cord and use the above procedure NOTE The green LED on the USBWireless LAN Unit flashes to...

Page 94: ...s button select Network setting and press the ENTER button to enter 4 Press button to set Wireless LAN Setting On and press the ENTER button to confirm 5 Press button to select Set press the ENTER but...

Page 95: ...MultiPresenter app to the projector and project them onto a screen See our company s website for more details about MultiPresenter https www sharp nec displays com dl en soft multipresenter index htm...

Page 96: ...ayed 2 Start MultiPresenter The target device screen is displayed 3 Enter the 4 digit PIN code displayed in the start up screen in the target device screen When connection with the projector is comple...

Page 97: ...he filter is set to 10000 H at time of shipment To cancel the message press any button on the projector cabinet or the remote control To clean the filter detach the filter and the filter cover CAUTION...

Page 98: ...close the filter cover Push the filter cover until it clicks into place 6 Clear the filter usage hours Plug the power cord into the wall outlet and then turn on the projector From the menu select Filt...

Page 99: ...dust off the cabinet If heavily soiled use a mild detergent Never use strong detergents or solvents such as alcohol or thinner When cleaning the vents or the speaker using a vacuum cleaner do not for...

Page 100: ...ess and contrast page 39 Check that the AV MUTE image off buttons are not pressed Reset the settings or adjustments to factory default using the Factory default in the Expand Menu page 56 Enter your r...

Page 101: ...tandby mode and before turning on the power to the notebook PC In most cases the output signal from the notebook PC is not turned on unless connected to the projector before being powered up NOTE You...

Page 102: ...the projector with a MacBook output may not be set to the display resolution of the projector un less mirroring is off on your MacBook Refer to owner s manual supplied with your Mac computer for mirro...

Page 103: ...r status Power is off Off Off Off Standy ECO Orange Blink 2 Off Off Standy Network Orange Light Off Off Standy Normal Orange Blink 1 Off Off Light source ON Light source power ECO1 ECO2 Blue Light Off...

Page 104: ...s too low Please contact your dealer or service personnel Red Blink 4 Green Blink 4 Red Light When LD Driver SPI commumication error Please contact your dealer or service personnel Red Blink 4 Green L...

Page 105: ...se contact your dealer or service personnel 1 Repetition to light on for 1 5 seconds off for 1 5 seconds 2 Repetition to light on for 1 5 seconds off for 7 5 seconds 3 Repetition to light on for 2 5 s...

Page 106: ...0 15 9 Wide 0 9 6 Tele 1 Effective pixels are more than 99 99 2 This is the light output value lumens when the Image mode is set to Dynamic and the ECO mode is set to Normal 3 Compliance with ISO21118...

Page 107: ...0 240 V Network stand by for ErP 2 0W or less 100V 130V 2 0W or less 200 240 V Normal stand by for ErP 0 5W or less 100V 130V 0 5W or less 200 240 V 5 An image with higher or lower resolution than the...

Page 108: ...3 120 5 4 7 119 5 4 7 82 3 2 53 2 1 Lens center Cabinet Dimensions Unit mm inch PE506UL 373 14 7 358 14 1 4 M4 1 0 16 M0 16 0 4 144 5 7 56 2 2 405 15 9 135 5 3 120 5 4 7 119 5 4 7 82 3 2 53 2 1 Lens...

Page 109: ...N 358 14 1 405 15 9 135 5 3 120 5 4 7 150 5 9 130 5 1 4 M4 1 0 16 M0 16 0 4 144 5 7 56 2 2 373 14 7 358 14 1 4 M4 1 0 16 M0 16 0 4 144 5 7 56 2 2 405 15 9 135 5 3 120 5 4 7 119 5 4 7 82 3 2 53 2 1 Len...

Page 110: ...9 7 8 Pin No RGB Signal Analog YCbCr Signal 1 Red Cr 2 Green or Sync on Green Y 3 Blue Cb 4 Ground 5 Ground 6 Red Ground Cr Ground 7 Green Ground Y Ground 8 Blue Ground Cb Ground 9 Hotplug 10 Sync Si...

Page 111: ...Hz 148 500 67 500 60 000 148 352 67 433 59 940 13 1920x1080p 50Hz 148 500 56 250 50 000 14 640x480 60Hz 640x480 25 175 31 469 59 940 15 640x480 67Hz 30 240 35 000 66 667 16 640x480 72Hz 31 500 37 861...

Page 112: ...00 79 976 75 025 44 1280x1024 85Hz 157 500 91 146 85 024 45 1360x768 60Hz 1360x768 85 500 47 710 60 020 46 1366x768 60Hz 1366x768 84 750 47 720 59 799 47 1400x1050 60Hz 1400x1050 121 750 65 317 59 978...

Page 113: ...FF 02H 13H 00H 00H 00H 15H NOTE Contact your local dealer for a full list of the PC Control Codes if needed Cable Connection Communication Protocol Baud rate 960 4800 19200 38400 bps Data length 8 bit...

Page 114: ...ONNECTION INTERFACE 1 Connection thru the serial port Communication Protocol Item Information Baud rate 4800 9600 19200 38400 bps Data length 8 bits Parity bit No parity Stop bit 1 bit Flow control No...

Page 115: ...ven though you adjust the brightness and or the contrast Input source s resolution and frequency are supported by the projector Image is too dark Remains unchanged even though you adjust the brightnes...

Page 116: ...Red cycles Lights in Blue Green Orange Red Remote control model number Installation environment Screen size inch Screen type White matte Beads Polarization Wide angle High contrast Throw distance fee...

Page 117: ...r warranty and InstaCare service program Visit our web site at https www sharpnecdisplays us click on support center register product and submit your completed form online Upon receipt we will send a...

Page 118: ...Sharp NEC Display Solutions Ltd 2021...

Reviews: