English-9
English
Quick Start
For box contents, please refer to the printed contents sheet provided in the box.
To connect the LCD monitor to your system, follow these instructions:
NOTE:
Make sure to read “Recommended Use” (
page 3
) before installation.
CAUTION:
The accessories included depends on the location where the LCD monitor was shipped.
1. Turn off the power to your computer.
2.
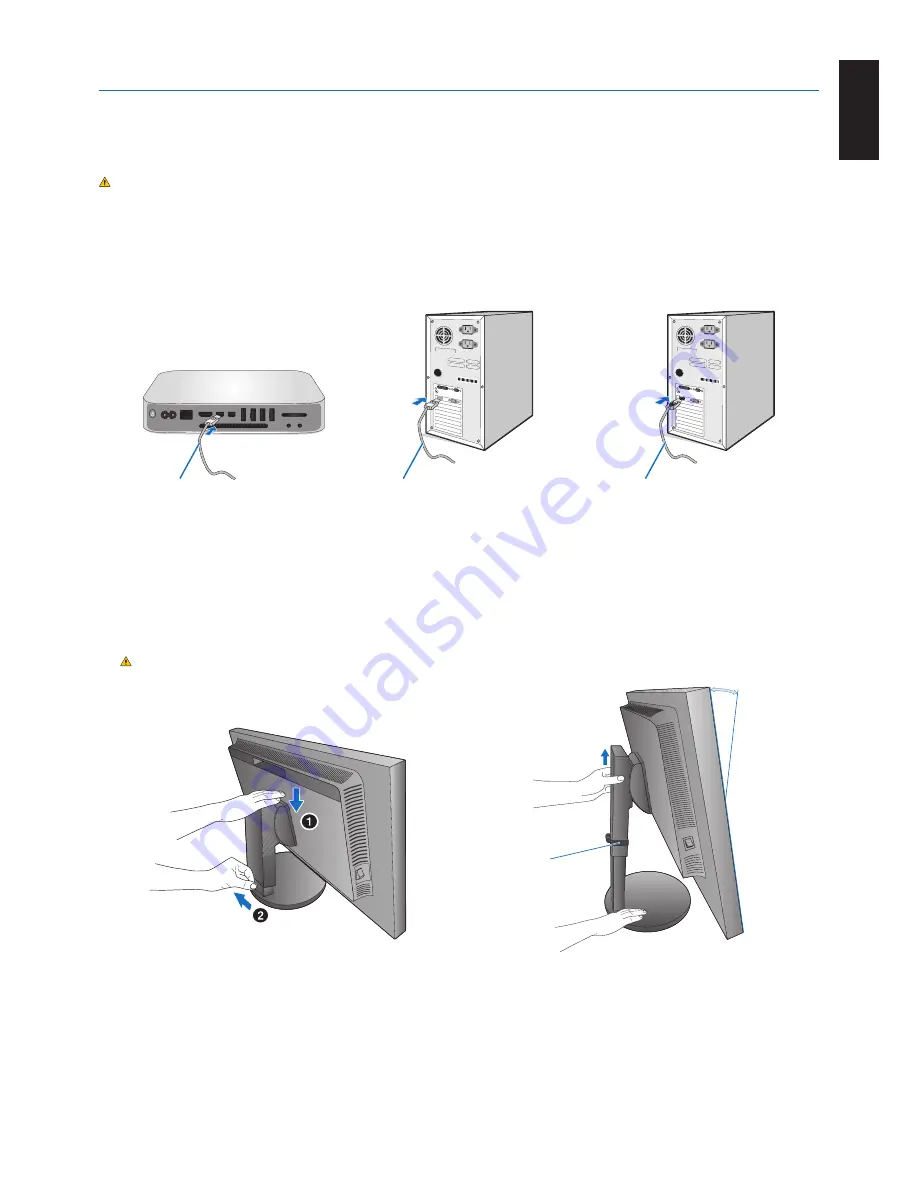
For a MAC with Thunderbolt or Mini DisplayPort output:
Connect a Mini DisplayPort to DisplayPort cable to a
video connector in your system (
Figure A.1
).
For a PC with DisplayPort output:
Connect the DisplayPort cable to the connector of the display card in your system
(
Figure A.2
).
For a PC with HDMI output:
Connect the HDMI cable to the connector of the display card in your system (
Figure A.3
).
Figure A.3
Mini DisplayPort to DisplayPort cable
Figure A.1
Figure A.2
DisplayPort cable
HDMI cable
NOTE:
•
Please use a Certified DisplayPort cable.
• When removing the DisplayPort cable, hold down the top button to release the lock.
•
Please use a High Speed HDMI cable with the HDMI logo.
3. Height adjustment is locked by a lock switch. Place a hand on top of the stand to push down the screen to the lowest
position. Slide the lock switch to unlock the stand and raise the monitor screen (
Figure B.1
).
Place hands on each side of the monitor to tilt the LCD panel to a maximum tilt angle and lift up to the highest position
(
Figure B.2
).
CAUTION:
Cable holder cannot be removed.
Figure B.1
Maximum Tilt
Cable holder
Figure B.2


