22
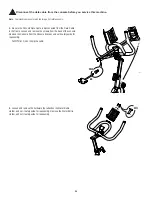
Note: Your machine may not match the image. For reference only.
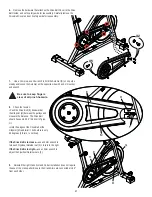
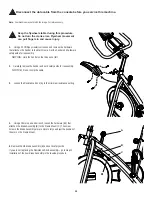
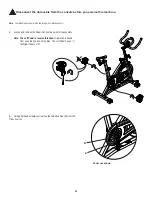
1. Be sure the Console Data Cable is disconnected from the Data Cable
in the frame. Loosen and remove the screws from the back of the console.
Remove the Console from the Console Bracket. Discard the old Console.
NOTICE:
Do not crimp the cable.
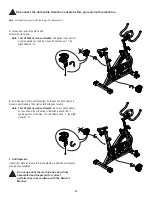
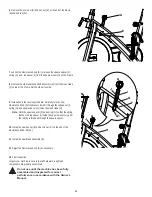
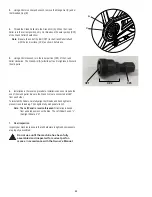
2. Install batteries in the replacement Console.
Note: The console uses AA size batteries (SUM3), which are not
included. Make sure that the batteries point in the direction of
the +/– indicators in the battery bay.
'RQRWPL[ROGDQGQHZEDWWHULHV
'RQRWPL[DONDOLQHVWDQGDUGFDUERQ]LQFRU
UHFKDUJHDEOH1L&G1L0+HWFEDWWHULHV
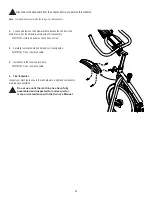
3. Put the replacement Console in position on the Console Bracket and
install the screws. Connect the Data Cable.
NOTICE:
Do not crimp the cable.
4. Final Inspection
Inspect your machine to ensure that all hardware is tight and components
are properly assembled.
Do not use until the machine has been fully
assembled and inspected for correct perfor
mance in accordance with the Owner’s Manual.
Disconnect the data cable from the console before you service this machine.
+
-
X2
X4
#2


