background image

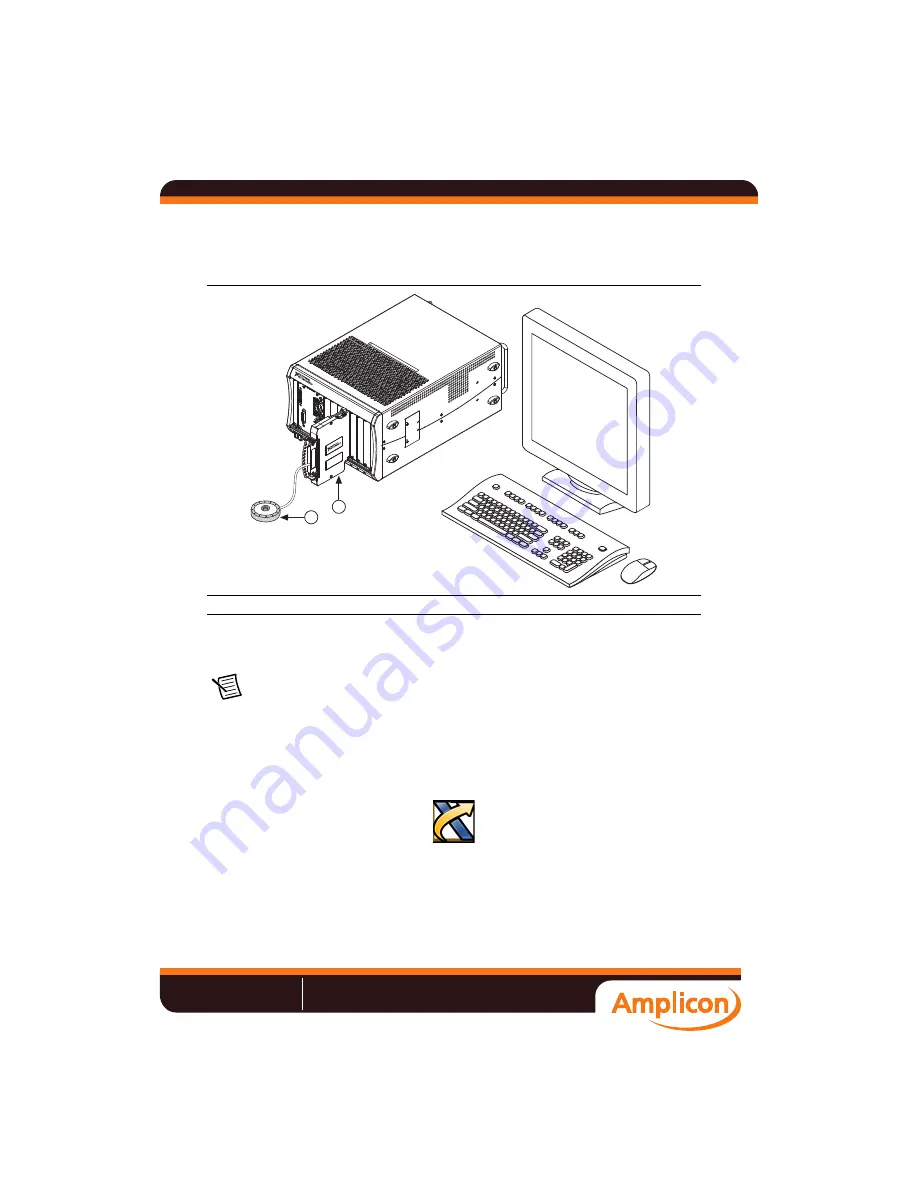
Figure 6 shows an example NI PXIe-4304/4305 system setup.

Figure 6.  

Sample NI PXIe-4304/4305 System

Confirm NI PXIe-4304/4305 Module Recognition

To confirm module recognition, complete the following steps:

Note

Software support for the NI PXIe-4304/4305 is provided by NI-DAQmx. 

The DAQ Getting Started Guide, which you can download at 

ni.com/manuals

offers step-by-step NI-DAQmx instructions for installing software and hardware, 
configuring channels and tasks, and getting started developing an application. For 
detailed NI software version support, refer to the 

NI-DAQmx Readme

.

1.

Launch MAX.

2.

Expand 

Devices and Interfaces

, and expand the chassis in which the module is located to

confirm that MAX detects the module and terminal block. The terminal block should
appear beneath its associated module. If your module or terminal block is not listed, press
<F5> to refresh MAX. If the module is still not recognized, go to

ni.com/support/daqmx

.

1

Terminal Block

2

Signal Input

NI PXIe

-1062Q

1

COOL

ING 

CLE

ARA

NC

E A

ND

 FA

N FIL

TE

R MAI

NT

EN

ANC

E RE

QU

IRED

S

EE 

MA

NU

AL.

CO

OLING

 CL

EAR

ANC

E A

ND

 FA

N FIL

TE

R MAINTEN

ANC

E REQ

UIR

ED

S

EE MA

NUA

L.

2

Datasheet

Sales:


+44 (0) 1273 570 220   

Website:

 www.amplicon.com   

Email:

 [email protected]

       IT and Instrumentation for industry

 Amplicon.com

Summary of Contents for NI PXI/e-4000 Series

Page 1: ...hat could be damaged by the voltage present on the terminal block However you should only use these terminal blocks with their supported modules Contents Electromagnetic Compatibility Guidelines 2 Wha...

Page 2: ...uct is connected to a peripheral device or test object or if the product is used in residential or commercial areas To minimize interference with radio and television reception and prevent unacceptabl...

Page 3: ...nstalled before installing the PXIe 4304 4305 and TB 4304 hardware 1 Your application software such as LabVIEW LabWindows CVI or NET 2 NI DAQmx NI PXIe 4304 4305 modules were first supported in NI DAQ...

Page 4: ...ss System Timing slots Refer to the chassis documentation for details Figure 1 Symbols for PXI Express PXI Express Hybrid PXI Slots 5 Remove the filler panel and touch any metal part of the chassis to...

Page 5: ...er Devices and Interfaces and selecting Device Pinouts 1 Loosen the captive top cover screws and remove the top cover 2 Loosen the strain relief screws and remove the strain relief bar 3 Prepare the s...

Page 6: ...ation Make sure no exposed wire extends past the screw terminal Exposed wire increases the risk of a short circuit that can cause circuit failure 1 Strain Relief Screws 2 Strain Relief Bar 3 Tie Wrap...

Page 7: ...ief when necessary 10 Reinstall the top cover and tighten the captive top cover screws Note For information about sensors go to ni com sensors AI3 AI3 AI2 AI4 AI4 AI5 AI7 AI7 AI6 AI6 AI5 AI0 AI0 AI1 A...

Page 8: ...04 4305 module Note For safety purposes and to prevent damage to equipment when high voltages are present all NI PXIe 4304 4305 modules and TB 4304 terminal blocks are keyed to prevent connection betw...

Page 9: ...t refer to the NI DAQmx Readme 1 Launch MAX 2 Expand Devices and Interfaces and expand the chassis in which the module is located to confirm that MAX detects the module and terminal block The terminal...

Page 10: ...Test When the self test completes a verification message appears If an error occurs refer to ni com support daqmx For information about sensors go to ni com sensors Run Test Panels 1 In MAX expand De...

Page 11: ...t click Data Neighborhood and select Create New to open the DAQ Assistant 2 Select NI DAQmx Task and click Next 3 Select Acquire Signals 4 Select the analog input and the measurement type such as volt...

Page 12: ...e The chassis can be powered on or off when removing the terminal block 1 Loosen the terminal block mounting screw located at the top of the terminal block 2 To remove the terminal block a Raise the l...

Page 13: ...that the chassis is powered off before removing the module 2 Loosen the captive screws on the top and bottom of the module Caution Do not pull the front panel to remove the module Doing so may cause m...

Page 14: ...d NI DAQmx Device or Modular Instrument 4 Type 4304 or 4305 in the text box at the top of the window 5 Select the device from the list provided 6 Click OK More Information After you install NI DAQmx t...

Page 15: ...go to ni com info and enter rdsenn to start the Return Merchandise Authorization RMA process Specifications TB 4304 Note NI PXIe 4304 4305 module specifications are located in the NI PXIe 4304 4305 Sp...

Page 16: ...ure Pollution Degree 2 Indoor use only Operating Environment Ambient temperature range 0 C to 55 C Tested in accordance with IEC 60068 2 1 and IEC 60068 2 2 Meets MIL PRF 28800F Class 3 low temperatur...

Page 17: ...ignals or use for measurements within Measurement Categories II III or IV Caution The protection provided by the TB 4304 can be impaired if it is used in a manner not described in this document Safety...

Page 18: ...gy for the treatment of material or inspection analysis purposes Note For the standards applied to assess the EMC of this product refer to the Online Product Certification section CE Compliance This p...

Page 19: ...t life cycle all products must be sent to a WEEE recycling center For more information about WEEE recycling centers National Instruments WEEE initiatives and compliance with WEEE Directive 2002 96 EC...

Page 20: ...d party legal notices in the readme file for your NI product Refer to the Export Compliance Information at ni com legal export compliance for the National Instruments global trade compliance policy an...

Reviews: