
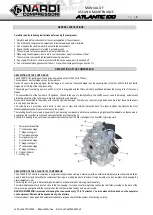


MANUAL OF
USE AND MAINTENANCE
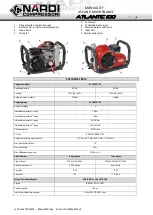
ATLANTIC 100
P g .
|
4
ATLANTIC 100 - Rev.00/16 Cod. AT200-002
SAFETY RULES FOR USING THE COMPRESSOR
IDENTIFICATION OF SAFETY RULES FOR OPERATORS:
It is very important to identify and check the dangerous points on the machine before starting to use it.
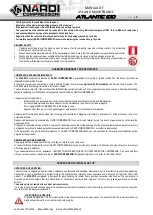
For this purpose, stickers have been applied with symbols to inform users of the hazards of: high voltage, valves under pressure, rotating fans, hot
points, etc.
The machine is also fitted with devices for the prevention of accidents and overall safety. These intervene in the case of malfunctions or faults in
order to avoid danger to operators.
These devices must always be present and must
NOT
be modified. If it is necessary to intervene on these devices, contact our technicians.
Operators must check the good condition of the equipment and the efficient operation of the safety devices.
The compressor must be periodically checked by operators and technicians who will replace worn or damaged components.
SAFETY RULES FOR OPERATORS AND THE CORRECT USE OF THE COMPRESSOR:
The person responsible for the compressor must have technical knowledge about breathable air, be aware of the regulations in force, and
must know all aspects of the operation of the machine. If operation is delegated, the operator must ensure that the substituting person is
informed of all the operations to be carried.
The compressor is designed to produce breathable air pursuant to the DIN 12021 standards.
Air is drawn in from the surrounding environment (which the operator must ensure if free of fumes and/or harmful gasses), it passes through an
intake filter and then enters a compression/filtering cycle until it reaches the high pressure air cylinders.
FUNDAMENTAL FOR SAFETY:
Carefully read the following instructions before using the compressor
:
- Only refill tested cylinders and never exceed the operating pressure.
- The compressor must not intake contaminated or polluted air, it must not be located in dusty areas or areas at danger of explosion,
corrosion, or fire.
- If the compressor is driven by a petrol or diesel engine it is forbidden to use it in a closed environment. In all cases check that the
intake is facing the opposite direction to the exhaust fumes.
- During maintenance or when replacing a part of the compressor, always ensure that it is not under pressure and that the power supply
plug is disconnected from the electrical supply. Fuel filling must be conducted with the machine off.
- Replace the air purification filters regularly and only with original Nardi Compressori products.
- If the compressor has manual condensate release, this must be conducted every ten minutes. If it has automatic release, check that this
happens at intervals of no longer than 10 minutes.
- When the compressor is out of use disconnect the power supply. Never tug the power cables and hold the plug to disconnect. Ensure
that the power cable does not pass over sharp edges or bend sharply around corners (use extensions to avoid this).
- Periodically check the condition of the filling hoses (flexible pipes under high pressure) especially close to the connectors. If they
exhibit minor defects have them replaced. They should in all cases be replaced every 2 years.
- Periodically check that the connectors are airtight.
- Replace damaged parts exclusively with original Nardi Compressori spare parts.
- Do not modify the machine without express written authorization from Nardi Compressori.
- If any component of the compressor shows visible signs of deterioration, do not use the machine until it is replaced with an original
spare part and check that no other machine components have been damaged.
- Before switching on the machine, check that there are no people in contact with it. Beware of all moving parts and avoid contact with
them.
- The compressor cooling fan must have clearance of at least 50 cm.
- When switching on check that the compressor does not turn in the opposite direction to that indicated by the arrow on the guard cover.
- The Manual of Use and Maintenance must be available at all times. It must be kept in an easily accessible place close to the machine
and protected from accidental damage.
- All maintenance and repair work on the machine must be conducted by specialised personnel.
- Electrical maintenance work must be carried out by a qualified electrician or a skilled worker who abides by all electro-technical and
safety standards.
- Before starting up the machine, visually check the condition of all the vulnerable components, like filling hoses and valves, for damage
or breakage resulting from accidental impact, etc.
- In dangerous situations switch the machine off immediately, or disconnect the power plug directly from the electrical supply.
- Before starting any maintenance on the machine, clean it of sand, oil, any other substances. Clean all the connectors, the screw
threads, the safety valves and all areas close to joints to be disconnected. It is also necessary to release the air pressure from all parts
of the compressor.
- If the machine is to be washed with water, take care not to wet the electrical motor or control panel. Also be careful of all the openings
on the compressor group.


