background image

Remote Operation Software (DX-PC For View) 


39

DX-PC For View provides multiple screen layout for playback.  The available formats are single-screen, 
quad, 1+7, 3x3, 4x4, 5x5, 1+32, 6x6, 7x7 and 8x8 and full-screen.  When in one of the multi-view formats, 
clicking the 

 or 

 button will move to the previous or next page.  To view a specific image in the single- 

screen mode, move the cursor to that image and double click the left mouse button.  To return to the previous 
screen mode from the single-screen mode, double click the left mouse button in the playback window. 


Clicking 

 (Layout Load) will apply the selected frame layout to DX-PC For View, and clicking 

 (Layout 

Setup) allows you to set up the user-defined frame layout. 


Image Processing


The 

Image Processing

 panel allows enhancing played back images using processing controls. 


   Blurs the image. 
   Sharpens the image. 
   Equalizes the image. 
   Reduces the alias effect that occurs when using the zoom function. 
   Reloads the original image. 


Playing Recorded Audio


DX-PC For View will play audio when it is in the single-screen layout while playing back recorded video 
that has recorded audio.  Audio playback can be On or Off by selecting 

Enable Audio 

from the menu 

displayed by clicking the right mouse button on the screen. 


NOTE:  Audio might be interrupted during playback because of network conditions and your PC’s 
performance. 


NOTE:  Playing recorded audio may not be supported, depending on the specifications of the remote


DVR. 


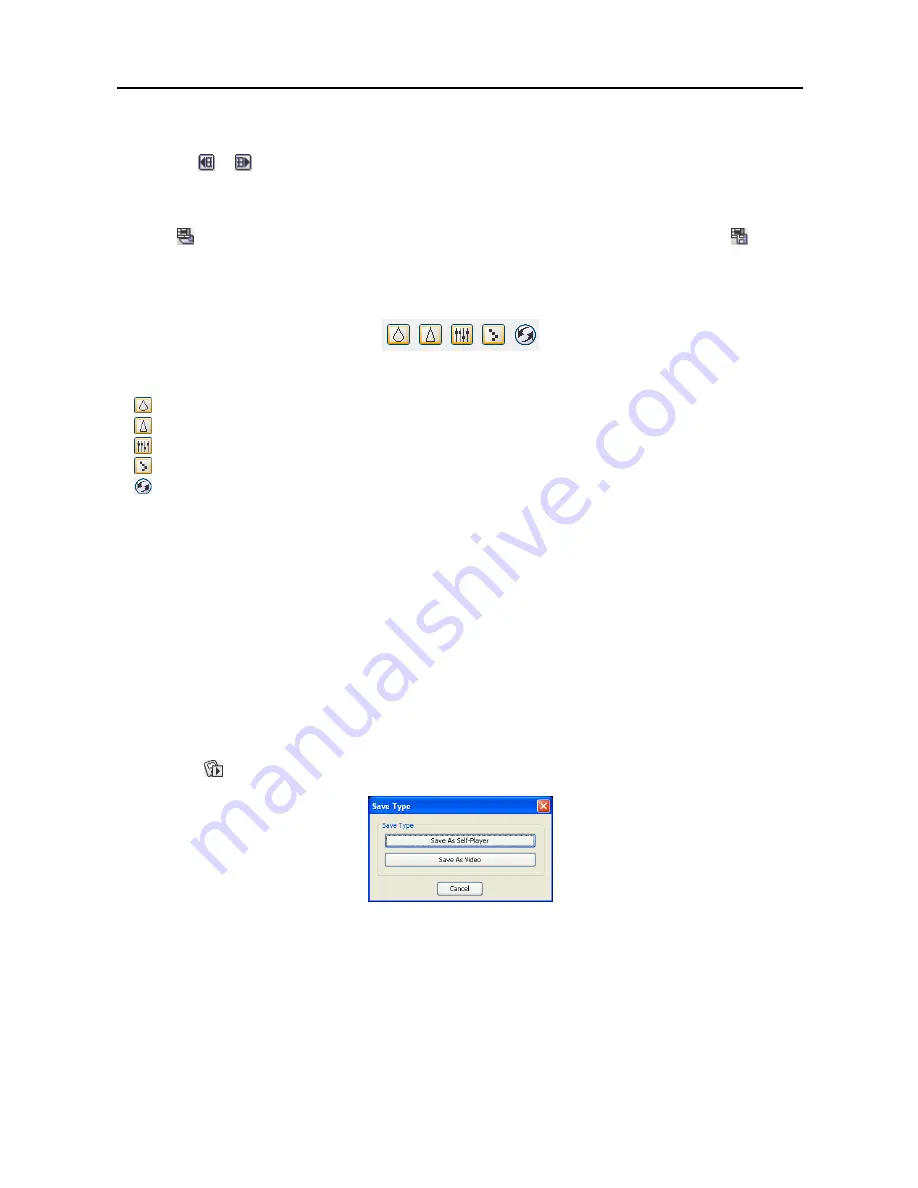
Save


Clicking the 

 button on the Search View panel saves recorded video. 


  Save As Self-Player…

: Saves any video clip of recorded data as an executable file.  Set up the save 

parameters in the following dialog box.  Click the 

Start

 button, and select 

Save in

.  Enter a 

File name


and then select 

Save as type

 (.

exe

) for the video you are saving.  Then click the 

Save

 button.


Summary of Contents for DX-PC for View

Page 1: ......

Page 2: ......

Page 3: ...ation 1 Chapter 2 Installation 3 Chapter 3 Configuration 9 3 1 Screen 9 3 2 Panel 10 3 3 Menu 16 3 4 Toolbar 31 Chapter 4 Operation 33 4 1 Live Monitoring 33 4 2 Playback and Search 35 4 3 Additional Functions 41 4 4 Panic Recording 42 4 5 Status View 43 Appendix A Reviewing Video Clips 45 Appendix B DVR Name Service DVRNS 48 Appendix C Map Editor 49 ...

Page 4: ...User s Manual ii ...

Page 5: ... system and event log information of remote DVRs Remote monitoring of multiple remote sites using maps Connect up to 64 remote sites up to 16 remote sites for remote search at a time NOTE This product includes software developed by the OpenSSL Project for use in the OpenSSL Toolkit http www openssl org NOTE The software included in this product contains some Open Sources You may obtain the complet...

Page 6: ...User s Manual 2 ...

Page 7: ...ion will fail If you have logged on as other user you will be asked to enter the administrator user name and password when running the file NOTE The User Account Control window might appear when using Microsoft Windows Vista or later operating system Click Allow and install DX PC For View software following the instructions 3 The NET Framework and the Visual C Runtime Libraries are installed autom...

Page 8: ...User s Manual 4 5 When the following dialog box appears click Next 6 Click Next 7 Select whether or not to run DX PC For View automatically when logging onto Windows and then click Next ...

Page 9: ...ing the language below select the desired startup language from the list of available languages and then click OK NOTE To properly display the selected language your PC s operating system should be set to support the selected language 9 When the following dialog box appears after finishing the DX PC For View installation select Install MSXML application and click Finish Installing the MSXML is req...

Page 10: ...User s Manual 6 10 Click Next 11 Select I accept the terms in the License Agreement and click Next 12 Enter User Name and Organization and click Next ...

Page 11: ...Remote Operation Software DX PC For View 7 13 Select Install Now 14 Click Finish to complete the MSXML installation ...

Page 12: ...User s Manual 8 ...

Page 13: ...onsists of the screen 12 docking panels menu and toolbar NOTE Some panels will not be displayed on the screen in the default frame layout To display those panels open the View menu at the top of the screen and select each panel from the menu 3 1 Screen The Screen displays images from selected cameras in the live monitoring or playback modes DX PC For View provides various multi screen layouts sing...

Page 14: ... the cursor over the edge of the panel until the cursor changes to or Then click the left mouse button and drag the panel border to enlarge or reduce its size To move a panel to a different position on the screen scroll the cursor over the title bar of a panel that has not been auto hidden until it changes to Once you click and drag position arrows will display on the screen The four position arro...

Page 15: ...also be done by selecting Connect Status View from the popup menu displayed by clicking the right mouse button after selecting the site from the list This popup menu initiates the remote menu including Remote Setup Remote System Log and Remote Event Log Refer to 3 3 Menu Remote Menu for more details Favorite Sites Panel The Favorite Sites panel displays the list of Favorite sites registered during...

Page 16: ...xample the monitor displays the current popup screen with enough frames for 16 cameras when you select 4x4 NOTE Refer to Appendix C Map Editor Device Setting section for more details about the popup function To connect to the remote site select the device you want to connect to from the Map panel and then drag and drop it in the desired position on the screen or the Status View panel Also placing ...

Page 17: ...OTE Refer to 4 1 Live Monitoring for more details Image Processing Panel The Image Processing panel allows enhancing played back images NOTE Refer to 4 2 Playback and Search for more details Watch Event View Panel The Watch Event View panel displays events detected at individual remote sites while DX PC For View is in the live monitoring mode The description of event icons is as follows ...

Page 18: ... The Emergency Event View panel displays a list of events preset for notification at the remote site that were called from individual remote sites LAN connection only Selecting an event from the list and then dragging and dropping it in the desired position on the Watch or Search screen connects to the remote site and a checkmark is placed in the box at the left Selecting an event or site from the...

Page 19: ... on the specifications of the remote DVR Search View Panel The Search View panel allows time lapse or event searching of recoded data on the remote DVR NOTE Refer to 4 2 Playback and Search for more details Status View Panel DX PC For View provides a status display remote setup system log and event log view of the connected remote site in real time To display a status of the remote site select a c...

Page 20: ...s Manual 16 3 3 Menu System Menu Setup Allows setting up the system operation and remote site configuration System 1 Set up the date time format for DX PC For View display option and panic recording function ...

Page 21: ... displays images by fitting them to the screen size and selecting Original Ratio displays images by fitting them within the screen size while maintaining their original ratio Anti Aliasing Screen When using the option the image display quality on the screen will be enhanced by eliminating stair stepping aliasing effects in the enlarged image Use Slow Connection Draw Mode When using the option in s...

Page 22: ... Recording Mode Setup Set up the panic recording mode Visible Watch Camera Records camera channels currently displayed on the Watch screen User Assignment Setup Records camera channels assigned by the user on the Watch screen Camera Range Setup Records camera channels within preset channel range Select the boxes beside Camera and adjust camera range up to 16 channels NOTE Panic recoding will NOT b...

Page 23: ...ergency Event panel Set up DX PC For View to sound when events are detected by selecting events from the list and designating the sound file wave path You can set up a different sound for each type of event Report Setup Set up the Use On or Off and check intervals from 1 to 24 hours of the report function When using the report function DX PC For View checks on the remote site based on the user def...

Page 24: ...DVR at the remote site that is PC based Enter a site name and the IP address of the remote site modem telephone number for dial up connections acquired from your network administrator Click the Port button to set up the IP port number of each program The IP port number should match the value set during the network setup of the remote DVR If the remote system version does not allow you to set the I...

Page 25: ...y events are called in from the remote site The Emergency Event Instruction can be checked by clicking the right mouse button after selecting the event or the site from the list in the Emergency Event panel Change Select the group or site you want to change and click the Change button or double click the group or the site to change Then edit the site information Remove Select the group or site you...

Page 26: ...eft mouse button on the camera in the Favorites map Selected cameras will be outlined in red Clicking the left mouse button on the camera while holding the Ctrl key toggles camera selection On and Off Multiple cameras can be selected by clicking the left mouse button while holding the Shift key NOTE W Watch Screen and S Search Screen displayed to the left of the camera number indicates the display...

Page 27: ...ax 20 change the Auto Sequencing settings of a group or delete the group by using the popup menu displayed by selecting the Auto Sequencing group and clicking the right mouse button Add Select the site to add from the Group List and click the Add button Select an Auto Sequencing group to add the site from the popup menu displayed by clicking the button Add All Adds all sites in the Group List to t...

Page 28: ...roup List and add them to the Upgrade Sites list by clicking the Add button Then click the Upgrade Now button to initiate the remote upgrade job for listed Upgrade Sites Add Select the site to add from the Group List and click the Add button Add All Adds all sites in the Group List to the Upgrade Sites list Remove Select the site to remove from the Upgrade Sites list and click the Remove button Re...

Page 29: ...oup List and click the Add button Remove All Removes all the sites in the Setup Sites list Setup Now Performs the setup on the Setup Sites NOTE Batch job setup of remote sites is NOT supported for the PC based DVRs Disconnect Disconnects all current connections Disconnection can also be performed by clicking the button on the toolbar View Log Displays log information saved in the DX PC For View sy...

Page 30: ...rd list enter a filter in the text box Then select a comparison operator from the last list Equal to search for logs that satisfy the condition case sensitive Not Equal to search for logs excluding logs that satisfy the condition Like to search for logs that include the entered keyword or Not Like to search for logs that do not include the entered keyword Clicking the Add Condition button allows y...

Page 31: ... change the setup of a remote DVR Select the remote site on the Remote Sites panel initiate the Remote Setup menu and the setup screen displays NOTE Refer to the user manual for the remote DVR for more details on system setup Remote System Log Remote Event Log Displays the system log and event log information of a remote DVR Set the time range of interest and click the Find button The log entries ...

Page 32: ... CSV file UTF 8 encoded Move Buttons Moves to the first page previous page next page or last page You can go directly to a log page by clicking the page number button Close Closes the Log dialog box Favorite Menu NOTE The Favorite menu can also be accessed using the toolbar controls Saves the current screen layout directly to the Favorite site Sequence Menu NOTE The Sequence menu can also be acces...

Page 33: ...er program and plays recorded video Refer to 4 4 Panic Recording for more details Image Menu NOTE The Image menu can also be accessed using the toolbar controls Save Saves the current image as a bitmap bmp or JPEG jpg file Print Prints the current image NOTE Refer to 4 3 Additional Functions for more details Layout Menu NOTE The Layout menu can also be accessed using the toolbar controls Screen La...

Page 34: ...e layout to DX PC For View Default Layout Displays the panels that are used most frequently in the Watch and Search screen modes Admin Layout Displays only the panels that are used most frequently in the Admin screen mode Full Layout Displays all the panels Hide Layout Hides all panels and displays only the screen User Defined Layout Displays the user defined layout Layout Setup The user can confi...

Page 35: ...tup Log Save Favorite Sites Auto Sequence Save Print Panic Recording Play Select the desired screen layout using the layout toolbar When changing the screen layout the selected camera on the current screen will be located in the first cell of the new layout When in one of the multi view formats clicking the or button will move to the previous or next page Clicking Layout Load will apply the select...

Page 36: ...User s Manual 32 ...

Page 37: ... also be set to connect using the right or left mouse buttons This is user defined and must be set during System setup Select Watch Screen to connect to the selected site on the Watch screen when the text menu screen appears Screen Layout and Frame Layout DX PC For View provides multiple screen layout options The formats available are single screen quad 1 7 3x3 4x4 5x5 1 32 6x6 7x7 8x8 and full sc...

Page 38: ...ite NOTE While in the sequence monitoring mode you cannot manually connect to sites by dragging and dropping with the mouse Color Control Brightness Contrast Saturation Hue Undo Adjust the brightness contrast saturation and hue of live video for each camera by clicking the target icons on the Color Control panel Clicking the icon cancels the image processing operation and reloads the original imag...

Page 39: ... icon will be displayed on each Search screen The remote site connection on the Search screen will automatically be disconnected if there is no activity for a specified amount of time Click the button on the toolbar or select Disconnect from the System drop down menu to disconnect the current connection manually NOTE Connecting to a Favorite site will be available if the Search Screen display opti...

Page 40: ...displays the image in the preset aspect ratio You can enlarge a specific part of the image up to five times using the control slider The user can electronically pan and tilt within the enlarged image by dragging the image using the mouse Click the left mouse button on the enlarged image and drag to move its position Clicking the button cancels the enlargement and resets the image You can change th...

Page 41: ...re are recorded data during that time Select a specific hour by clicking the mouse on the desired hour segment The recorded data of each camera channel are displayed by time in one minute segments and a red vertical line indicates the selected time that will be played back The color of the bar indicates different types of recording Yellow for Pre event Purple for Event Red for Panic and Blue for T...

Page 42: ... second to 10 minutes If you adjust the event dwell time DX PC For View will display the images of first queried event and ignore remaining events occurring during the preset period NOTE When First is selected for the search starting time the search will be from the first recorded data When Last is selected for the search ending time the search will be to the last recorded data Additional Function...

Page 43: ... controls Blurs the image Sharpens the image Equalizes the image Reduces the alias effect that occurs when using the zoom function Reloads the original image Playing Recorded Audio DX PC For View will play audio when it is in the single screen layout while playing back recorded video that has recorded audio Audio playback can be On or Off by selecting Enable Audio from the menu displayed by clicki...

Page 44: ...time and clicking the button again sets the ending time To Save As Video Saves any video clip of recorded data in an AVI Audio Video Interleaved file format Set up the save parameters in the following dialog box Click the Start button and then set the file name Clicking the Save button starts saving video NOTE Selecting Include Audio Data includes audio data when saving video with recorded audio T...

Page 45: ...ion Search only Diff to ref image Sets the minimum proportion of blocks that must be activated to be considered as a change Museum Search only Activation Time Sets the duration that the change must last to be considered as a change Museum Search only If a change is detected but does not last as long as the Activation Time the change is not considered as a change Detection Area Select Clear Sets th...

Page 46: ...s are enabled when the selected camera screen can display images in that size Set Record Camera Sets the selected camera channel to be recorded during panic recording Refer to 3 3 Menu System Menu for details on configuring camera channels for panic recording Deinterlacing Enhances image display quality of interlaced video on the screen by eliminating horizontal scan lines or noise in areas with m...

Page 47: ...he icon will display on each screen when panic recording starts NOTE Audio recording is not supported 4 5 Status View DX PC For View provides a status display remote setup system log and event log view of the connected remote site in real time To display a status of the remote site select a camera or a site from the Remote Site list and drag it to the Status View panel You can also select Connect ...

Page 48: ...The Off button indicates that the remote DVR is in the panic recording mode and you can stop panic recording by clicking the button NOTE Remote Panic Control may not be supported depending on the specifications and version of the remote DVR Status Display Window The Status Display Window displays the event alarm out system check and recording status information of the remote system connected to th...

Page 49: ...the display settings of your PC If you are experiencing display problems click the right mouse button on the background screen and select Properties Settings then set the Color quality to 32 bit Then select Advanced Troubleshoot and then set the Hardware Acceleration to Full Please make sure that DirectX version 9 0 or higher has been installed if the display problem continues To check the version...

Page 50: ...at has recorded audio Single Screen Layout Only Anti Aliasing Screen Enhances image display quality on the screen by smoothing stair stepping aliasing effects in the enlarged image If video plays slow because of your CPU s slow speed releasing the Anti Aliasing Screen option might improve playback speed Show Text In Displays text in data if the video was recorded with text in data In the single sc...

Page 51: ... this happens press the ESC key on your PC keyboard to return to the normal screen mode Click the slider bar and move it left or right to move through the video clip Placing the mouse cursor on an image and clicking will cause that image to display full frame NOTE Some options may not be available depending on the specifications and version of the remote DVR ...

Page 52: ...ame and IP address of the DVR during the DVRNS setup on the Remote DVR This unit name and IP address will be registered on the DVRNS server directly NOTE Refer to the applicable manual for each remote DVR for more details on DVRNS setup STEP 2 DX PC For View DVRNS Server Request the IP address of the remote DVR using the registered unit name of the DVR you want to connect to STEP 3 DVRNS Server DX...

Page 53: ... Windows Background Image Setting First prepare the image in a bitmap or JPEG file format Click the Background button on the toolbar and select the background image of the map Go to the Property Canvas tab and set the background image information Name Enter a name of the background image Horizontal Vertical Adjust the background image size by clicking each field and changing the numbers Position A...

Page 54: ... the IP address of the DVR and you do not need to enter the network IP port number Login Setup Enter the user ID and password for the DVR associated with devices DVRNS Server Enter the IP address and port number 10000 to 12000 of the DVRNS server which matches the values set during the DVRNS setup on the DVR Clicking the OK button saves the setting Popup Dwell Time Select Popup Dwell Time in the O...

Page 55: ...me of the DVR to display on the popup screen Device Setting Selecting the or buttons on the toolbar displays the Camera AlarmOut and AlarmIn tabs under the Image Bar Select the icons and drag and drop them at the desired locations on the background image Go to the Property Camera AlarmOut AlarmIn tab and set the device information General Name Enter a device name Description Enter description of t...

Page 56: ...ew Popup box pops up another screen by clicking the mouse button on the camera icon on the Map panel regardless of event detection Event AlarmOut Checking the Switch on off box controls the alarm out remotely by clicking the alarm out icon on Map panel Event AlarmIn Selecting Alarm in Event from a drop down list and checking the Watch View Popup box sets the Map panel to pop up another screen when...

Page 57: ...the link box Ratio Adjust the image size within the link box X Coordinates Y Coordinates Adjust the position of the link box on the screen by clicking each field and changing the numbers Horizontal Vertical Adjust the link box size by clicking each field and changing the numbers Text Show Select Yes to display the name of the link box on the selected image Clicking the Save button on the toolbar s...

Reviews: