


4
Customizing Your Copy
4-2
Di200
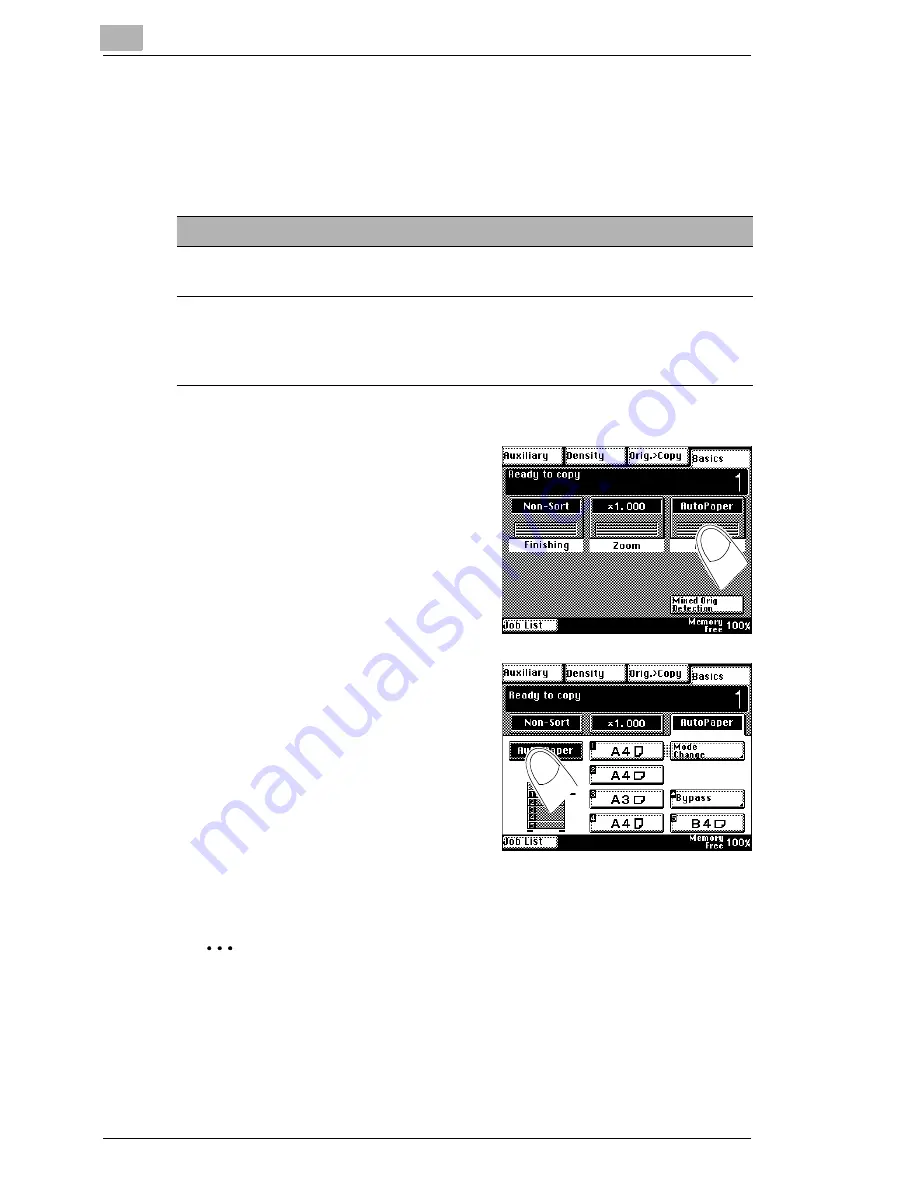
Enabling Auto Paper Select Mode
Allow the copier to select the appropriate paper size for your copies. The
copier calculates the appropriate paper size according to the size of the
original and the zoom factor.
1
Touch the Basics menu key [Paper].
The paper settings are shown.
2
Press the [AUTO PAPER] key.
The background of the key turns
black. "Auto Paper" mode is
enabled.
3
Touch the [BASICS] index key to
show the Basics menu keys again.
§
To disable “Auto Paper“ mode again, select a paper drawer manually.
For more information, see page 4-3.
Wrinkled, curled and dog-eared?
Wrinkled, curled or dog-eared originals are not always identified
correctly in this mode. Use only smooth originals.
Note the following important information!
Original sizes that can be
automatically recognised:
A3 L, B4 L, A4 L, A4 C, Letter L, A5 L
Plus, with additional equipment:
(To take advantage of this
feature, contact your technical
representative.)
11 × 17 L, Legal L, Letter C, FLS
Summary of Contents for Di200
Page 1: ...The essentials of imaging www minoltaeurope com Advanced Information Di 200 ...
Page 2: ......
Page 62: ...2 Getting to Know Your Copier 2 46 Di200 ...
Page 82: ...3 Initial Steps 3 20 Di200 ...
Page 92: ...4 Customizing Your Copy 4 10 Di200 8 Confirm each of your settings by pressing ENTER ...
Page 140: ...4 Customizing Your Copy 4 58 Di200 ...
Page 184: ...5 Utility 5 44 Di200 7 Confirm your input with ENTER ...
Page 190: ...5 Utility 5 50 Di200 ...
Page 209: ...Troubleshooting 6 Di200 6 19 6 Close the upper right door and the right panel R1 ...
Page 222: ...6 Troubleshooting 6 32 Di200 ...
Page 224: ...7 Appendix 7 2 Di200 3 Original Glass clean with a soft dry cloth ...
Page 226: ...7 Appendix 7 4 Di200 4 Wipe the surface of the screen clean with a soft dry cloth ...
Page 250: ...7 Appendix 7 28 Di200 ...


