


Troubleshooting
6
Di200
6-3
6.2
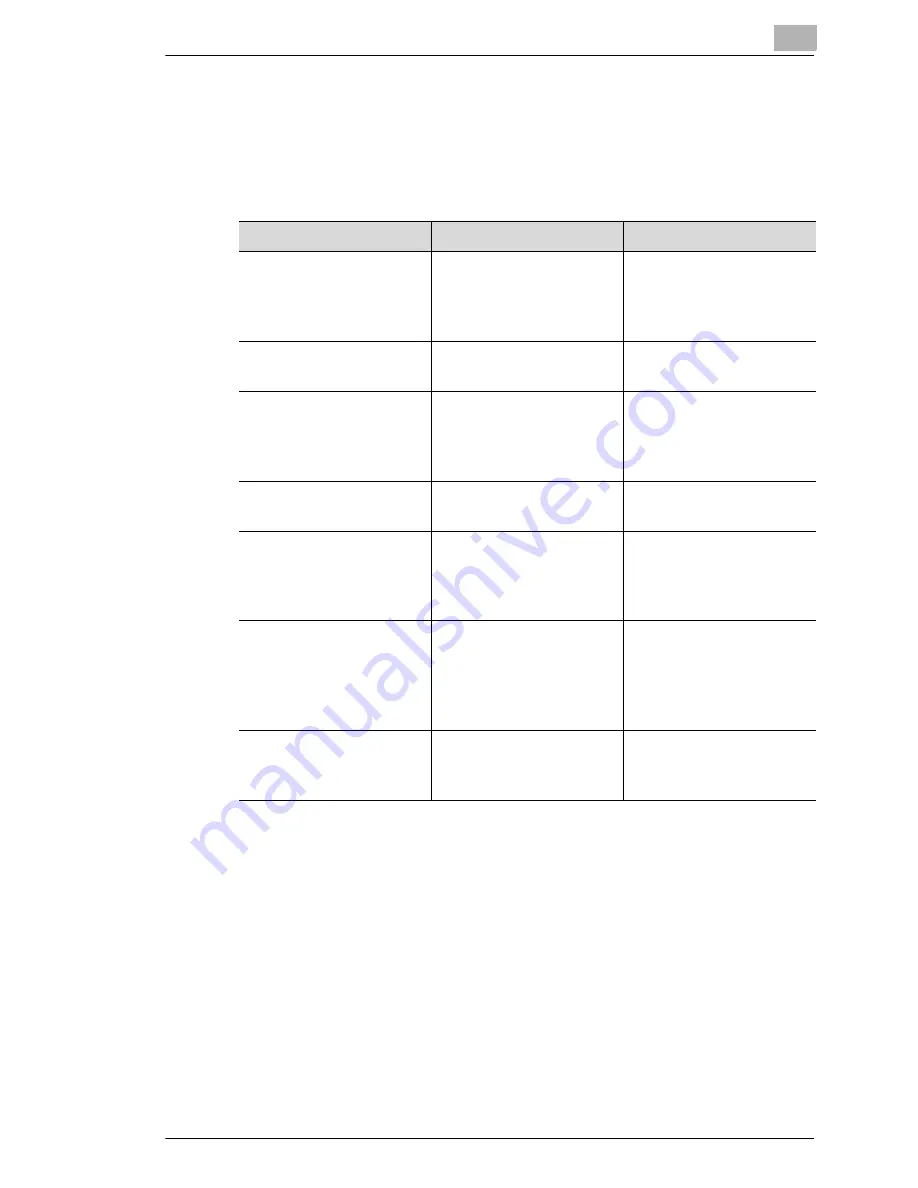
If a Message Appears on the Touch Screen . . .
The Touch Screen shows messages that describe a copier mode or
malfunction. The following table will help you to understand common
messages and take the appropriate action.
Message
Cause
Action
Malfunction detected.
Call your technical repre-
sentative and provide the
error code:
A serious malfunction
has been detected in the
copier. No more copies
can be produced.
Call and inform your
technical representative
of the code displayed on
the touch panel.
Please add toner.
The toner has run out.
Replace the toner bottle;
see page 2-38.
The development unit
needs replacing. Please
inform your technical rep-
resentative.
The service life of your
imaging drum has been
reached. No more copies
can be produced.
Call your technical repre-
sentative.
Preventive maintenance
time
The copier is due for pre-
ventative maintenance.
Call your technical repre-
sentative.
Return the following # of
originals to document
feeder:
The displayed number of
originals could not be
processed.
Place the indicated
number of originals back
in the automatic docu-
ment feeder.
Image data has caused
memory overflow. Your
copy job has been can-
celled.
The memory capacity of
the copier is insufficient.
Create the copy with dif-
ferent settings.
If this message is shown
often, increase the mem-
ory capacity.
This mode cannot be se-
lected with the OOO
mode.
Certain modes cannot be
combined; see page 6-
23.
Cancel one of the two
functions.
Summary of Contents for Di200
Page 1: ...The essentials of imaging www minoltaeurope com Advanced Information Di 200 ...
Page 2: ......
Page 62: ...2 Getting to Know Your Copier 2 46 Di200 ...
Page 82: ...3 Initial Steps 3 20 Di200 ...
Page 92: ...4 Customizing Your Copy 4 10 Di200 8 Confirm each of your settings by pressing ENTER ...
Page 140: ...4 Customizing Your Copy 4 58 Di200 ...
Page 184: ...5 Utility 5 44 Di200 7 Confirm your input with ENTER ...
Page 190: ...5 Utility 5 50 Di200 ...
Page 209: ...Troubleshooting 6 Di200 6 19 6 Close the upper right door and the right panel R1 ...
Page 222: ...6 Troubleshooting 6 32 Di200 ...
Page 224: ...7 Appendix 7 2 Di200 3 Original Glass clean with a soft dry cloth ...
Page 226: ...7 Appendix 7 4 Di200 4 Wipe the surface of the screen clean with a soft dry cloth ...
Page 250: ...7 Appendix 7 28 Di200 ...


