6
6.1 Single-Sided Copies
6-4
Di1611/Di2011
A
d
v
anc
ed
Cop
y
O
p
er
ati
ons
Ch
apt
er
6
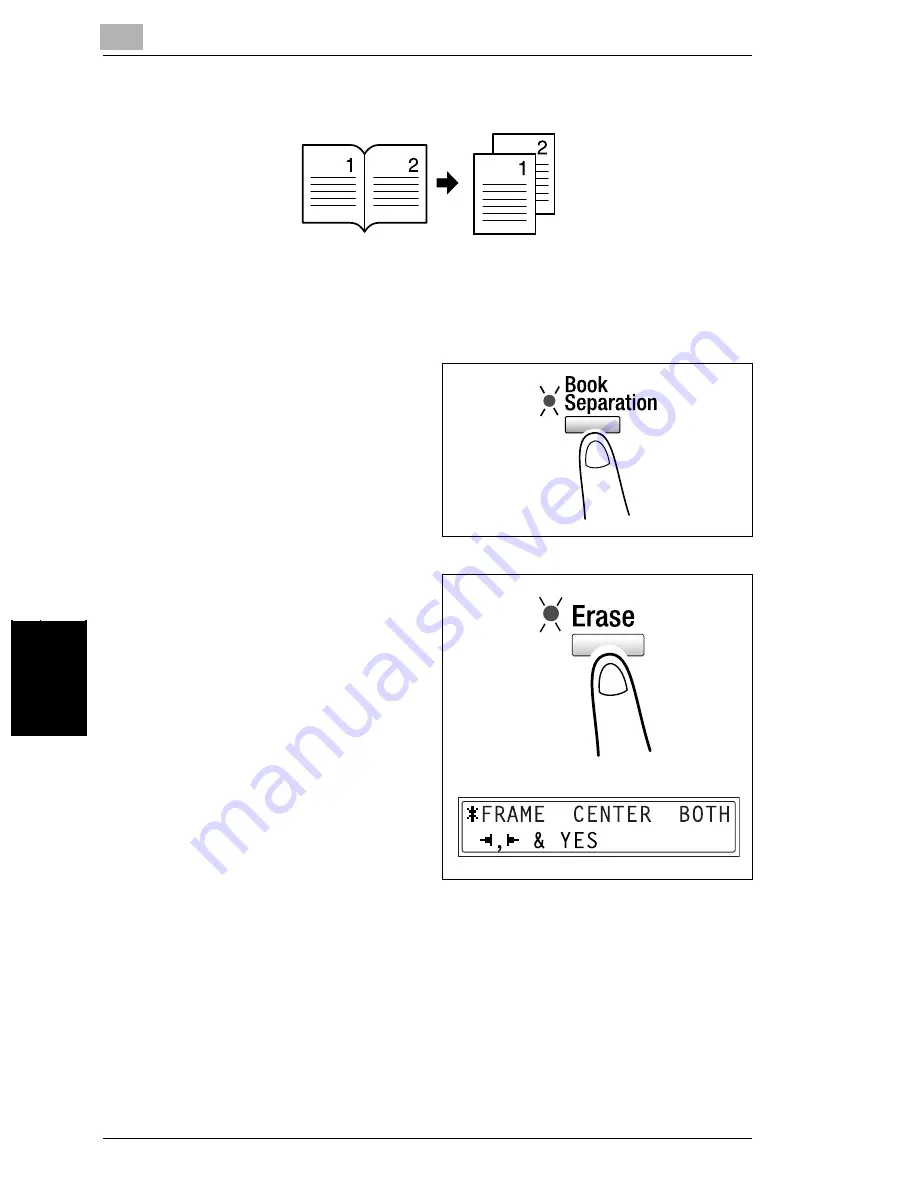
To make copies using the “Book Separation” function
1
Load the document to be copied.
❍
Refer to
“Loading the Document” on page 3-9
.
2
Press the [Book Separation] key.
The “Book Separation” indicator lights
up.
3
To erase around the text or along the
binding, press the [Erase] key.
❍
To begin copying, continue with
step 5.
?
Do you know how large an area is
erased?
➜
The width of the erased area for
the “FRAME” setting can be set
between 5 mm and 20 mm, in 1
mm increments. The
manufacturer’s default setting is
10 mm.
➜
The width of the erased area for
the “CENTER” setting is fixed at
10 mm.
➜
The width of the erased area for the “FRAME” setting can be changed using
the “ERASE SETTING” function in the Utility mode
(“To specify the erased
width (“ERASE SETTING” function)” on page 7-47).
4
Press the [Yes] key.
The main screen appears.
Summary of Contents for Di1611
Page 1: ...Di1611 Di2011 User Manual www konicaminolta net ...
Page 9: ...Contents viii Di1611 Di2011 ...
Page 10: ...Introduction Chapter 1 1 1Introduction ...
Page 25: ...1 1 5 Safety Information 1 16 Di1611 Di2011 Introduction Chapter 1 ...
Page 26: ...Precautions Chapter 2 2 2Precautions ...
Page 50: ...Basic Operations Chapter 3 3 3Basic Operations ...
Page 73: ...3 3 6 Reducing Electricity Usage 3 24 Di1611 Di2011 Basic Operations Chapter 3 ...
Page 74: ...Useful Operations Chapter 4 4 4Useful Operations ...
Page 90: ...Before Making Copies Chapter 5 5 5Before Making Copies ...
Page 129: ...5 5 9 Interrupting Copy Jobs 5 40 Di1611 Di2011 Before Making Copies Chapter 5 ...
Page 130: ...Advanced Copy Operations Chapter 6 6 6Advanced Copy Operations ...
Page 153: ...6 6 8 Access Numbers 6 24 Di1611 Di2011 Advanced Copy Operations Chapter 6 ...
Page 154: ...Utility Mode Copy Functions Chapter 7 7 7Utility Mode Copy Functions ...
Page 209: ...7 7 6 Specifying Copy Settings 7 56 Di1611 Di2011 Utility Mode Copy Functions Chapter 7 ...
Page 210: ...Error Messages Chapter 8 8 8Error Messages ...
Page 230: ...Troubleshooting Chapter 9 9 9Troubleshoot ing ...
Page 234: ...Appendix Chapter 10 10 10Appendix ...
Page 248: ...Index Chapter 11 11 11Index ...


