USER GUIDE
12
11.1 SSL Certificate notes
Upon first connection to Smart IP Access’s https Configuration page, 2 browser
security warnings appear. Click
Yes
to proceed.
The first warning disappears upon first Smart IP Access client installation, once
Minicom’s root certificate is installed.
12. Network > Configuration
Consult your Network Administrator for the network settings.
Device name -
Type the name for the Smart IP Access. Default device name
consists of the letter ‘D’ followed by the 6-digit device number (D.N.) found on the
silver label on the underside of the IP Access box.
First TCP Port
- Choose 3 consecutive ports, and type in the first port number of
the series. The default port – 900 – is suitable for the majority of installations.
Note
Firewall or router security access list must enable inbound communication through
the selected TCP ports for the Smart IP Access’s IP address.
For Client computer access from a secured LAN, the selected ports should be open
for outbound communication.
Enable Encryptio
n - Enable Encryption if you wish to operate in a secure
connection (recommended).
If enabled, the Internet Explorer at the Client computer must support 128 bit
Encryption.
Force HTTPS
- Access the Web front-end only using an HTTPS connection.
Smart IP Access won't listen on the HTTP port for incoming connections.
12.1 LAN 1
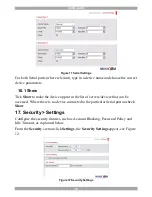
Under LAN 1 in Figure 7, is the following:
Enable DHCP
– When a DHCP server is active on the same network to which
Smart IP Access is connected, DHCP provides automatic IP assignment.
When DHCP is disabled – (Recommended) – You can assign a fixed IP address to
the Smart IP Access.
Consult your Network Administrator regarding the use of the DHCP.
Note!
Where
you have access to the DHCP server– your configured (or default) Smart IP Access
device name will appear on the DHCP server’s interface, making it easy to locate.


