


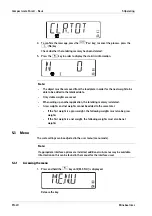


3.1.5
Leveling the weighing platform
To achieve reproducible weighing results at all times, the weighing platform must be set
up to be precisely horizontal.
Therefore the weighing platform must be re-leveled every time it is moved to a different
location.
Leveling the weighing platform
3.1.6
Acclimatizing the device
If a cold device is brought into a warm environment, condensation may form.
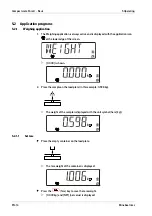
3.2
Connection
3.2.1
Power supply
AC power is used to power the scale when battery power is not needed.
Plug the USB-C plug into the USB-C jack on the bottom of the unit, then plug the AC
power supply into a wall outlet.
Note:
Do not use the USB-C power supply cable for the PC communication. Instead use a
standard USB-C cable.
3.2.1.1
Battery power
The scale can be operated immediately with the power supply. In order to operate the
scale with the battery, the battery should first be charged for 12 hours. If there is a power
outage or if the power cord is disconnected, the scale switches into battery operation
automatically. In the event of supply via a power supply, the battery is constantly charged
meaning that the battery charging display (see Chapter
) is continuously illuminated.
The scale can be used during the charging process; the battery is protected against
excess charging.
When the device is switched on, the battery status LED illuminates in red while the battery
is charging, and it goes green when the battery is fully charged.
.
Use the adjustable feet to align the weighing platform so that the air bubble of the
level indicator is in the center of the circle.
.
Check that all four of the adjustable feet are touching the surface.
The weight of the platform must be spread equally across the adjustable feet.
.
Adjust the adjustable feet: Retract the adjustable feet (clockwise) in order to lift the
scale. Extend the adjustable feet (counter-clockwise) in order to lower the scale.
.
Keep the device disconnected from the mains and allow it to acclimatize at room
temperature for approx. two hours.
Compact scale Puro® - Basic
3 Device installation
EN-8
Minebea Intec


