


4
5
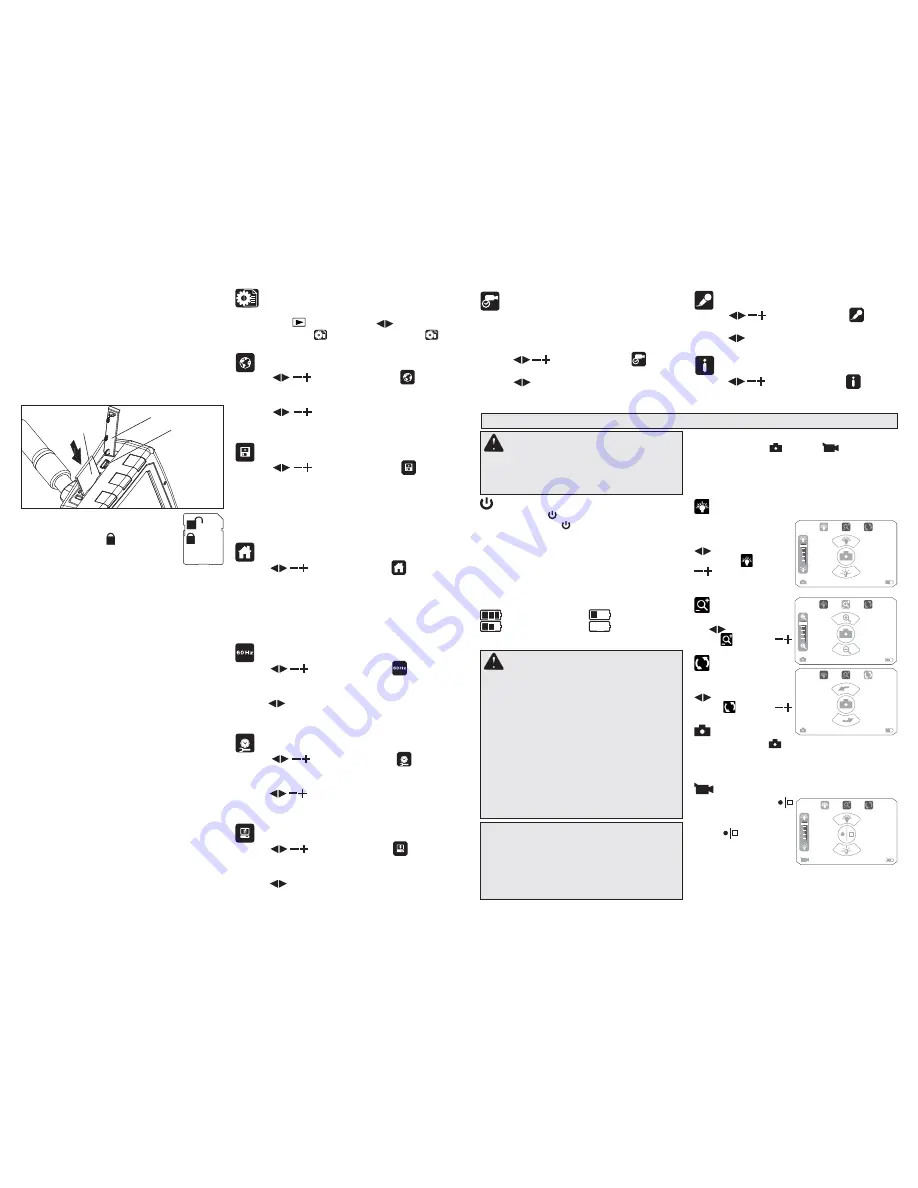
Inserting/Removing the Memory Card
1. Open the protective cover to access the memory
card slot.
2. Slide the memory card into the slot, the top of
the card should face away from the LCD screen.
Press in the card securely. It should click in
place.
3. Close the protective cover.
4. To remove the memory card, press it in and
release. It will pop out.
Fig. 2
Set-up Menu
To enter the set-up menu, turn on the tool and press
the Playback
button. Use the
buttons to
select Set-up Menu
. Note: The Set-up Menu
is also available from other Playback screens.
Language:
Use the
buttons to highlight
Lan-
guage.
Press the Select button.
Use the
buttons to select the desired
language to be displayed.
Press the Select button to accept.
Format:
Use the
buttons to highlight
For-
mat.
Press the Select button. “ERASE ALL DATA” is
displayed.
Select NO to return to the menu without
•
erasing all memory card data.
Select YES to erase all memory card data.
•
Factory Default:
Use the
buttons to highlight
Factory
Default.
Press the Select button. “RESTORE DEFAULT”
is displayed.
Select NO to return to the menu without
•
restoring factory defaults.
Select YES to restore all factory defaults.
•
Flicker Filter (50/60 Hz):
Use the
buttons to highlight
Flicker
Filter.
Press the Select button.
Use the
buttons to highlight “50 Hz” or “60 Hz”.
Set to “60 Hz” for North America use.
Press the Select button to accept.
Date/Time:
Use the
buttons to highlight
Date/
Time.
Press the Select button.
Use the
buttons to set the date and time
to be displayed on the pictures and movies.
Press the Select button to accept.
Screen Brightness:
Use the
buttons to highlight
Bright-
ness.
Press the Select button.
Use the
buttons to change LCD brightness.
Press the Select button to accept.
Interface
port
Protective cover
SD Memory card
Momentary Screen:
Momentary screens show the temporary button
layout for different functions. For example, the
select button becomes the shutter button when in
Picture mode.
Use the
buttons to highlight
Momen-
tary Screen. Press the Select button.
Use the
buttons to select “Always on”, “1 sec”
or “3 sec”.
Press the Select button to accept.
Mic:
Use the
buttons to highlight
Mic.
Press the Select button.
Use the
buttons to turn microphone on or off.
Press the Select button to accept.
Version:
Use the
buttons to highlight
Version.
Press the Select button to display the software
version.
OPERATION
WARNING
To reduce the risk of
injury, wear safety goggles or glasses with
side shields. Always remove battery pack
before changing accessories or making
adjustments.
Turning On/Off
Press the Power
button to turn the tool on. Press
and hold the Power
button to turn the tool off.
Sleep Mode
The tool will shut off automatically if unused for 5
minutes. To reset, press the Power button again.
Fuel Gauge
The fuel gauge is displayed in the lower right corner
of the LCD while the tool is on.
Full Battery Life
1/3 Battery Life
2/3 Battery Life
Charge Battery
WARNING
To reduce the risk of explo-
sion, electric shock and property damage,
always check the work area before begining
a job. Do not allow cable to contact electrical,
chemical, or moving hazards.
Behind walls: Shut off circuit breakers to the
entire area.
Inside Pipes: Ensure there is no electrical
charge to the pipes before beginning inspec-
tion. Do not allow liquid to fl ow down cable
and into tool.
Auto use: Turn off the engine and allow to cool
before beginning inspection. Do not allow the
visual inspection camera or cable to contact
oil, gas, or other corosive materials.
CAUTION
To reduce the risk of damage to
the tool, do not use excesssive force or “kink”
the cable. Do not use in areas where visual
inspection camera and cable will contact cor-
rosive or oily substances.
Do not use the cable to clear clogs or move
obstructions. This is not a drain cleaner!
Note:
When the memory card is “locked”
with the write-protection tab in the lower
position, the Locked
icon will be dis-
played when taking a picture or movie
is attempted. No pictures or movies can
be saved to the memory card.
The number of pictures that can be taken or movies
recorded is based on the size of the memory card. If
the memory card is full, the Full
F
icon is displayed
when taking a picture or movie is attempted. Noth-
ing additional is saved to the memory card.
Downloading to a Computer
Insert the interface cable into the port on the side
of the tool. Connect the USB end into the USB port
on your computer.
NOTE:
If you are unable to view the videos on
your computer it may be because your computer
is missing the DIVX or XVID codec. The AVI file
is recorded in MPEG4 format and your computer
needs a DIVX or XVID codec to decode and play
it. For more trouble shooting tips, instructions and
a link to download the missing codec, please go to
Milwaukeetool.com, and then search the key words
“M-Spector AV”.
Picture/Movie Modes
Select the Picture
or Movie
mode button.
Adjust the cable to best fi t the opening. After check-
ing the workspace for hazards, insert the cable.
Make any picture adjustments, as follows. Picture
Mode screens are used for examples:
LED Brightness
To increase or decrease
the brightness of the
camera LED, use the
buttons to select
Brightness
. Use the
to increase and
decrease the brightness,
or turn the LED off.
Zoom
To zoom in or out, use
the
buttons to select
Zoom
.
Use the
to zoom in and out.
Rotate
To rotate the camera
view by 180°, use the
buttons to select
Rotate
. Use the
to rotate the view.
Taking a Picture
Press the Select
button to take a picture. It
is saved onto the memory card. The remaining
number of pictures that can be taken is displayed
in the lower left corner.
Taking a Movie
Press the Select
button to start recording
a m o v i e . P r e s s t h e
Select
button again
to stop the recording.
The movie is saved onto
the memory card. The
remaining recording time is displayed in the lower
left corner.
3664
3664
3664
00:43:54


