background image

41 


7. 
Technical Specifications    


This section provides the specifications of the Raven Series Modular 
Media Converter System.     


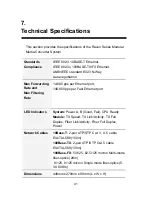
Standards 
Compliance 

IEEE 802.3 10BASE-T Ethernet, 
IEEE 802.3u 100BASE-TX/FX Ethernet, 
ANSI/IEEE standard 802.3 N-Way 
Auto-negotiation 

Max Forwarding 
Rate and   
Max Filtering 
Rate 

14,880 pps per Ethernet port,   
148,800 pps per Fast Ethernet port 
 

LED Indicators 

System:

 Power A, B (Good, Fail), CPU Ready 

Module:

 TX Speed, TX Link/Activity, TX Full 

Duplex, Fiber Link/Activity, Fiber Full Duplex, 
Power 

Network Cables 

10Base-T:

 2-pair UTP/STP Cat. 3, 4, 5 cable   

EIA/TIA-568 (100m) 

100Base-TX

: 2-pair UTP/STP Cat. 5 cable 

EIA/TIA-568 (100m) 

100Base-FX

: 50/125, 62.5/125 micron Multi-mode 

fiber-optics (2Km) 
  8/125, 9/125 micron Single mode fiber-optics (5, 
30, 60Km) 

Dimensions 

448mmx 279mm x 89mm (L x W x H)


Summary of Contents for Raven MIL-RCM16A

Page 1: ...RavenSeries Modular Media Converter System MIL RCM16A and MIL RCM16D 16 Slot Raven Conversion Modules Managed Chassis with AC or DC Power Source USER GUIDE...

Page 2: ...nsumer or purchaser and is not assignable MiLAN Technology makes no express or implied warranties including but not limited to any implied warranty of merchantability or fitness for a particular purpo...

Page 3: ...to the Network Pre Installation Requirements Mounting the Device Desktop Installation Rack mounted Installation Power On Diagnostic Test 4 Network Configuration Connecting a Terminal or PC to the Cons...

Page 4: ...5 2 1 Home Page 5 2 2 Modules Settings 5 2 3 IP Configuration 5 2 4 SNMP 5 2 5 Save and Reboot 5 2 5 1 Save Settings 5 2 5 2 Reboot System 5 2 6 Upgrade Firmware 6 SNMP Management 6 1 SNMP Management...

Page 5: ...optional matching power supply for load sharing and redundancy Figure 1 1 The Raven Series Media Converter System With built in web based Management managing and configuring the conversion system is s...

Page 6: ...LED indicators Power Good A B Power Fail A B System power CPU Ready Ethernet port link activity Full duplex Hot swappable bracket module design Converter module options 10 100TX to 100FX single mode...

Page 7: ...nt The conversion system provides an embedded HTML web server residing in flash memory It offers advanced management features and allows users to manage the conversion system from anywhere on the netw...

Page 8: ...erify them against the checklist below Raven Series Chassis Conversion Modules ship separately Power Cord Four Rubber Feet RS 232 cable CD ROM containing Users Guide Warranty Card If any item is missi...

Page 9: ...d one RS232 Fast Ethernet RJ 45 Management Module Figure 2 1 Front Panel for Raven Series Modular Media Converter System Figure 2 2 Front Panel for Raven Series Multi mode ST Module Figure 2 4 Front P...

Page 10: ...20A DC type power supply The conversion system ships standard with one power module and one fan module An additional power module unit is optional for load sharing and redundancy Note Redundant power...

Page 11: ...LED Status Meaning Speed RJ 45 On Green Link is on 100Mbps mode On Ethernet link up LINK ACT RJ 45 Flashing Green Port is transmitting packets On Link is on Full Duplex mode FDX RJ 45 Off Link is on...

Page 12: ...Off Power Module A is not ready On Power Module B is ready Good B Off Power Module B is not ready On Power Module A is fail Fail A Off Power Module A is ready On Power Module B is fail Fail B Off Powe...

Page 13: ...Console The console port is used to connect a management station or terminal with the conversion system Use the RS 232 serial port for out of band management Figure 2 8 Management Module Serial Port...

Page 14: ...and power cords can be connected easily Dedicated power supply Use dedicated power circuits or power conditioners to supply reliable electrical power to the network devices A dry cool place Keep the...

Page 15: ...o allow attachment of cables power cord and air circulation Attaching Rubber Feet A Make sure mounting surface on the bottom of the conversion system is grease and dust free B Remove adhesive backing...

Page 16: ...andard size 19 inch rack Perform the following steps to rack mount the conversion system A Position one bracket to align with the holes on one side of the conversion system and secure it with the brac...

Page 17: ...e conversion system to the rack with a screwdriver and the rack mounting screws Figure 3 3 Mounting the Raven Series Media Converter System in an EIA standard 19 inch Rack Note For proper ventilation...

Page 18: ...er indicator on the front panel to see if power is properly supplied Diagnostic Test The system will automatically perform a diagnostic test once the installation is completed and power is applied to...

Page 19: ...to a PC or terminal for monitoring and configuring the conversion system Figure 4 1 Connecting the Raven Series Media Converter System to a terminal via RS 232 cable Use the supplied RS 232 cable with...

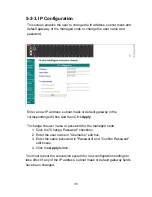
Page 20: ...er to telnet from a directly connected PC to the Device the IP address of the PC must be in the same class as the Device The default IP address of the Device is 192 168 1 77 with a subnet mask of 255...

Page 21: ...nd press the Enter key to access the Main Menu The following sections describe the options available in the Main Menu and their associated sub menus To select a menu item enter the appropriate charact...

Page 22: ...press Enter to select an item Note The Version 0 1 MAC Address 0 2 and System Up Time 0 3 fields are fixed and cannot be updated System Name 1 64 characters can be used to give the conversion system a...

Page 23: ...efault Gateway 6 The user can change the IP address of the default gateway if packets are being sent to another IP network The factory Default Gateway is 192 168 16 254 NOTE You must select the Save o...

Page 24: ...able No console management security The user name and password are required to enable console management The default setting is disabled No Get Request Community 9 32 characters can be used to enter a...

Page 25: ...21 Set Request Community A 32 characters can be used to enter a community string The default community string is public...

Page 26: ...the number or letter and then press Enter to select an item Enter the module position number 1 16 and then press Enter to change the settings for that module Note The Plugged 0 1 UTP Link 0 2 UTP Spe...

Page 27: ...nabled or disabled on the port LLF 4 Indicates whether LLF is enabled or disabled on the module LLF Direction 5 Indicates which direction LLF is enabled either UTP to Fiber or Fiber to UTP Note 6 This...

Page 28: ...tatus of the conversion system Power Modules To view Redundant Power Status select 3 and then press the Enter key from the main menu This screen shows the current redundant power supply status The con...

Page 29: ...menu Enter the number or letter and then press Enter to select an item Event Log Enabled 1 The user may enable or disable event log recording A maximum of 4095 event records will be stored by the conv...

Page 30: ...tter and then press Enter to select an item Send Trap 1 The user can enable or disable the SNMP Trap function Trap Community 2 32 characters can be used to enter the trap community string The trap sta...

Page 31: ...lnet Web based Management and SNMP To configure Secure IP select 6 and then press the Enter key from the main menu The user can enter enable or disable security for the conversion system A maximum of...

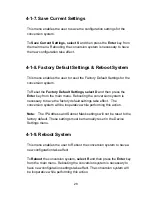
Page 32: ...m the main menu Rebooting the conversion system is necessary to have the factory default settings take effect The conversion system will be inoperative while performing this action Note The IP Address...

Page 33: ...ywhere on the network through a standard browser such as Internet Explorer or Netscape Web based management supports Internet Explorer 5 0 and later versions It is based on Java Applets with an aim to...

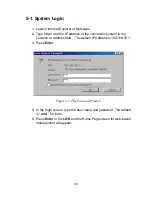
Page 34: ...ersion system in the Location or Address field The default IP Address is 192 168 16 1 3 Press Enter Figure 5 1 The Password Window 4 In the login screen type the user name and password The default is...

Page 35: ...31 5 2 System Configuration...

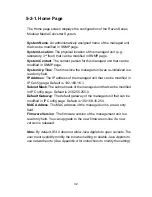
Page 36: ...anaged unit that can be modified in IP Config page Default is 192 168 16 1 Subnet Mask The subnet mask of the managed unit that can be modified in IP Config page Default is 255 255 255 0 Default Gatew...

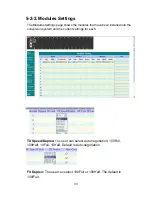
Page 37: ...that have been installed into the conversion system and the current settings for each TX Speed Duplex The user can select Auto negotiation 100Full 100Half 10Full 10Half Default is Auto negotiation FX...

Page 38: ...k Loose Forward The user can select to have LLF enabled checked or disabled unchecked When LLF is enabled the controlled port will auto disconnect if the controlling UTP or Fiber link is down The dire...

Page 39: ...sponding edit box and then Click Apply To change the user name or password for the managed node 1 Click the Change Password checkbox 2 Enter the user name in Username edit box 3 Enter the same passwor...

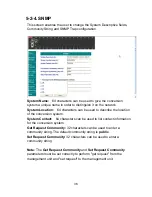
Page 40: ...be the location of the conversion system System Contact 64 characters can be used to list contact information for the conversion system Get Request Community 32 characters can be used to enter a commu...

Page 41: ...To reset the factory default settings click the Factory Default Settings Reboot checkbox and then press the corresponding Apply button The factory default settings will take effect The conversion syst...

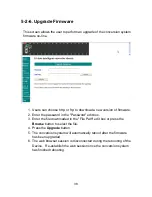
Page 42: ...ssword in the Password edit box 3 Enter the file downloaded in the File Path edit box or press the Browse button to select the file 4 Press the Upgrade button 5 The conversion system will automaticall...

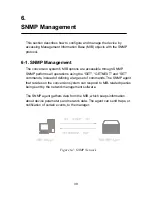
Page 43: ...P performs all operations using the GET GETNEXT and SET commands instead of defining a large set of commands The SNMP agent that resides on the conversion system can respond to MIB related queries bei...

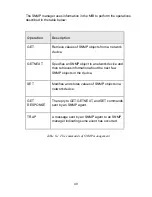
Page 44: ...ifies an SNMP object in a network device and then retrieves information about the next few SNMP objects in the device SET Modifies and stores values of SNMP objects in a network device GET RESPONSE Th...

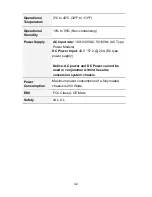
Page 45: ...te 14 880 pps per Ethernet port 148 800 pps per Fast Ethernet port LED Indicators System Power A B Good Fail CPU Ready Module TX Speed TX Link Activity TX Full Duplex Fiber Link Activity Fiber Full Du...

Page 46: ...t rate 100 240VAC 50 60Hz AC Type Power Module DC Power Input 40 5 57 0 20A DC type power supply Notice AC power and DC Power cannot be used in conjunction within the same conversion system chassis Po...

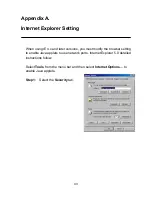
Page 47: ...ater versions you must modify the browser setting to enable Java applets to use network ports Internet Explorer 5 0 detailed instructions follow Select Tools from the menu bar and then select Internet...

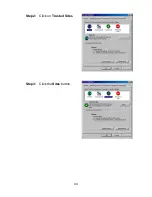
Page 48: ...44 Step 2 Click on Trusted Sites Step 3 Click the Sites button...

Page 49: ...conversion system to the Add this Web site to the Zone field and then click Add Step 5 Disable Require server verification for all sites in this zone by deselecting the checkbox and then click the OK...

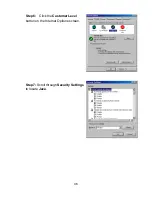
Page 50: ...46 Step 6 Click the Customer Level button on the Internet Options screen Step 7 Scroll through Security Settings to locate Java...

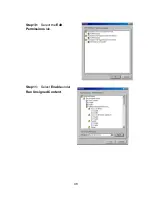
Page 51: ...47 Step 8 Select Custom under Java permissions Step 9 Click the Java Custom Settings button...

Page 52: ...48 Step 10 Select the Edit Permissions tab Step 11 Select Enable under Run Unsigned Content...

Page 53: ...49 90000414 Rev A2...

Reviews: