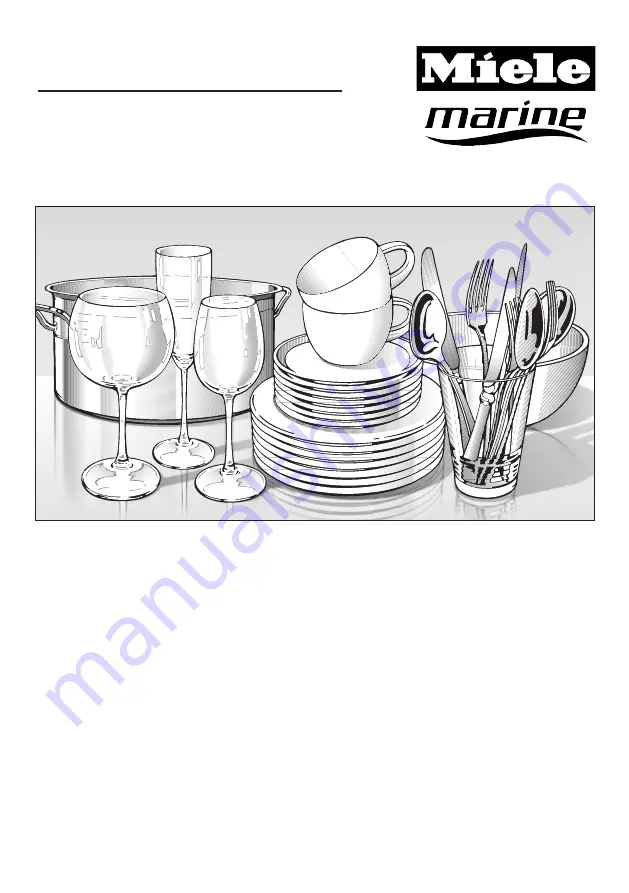
Operating Instructions
Commercial dishwasherPG 8133 SCVi
To prevent accidents and machine damage,
read these instructions
before
installation or use.
en - US
M.-Nr. 10 895 560
Page 1: ...Operating Instructions Commercial dishwasher PG 8133 SCVi To prevent accidents and machine damage read these instructions before installation or use en US M Nr 10 895 560 ...
Page 2: ...fore using the machine for the first time you require 22 Dishwasher salt 22 Filling the salt reservoir 23 Salt refill indicator 24 Rinse aid 25 Adding rinse aid 25 Rinse aid indicator 26 Loading the dishwasher 27 Tips 27 Loading examples 29 FlexAssist 31 Upper basket 31 Adjusting the upper basket 34 Lower basket 35 Cutlery 38 3D cutlery tray 38 Operation 40 Detergent 40 Adding detergent 41 Switchi...
Page 3: ...perature final rinse 57 EcoStart 58 Networking 60 Miele home 60 2nd interim rinse 63 Brightness 63 Volume 64 Refill reminders 64 Check filters 64 AutoOpen Drying 65 Optimize standby 65 BrilliantLight 65 Software version 65 Showroom program 66 Factory default settings 66 Closing the Settings menu 66 Cleaning and care 67 Maintenance 67 Cleaning the wash chamber 67 Cleaning the door and the door seal...
Page 4: ...ed questions 80 Cleaning the water intake 80 Cleaning the drain pump and non return valve 81 Miele Service 82 Contact in the event of a fault 82 Program updates 82 Optional accessories 83 Installation Instructions 84 Electrical connection 85 Plumbing 86 The Miele Waterproof system 86 Water intake 86 Connecting the water drainage system 88 Technical details 89 Sound emission tests 90 ...
Page 5: ...ents are contained in a nar row frame They are not imperative for the operation of the commercial dishwasher Operating steps Instructions on how to operate the commercial dishwasher are identified by specially marked operating steps They ex plain the procedure step by step Operating steps are identified by a black square Example Select the desired setting and press the center button to confirm Dis...
Page 6: ...kfast and other related establishments The commercial dishwasher is subsequently referred to as a dish washer in these operating instructions Glasses cutlery and dishes are referred to generally as cookware when not more specifically defined This dishwasher is not intended for continuous use This dishwasher is not suitable for cleaning medical products This machine is designed exclusively for use ...
Page 7: ...nteed if the above conditions are met The commercial dishwasher must not be operated on open decks This dishwasher is supplied with a special bulb to cope with par ticular conditions e g temperature moisture chemical resistance abrasion resistance and vibration This special bulb must only be used for the purpose for which it is intended i e to illuminate the wash chamber It is not suitable for roo...
Page 8: ...it Do not install the machine in an area where a danger of explosion or of freezing temperatures may be present Be careful when installing the dishwasher Wear protective gloves to avoid injury on any sharp metal components To ensure the stability of undercounter dishwashers these units may only be installed beneath a continuous countertop that is bolted to adjacent cabinetry In order to reduce the...
Page 9: ...only be replaced by genuine Miele origi nal parts Only when these parts are fitted can Miele guarantee the safety standards of the appliance The electrical safety of this dishwasher can only be guaranteed when correctly grounded If in any doubt please have the electrical installation tested by a qualified electrician Miele cannot be held li able for the consequences of an inadequate grounding syst...
Page 10: ...lacement may only be carried out by a qualified service technician Before servicing the appliance disconnect it from the power sup ply The plastic housing of the water connection contains electrical components It must not be dipped in water There are live wires in the water intake hose Do not shorten the water intake hose even if it is too long The built in Waterproof system offers reliable protec...
Page 11: ...r pipework to the dishwasher will need to be vented If this is not done components can be dam aged Please be aware that the dishwasher may be operating at high temperatures When the door is opened there is a danger of burning or scalding Dishes cutlery baskets and inserts must be allowed to cool down before they are unloaded Any water remaining in contain ers could still be very hot Empty them int...
Page 12: ...nstructions with regard to storage conditions use and dosage To avoid material damage and corrosion do not allow any acids or solutions containing chloride to get into the wash cabinet Simi larly avoid any materials with a corrosive effect Do not wash items soiled with ash sand wax lubricating grease or paint in the dishwasher These materials will cause damage to the dishwasher Do not clean the di...
Page 13: ...in the unlikely event of a fault with the opening mecha nism Keep children away from process chemicals These contain ingre dients which can cause burning in the mouth or throat or inhibit breathing Keep children away from the dishwasher when the door is open There could still be residual process chemicals in the dish washer Seek medical advice immediately if a child has swallowed or inhaled any pr...
Page 14: ...ot visible b Cutlery tray c Upper basket d Middle spray arm e Air intake for drying f Lower spray arm g Filter combination h Data plate i Rinse aid reservoir j Dual compartment detergent dis penser k In operation indicator light l Reservoir for dishwasher salt ...
Page 15: ...Control panel a In operation indicator light b Program selection c Option buttons with indicator lights d Arrow buttons e button FlexiTimer with indicator light f OK button g Display h Program selection button i On off button ...
Page 16: ... to alter the dishwasher s electronics to suit differ ent requirements The Settings menu is accessed by pressing the button The arrows on the display indicate that further options are available You can use the arrow buttons next to the display as appropriate to select these further options The OK button is used to confirm a message or setting and also to move to the next menu or another level The ...
Page 17: ...r the proper functioning and safe use of the equipment Handling these mate rials improperly by disposing of them in your household waste can be harmful to your health and the environment There fore please do not dispose of your old appliance with regular household waste and follow local regulations on proper disposal Consult with local authorities dealers or Miele in order to dispose of and recycl...
Page 18: ... most economical dish washing Choose a program that best suits the degree of soiling and the type of dishes being washed Select the ECO program for energy saving dishwashing This program is the most efficient in terms of its com bined energy and water consumption for cleaning dishes with a normal level of soiling Follow the detergent manufacturer s recommendations on detergent dosage When using po...
Page 19: ...e en gage the door closing mechanism If the door is opened during operation all functions are automatically inter rupted Water in the dishwasher may be hot Danger of scalding Only open the door during operation if absolutely necessary and exercise extreme caution when doing so Keep the area around the door free of obstructions Closing the door Push the baskets in Then lift the door upwards and pus...
Page 20: ...ry if appropriate and confirm your selection with OK See Display functions for more infor mation about the display and controls A check will appear next to the lan guage that has been set Time of day The display will then change to the screen for setting the time The current time of day must be set be fore you can use the FlexiTimer pro gramming option Use the arrow buttons to set the hour and con...
Page 21: ...grammed at the factory for a water hardness level of 1 gpg 1 d Use the arrow buttons to select the hardness of your water supply and confirm with OK See Settings menu Water hardness for more information on setting the water hardness Finally the notes Miele home enabled and Set up complete will appear in the display After confirming these notes with OK the messages Refill salt and Refill rinse aid ...
Page 22: ... surfaces of the machine Mains water with a hardness level higher than 4 gpg 4 d must be soft ened This occurs automatically in the integrated water softener The water softener is suitable for a water hardness level of up to 38 gpg 36 d The water softener requires dishwasher salt If the water in your area is very soft and constantly lower than 5 gpg 5 d you do not need to add dish washer salt The ...
Page 23: ...servoir when the cap is removed It should therefore only be removed in order to refill the salt reservoir Fill the reservoir with approx 2 L of water first use only Place the provided funnel over the salt reservoir and carefully fill with dishwasher salt until the reservoir is full The salt reservoir holds approx 4 4 lb of salt depending on the type of salt Clean any excess salt from around the re...
Page 24: ...may have overflowed and have it pumped away After the salt reservoir has been filled the refill reminder may still appear in the display if the salt concentration has not yet reached the correct level In this case still confirm the message with OK The salt refill indicator will be turned off if you have programmed the dishwasher for a water hardness below 5 gpg 5 d If you do not want the refill re...
Page 25: ...liquid or cleaning agent This would damage the rinse aid reservoir Suitable products are available from Miele Professional Alternatively it is possible to use household vinegar with a max 5 acid content or liquid citric acid with up to 10 acid content The resulting rinsing and drying quality will not however be as good as when rinse aid is used Do not use vinegar with a higher acid content e g vin...
Page 26: ...r ing the next program You can adjust the rinse aid dosage for best results see Settings menu Rinse aid Rinse aid indicator When the Refill rinse aid message ap pears in the display the reservoir con tains sufficient rinse aid for 2 3 pro grams only Add rinse aid in plenty of time Confirm with OK The rinse aid refill indicator will go out If you do not want the refill reminders to appear you can s...
Page 27: ...hould be placed in the center of the basket to ensure better water coverage Concave items such as mugs or bowls should be placed at an angle so that the water can run off The spray arms must not be blocked by items which are too tall or hang through the baskets If in doubt test for free movement by manually rotat ing the spray arms Make sure that small items cannot fall through the holders in the ...
Page 28: ... a program where wa ter has not run off smoothly It may need to be rubbed dry with a soft cloth Silver which has been in contact with foods containing sulphur can discolor These include egg yolk onions mayon naise mustard fish and marinades Aluminum components e g range hood grease filters must not be cleaned with a commercial or in dustrial cleaning agent These may damage the material Tip When pu...
Page 29: ...Loading the dishwasher 29 Loading examples Loading for 10 standard place settings with cutlery tray Upper basket Lower basket Cutlery tray depending on model ...
Page 30: ...Loading the dishwasher 30 Loading for 16 standard place settings with cutlery tray Upper basket Lower basket Cutlery tray depending on model ...
Page 31: ...e the dishwasher without the upper and lower baskets in place Use the upper basket for small light weight and delicate items such as cups saucers glasses dessert bowls etc Shallow pans or casserole dishes can also be placed in the upper basket Long items such as soup ladles mix ing spoons and long knives should be placed lying down across the front of the upper basket Cup rack Using the yellow lev...
Page 32: ...arger items such as casserole dishes Press the yellow lever downwards and then lower the spikes XXL cup rack depending on model The cup rack can be set at two different widths so that it can also accommodate large cups Pull the cup rack upwards and click it back into position at the required width ...
Page 33: ...ou can also move one of the side in serts in the cutlery tray to make more room for tall glasses see Cutlery 3D cutlery tray Adjusting the height You can set the glassware rail at two different heights Pull the rail upwards and click it back into position at the required height Use the lower position for small glasses and tumblers Use the higher position for tall glasses and glasses with stems ...
Page 34: ...on the levers at either side of the upper basket Adjust the basket to the desired height and then push the levers se curely back down into position Depending on the setting of the upper basket the following plate dimensions can be accommodated Dishwashers with cutlery tray see data plate for model number Upper basket adjust ment Plate in inches cm Upper basket Lower basket ADA Full size Upper 7 7 ...
Page 35: ...in the center of the lower basket When tilted plates up to 13 3 4 35 cm in diameter can be accommo dated Removable MultiComfort insert The rear section of the lower basket is used for washing cups glasses plates pots and pans You can remove the MultiComfort insert to make more room for larger items such as casserole dishes Removing the insert Pull the yellow handle forwards and remove the insert R...
Page 36: ...be leaned against the glass rack or suspended from it The glass holder can be raised to make more room for tall items You can set the glass holder at two dif ferent heights Slide the glass holder to the desired height until the catches click into place at the top or bottom Glassware rail The glassware rail is designed to hold glasses with long stems securely Lower the rail and lean tall glasses ag...
Page 37: ...d saucers The spikes can be lowered to make more room for large items e g pots pans and dishes Press the yellow lever downwards and then lower the spikes Bottle holder The bottle holder can be used to wash narrow items e g milk and baby bot tles If the bottle holder is not needed lift it up and fold the sides down as illustrated ...
Page 38: ...of the serrated re tainers on the base of the cutlery tray to ensure that water runs off them freely For optimum cleaning results arrange spoons with the inner part facing the center of the cutlery tray The upper spray arm must not be blocked by items which are too big e g very large platters The side sections of the tray can be moved into the middle using the yellow grips in order to accommodate ...
Page 39: ...t the height of the middle section of the cutlery tray to make more room for large items of cutlery Both rows of spikes in the middle sec tion of the cutlery tray can be flipped over to make room for larger pieces of cutlery Raise the spikes and then flip them over ...
Page 40: ...ou can also add a small amount of detergent to compart ment l see Program chart Failure to use the recommended amount of detergent may adversely affect the cleaning results Detergents containing active chlorine must not be used They can damage plastics and elas tomers in the dishwasher Do not inhale or ingest powder detergent Do not swallow dish washer detergents Dishwasher de tergents can cause b...
Page 41: ...the flap Ensure that the detergent packaging is properly closed after use to avoid the detergent getting damp and be coming lumpy Dispensing aid Compartment I holds a maximum of 10 mL and compartment II holds a maximum of 50 mL of detergent In compartment II there are markings to assist with dispensing 20 and 30 They indicate the filling quantity in mL when the door is open in the horizontal posi ...
Page 42: ...erent programs and their uses are described in the Program guide later on in this booklet Use the program selection button to select the program required The indicator light next to the program selected will come on Further programs are selected via the option Use the program selector button to select the option The first of the additional programs will appear in the display Use the arrow buttons ...
Page 43: ... time left until the end of the program is dis played Each program phase is indicated by a symbol Pre wash Soak Main wash Interim rinse Final rinse Drying End The displayed program duration may vary with the same program It is influ enced by among other things the wa ter temperature at each intake the re activation process of the water softener and the amount of dishes The times shown in the progr...
Page 44: ...ogram has finished when End appears in the display and the door has opened slightly if applicable The drying fan may continue to run for a few minutes at the end of the pro gram Open the door completely to re en gage the door closing mechanism The dishwasher can now be emptied The in operation indicator light will go out 10 minutes after the end of the pro gram if the door is closed If you have de...
Page 45: ... basket and cutlery tray from fall ing onto the dishes in the lower basket Interrupting a program A program will be interrupted as soon as the door is opened If the door is closed again the program will continue from the point it was at be fore the door was opened Water in the dishwasher may be hot Danger of scalding Only open the door if absolutely nec essary and exercise extreme caution when doi...
Page 46: ...l remain active for that particular program until the set ting is changed Countdown indicator The Countdown indicator option is selected as standard and displays the time remaining until the end of the pro gram You can also switch to the Temperature while the program is running Temperature The Temperature option shows the current temperature of the wash block You can also switch to the Countdown i...
Page 47: ...ing into contact with dishwasher detergent Do not fill the detergent dispenser until just before starting the pro gram i e before you activate the FlexiTimer with OK Open the door Switch the dishwasher on with the button Select the desired program Press the button The indicator will light up You can use the arrow buttons to select the Start at Finish at EcoStart and Back functions Confirm selectio...
Page 48: ...m selected will begin automatically Finish at With the Finish at function you set the latest time at which you wish the pro gram to end Use the arrow buttons to set the hour and confirm with OK The hour will be saved and the minute numerical keypad will be highlighted Use the arrows to set the min utes and confirm with OK The estimated start time for the pro gram selected will appear in the displa...
Page 49: ...pear in the display The indicators will light up Close the door The selected program will start auto matically during the most cost effective time zone It will finish at the latest by the set finish time Changing or deleting set times You can change the set times or start the program before the start time in the display is reached Open the door Press the button Use the arrow buttons to select the ...
Page 50: ...5 g or 1 tab China Crystal Special glassware program 20 25 g or 1 tab ECO Energy saving program with a long running time 20 25 g or 1 tab Plastics Special plastics program 20 25 g or 1 tab Sanitize Special hygiene program for items that need to be hygienically clean 20 25 g or 1 tab Rinse Hold To rinse heavily soiled items e g for initial re moval of dirt or to prevent residues drying on to dishes...
Page 51: ... min X X 126 F 52 C 40 min X 5 min X 140 F 60 C 30 s X 30 min X X 10 min X 120 F 50 C 1 min X 5 min X 140 F 60 C 30 s X 45 min X X 8 min X 140 F 60 C 10 min X 3 min X X 180 F 82 C 15 s X 30 min X X Cold 10 min X stages included in a program X optional stages which can be selected see Program options Options 2 Select Interim rinse II via the Settings button see Menu Settings 2nd Interim rinse 3 Opt...
Page 52: ... min 7 China Crystal 1 0 kWh 0 4 kWh 4 gal 15 2 L 33 min 7 31 min 7 23 min 7 22 min 7 Sanitize 2 1 kWh 1 3 kWh 5 3 gal 20 2 L 76 min 7 71 min 7 60 min 7 58 min 7 Plastics 1 2 kWh 0 5 kWh 5 3 gal 20 2 L 98 min 94 min 85 min 84 min Rinse Hold 0 02 kWh 0 02 kWh 1 5 gal 5 5 L 13 min 13 min ECO 13 place set tings 0 927 kWh 0 6 kWh 3 6 gal 13 8 L 215 mi n 215 mi n 206 mi n 206 mi n ECO 14 place set ting...
Page 53: ... 15 2 L 61 min 7 37 min 7 Sanitize 2 2 kWh 1 4 kWh 5 3 gal 20 2 L 124 min 7 89 min 7 Plastics 1 3 kWh 0 5 kWh 5 3 gal 20 2 L 90 min 52 min Rinse Hold 0 02 kWh 0 02 kWh 1 5 gal 5 5 L 13 min 13 min ECO 13 place set tings 0 927 kWh 0 6 kWh 3 6 gal 13 8 L 215 min 206 min ECO 14 place set tings 0 941 kWh 0 6 kWh 3 6 gal 13 8 L 216 min 207 min 6 The quoted values are calculated in accordance with EN 502...
Page 54: ... Sub menu options which have already been selected will have a check be side them To exit a sub menu use the ar row buttons to select Back and confirm with OK The display will revert to the menu above Language The display can be set to appear in one of several different languages You can change the language in the display via the Language sub menu Select the language you want as well as the countr...
Page 55: ...time of day You can set the time of day The current time of day must be set be fore you can use the FlexiTimer pro gramming option Select the Set menu option Use the arrow buttons to set the hours and confirm with OK Then set the minutes and confirm with OK The time of day has now been saved Synchronize This option is only displayed if you have activated the network settings see Settings menu Netw...
Page 56: ...18 26 gr gal 17 25 d always program the dish washer to the higher value 26 gr gal or 25 d in this example Select the hardness of your water and press the center button to con firm A check will appear beside the water hardness which has been set d gr gal Display 1 1 1 2 2 2 3 3 3 4 4 4 5 5 5 6 6 6 7 7 7 8 8 8 9 9 9 10 10 10 11 11 11 12 12 12 13 13 13 14 14 14 15 15 15 16 16 16 17 17 17 18 18 18 19 ...
Page 57: ... dosage If clouding or smearing appears on dishware and glassware Decrease the rinse aid dosage Select the setting you want and con firm your choice with OK Temperature unit The temperature can be displayed in degrees Celsius or degrees Fahrenheit Select the setting you want and con firm with OK High temperature final rinse For better drying the final rinse temper ature can be increased for indivi...
Page 58: ...her will then start automati cally in the cheapest electricity rate time and the program will end at the latest at the finish time set Setting the electricity rate times Before you can use the EcoStart option you must set at least one electricity rate time Use the arrow buttons to select the electricity rate time R1 R3 you want to set and confirm with OK The start of the electricity rate time se l...
Page 59: ...or this time zone Use the arrow buttons to select the electricity rate time R1 R3 you want to delete and confirm with OK For example select Delete R1 and confirm with OK For example select Delete R1 and confirm with OK The settings for the electricity rate time selected will be reset Confirm the message with OK The electricity rate time has now been deleted ...
Page 60: ...This menu option is only displayed if you have activated the network set tings see Settings Network There are a number of ways of connect ing your dishwasher to your WLAN net work MielePro mobile app The MielePro mobile app is available to download free of charge from the Ap ple App Store or from the Google Play Store After installing the MielePro mobile app on a mobile device you can do the follo...
Page 61: ...ils you have proba bly not connected WPS to your router quickly enough Repeat the steps above SmartStart The SmartStart function is used for start ing your dishwasher automatically at a time when your energy costs are most economical If the Permitted SmartStart option has been activated SmartStart will appear in the FlexiTimer menu of the se lected program instead of EcoStart The dishwasher will t...
Page 62: ...vated the Remote control function the MobileControl option will be the first option listed under Set tings In order to operate the dishwasher with the MielePro mobile app please acti vate the MobileControl function Confirm the MobileControl menu op tion with OK Close the door The dishwasher can now be operated remotely using the MielePro mobile app If you now do not wish to operate the dishwasher ...
Page 63: ...ged Select Default settings and confirm with OK Please wait will appear in the display The message Module status Process suc cessful will appear in the display after a few minutes Confirm the message with OK The WLAN module factory default set tings have been restored If the factory default settings were not restored to your WLAN module repeat the instructions above 2nd interim rinse You can incre...
Page 64: ...on Keypad tones A buzzer tone sounds each time a but ton is pressed The volume for the keypad tone can be set to one of seven different settings If no volume is selected the buzzer is switched off Use the arrow buttons to set the volume required and confirm your se lection with the OK button Refill reminders If you consistently use a Tab detergent and the refill indicators for salt and rinse aid a...
Page 65: ...function switched on as standard To save energy the dishwasher will switch off automatically a few minutes after the last time a button is pressed or after the end of a program The dishwasher will not switch off in the event of a fault Optimize standby can be switched off if you prefer If you do this the duration before the dishwasher switches off au tomatically increases to approx 6 hours Doing t...
Page 66: ...en automatically BrilliantLight The interior lighting is on constantly Factory default settings You can reset all dishwasher settings to the factory default settings WLAN module settings where applica ble have to be reset separately see Settings Miele home Module set tings Select Reset and confirm with OK Closing the Settings menu You can exit the Settings menu using Close Select Close and confirm...
Page 67: ...st run Seals will be tested for water tight ness All relevant measuring systems will be safety tested including fault dis plays Safety features Check the condition of your dish washer regularly approx every 4 6 months This way faults and prob lems can be avoided All surfaces of this machine are susceptible to scratching Contact with unsuitable cleaning agents can alter or discolor all sur faces Cl...
Page 68: ...washing liquid applied with a soft sponge Wipe the surfaces dry using a soft cloth Glass cleaners may be used to clean the exterior However do not allow them to sit or puddle this can cause damage to the surface Remove the cleaner promptly To better maintain your appliance avoid the following Cleaning products containing soda ammonia acid or chloride Descaling agents Abrasive cleaning products suc...
Page 69: ...e The message Check filters will appear in the display after every 50 program cy cles factory default setting You can set the interval for the Check filters message to appear to a value between 30 and 60 program cycles see Settings menu Check filters Check the filter combination Clean it if necessary Then confirm the message with OK The message will go out Filter system Turn the dishwasher off Tur...
Page 70: ...en close the flap so that the catch engages Replace the filter system so that it lies flat in the base of the wash cabinet Then turn the handle clockwise until both arrows point towards each other This will lock the filter system in place Take care when you are fitting the filter system that it is secured in position correctly Otherwise coarse soil could get into the circulation system and cause a...
Page 71: ...y tray if applica ble Push the top spray arm upward to engage the inner ratchet then un screw the spray arm Push the middle spray arm upward to engage the ratchet then un screw the spray arm Remove the lower basket Pull the lower spray arm firmly up ward to remove it Use a pointed object to push food particles in the jets into the spray arms Rinse the spray arms thoroughly un der running water Rei...
Page 72: ...ishwasher is not plugged in Insert the plug The fuse has tripped Reset the fuse see data plate for the correct fuse rating The dishwasher stops during a program The fuse has tripped Reset the fuse see data plate for the correct fuse rating If the fuse trips again contact Miele Customer Service After the program has started the in operation indicator light is not vis ible The indicator reflector pa...
Page 73: ... Press the Start button If the fault message is displayed again there has been a malfunction Contact Miele Service Waterproof The Waterproof system was activated Close the water supply Contact Miele Service Fault F78 A fault has occurred in the circulation pump Turn the dishwasher off for at least 30 seconds with the button Turn the dishwasher back on Select the desired program Press the Start but...
Page 74: ... program again Clean the water intake filter see Frequently asked questions The flow pressure at the water connection is lower than 30 kPa 0 3 bar Consult a plumber The following fault mes sage appears in the dis play Drain Before remedying the fault Turn the dishwasher off with the button Water drainage fault There might be water in the wash chamber Clean the filter combination see Cleaning and c...
Page 75: ...dded Make sure the compartment is dry before adding detergent The detergent dis penser flap cannot be closed Detergent residue is blocking the latch Remove the detergent residue The inside of the door and or the interior walls are wet after a program has finished This is not a fault It is caused by the drying system The moisture will dissipate after a short while Water remains in the wash chamber ...
Page 76: ...abinet Dishware is moving around in the wash cabinet Interrupt the program and rearrange loose pieces A foreign object e g a cherry pit has become lodged in the drain pump Remove the foreign object from the drain pump see Cleaning the drain pump and non return valve There is a knocking noise from the water pipe This may be caused by the installation or the diameter of the water pipe However this w...
Page 77: ...he items so that the spray arms can ro tate freely The filter system in the base of the wash chamber is not clean or is not correctly fitted This may cause the spray arm jets to become blocked Clean and or fit the filter combination correctly Clean the spray arm jets if necessary see Clean ing and care Cleaning the spray arms The non return valve is open and blocked Dirty water has flowed back int...
Page 78: ...ht away Glasses are dull and discolored the deposit cannot be wiped off The glassware is not dishwasher safe The surfaces are affected Purchase glassware which is dishwasher safe Tea or lipstick stains have not been com pletely removed The wash temperature of the selected program was too low Select a program with a higher wash temperature The bleaching effect of the detergent is too low Switch to ...
Page 79: ...alt The salt reservoir cap has not been screwed on cor rectly Replace it making sure that it screws back on cor rectly The water softener is programmed to too low a water hardness level Program the water softener to a higher water hard ness level see Settings menu Water hardness There are rust stains on the cutlery A program was not run after dishwasher salt was added Traces of salt have got into ...
Page 80: ...nion This filter is available from a Miele dealer or Miele Service To clean the filter Disconnect the dishwasher from the electrical supply Switch off at the mains socket and withdraw the plug Turn off the water supply Unscrew the water intake valve Take the seal ring out of the screw connection Withdraw the filter using pointed pli ers and rinse clean under running wa ter Replace the filter and w...
Page 81: ...e catch for the non return valve inwards Tilt the non return valve inwards until it is released Rinse it thoroughly under running wa ter and remove any dirt from the non return valve The drain pump is located underneath the non return valve see arrow Remove all foreign objects from the drain pump glass or bone splinters Before returning the non return valve check that the drain pump is not blocked...
Page 82: ...nd at the end of this document Please quote the model and serial num ber of your dishwasher when contacting Miele These can be found on the data plate along the right edge of the open door Program updates The program update function is de signed to enable a service technician to update your dishwasher s electronics in keeping with advances in technology Program updates can only be per formed by a ...
Page 83: ...er basket can be used for cleaning the in dividual parts of the Miele Cappuccina tore in the dishwasher Cutlery basket The cutlery basket is placed in the lower basket and can be used to wash additional items of cutlery in a dish washer which is fitted with a cutlery tray Glass rail This rail is designed to hold glasses with stems securely in the lower basket ...
Page 84: ...am supplied with these instructions To comply with IEC sound testing protocols please contact Miele for additional instructions Information is subject to change Please refer to our website to obtain the most current product specification technical warranty information ...
Page 85: ... use only original Miele replacement parts or a suitable cable with core cable ends For technical data see the data plate or the attached wiring diagram The dishwasher must only be operated with the voltage frequency and fuse rating shown on the data plate This machine can be converted to a different type of power supply in ac cordance with the conversion diagram and wiring diagram supplied Conver...
Page 86: ... mountainous regions the water composition may cause precipitates to form requiring the use of softened water for the dishwasher A backflow preventer is not required the dishwasher corresponds with the applicable standards for the protec tion of drinking water The water pressure flow pressure at the connection point must be be tween 50 and 1000 kPa 0 5 and 10 bar If the water pressure is lower tha...
Page 87: ... To avoid any damage to the ma chine the dishwasher must only be connected to fully vented pipework The intake hose must not be shortened or damaged in any way as it contains electrical components see illustration ...
Page 88: ...d The hose can be extended us ing a connection piece to attach a further length of hose The drainage length must not be longer than 13 ft 4 m and the delivery head no higher than 39 1 m The drainage system must be able to handle a discharge rate of at least 16 L min Make sure that there are no kinks in the hose and that it is not crushed or stretched Venting the drain If the on site drain connecti...
Page 89: ...7 W Frequency band 2 412 2 462 GHz Maximum transmitting power 100 mW Water pressure supply pressure 7 25 145 psi 50 1 000 kPA Cold or hot water supply Up to max 140 F 60 C Mains water hardness Max 37 5 gpg 36 d Delivery head Max 3 3 3 8 1 0 m Drain hose length Max 13 1 1 2 4 0 m Ambient temperature 41 F 5 C to 104 F 40 C Relative humidity Maximum Linear decreasing to 80 for temperatures up to 88 F...
Page 90: ... tests Load the dishwasher with 16 standard place settings and use the Normal pro gram Setup for sound emission tests The dishwasher must be set up according to the following specifications Install the dishwasher into an analyzing unit Secure the front panel ...
Page 91: ...mission tests 91 Push the provided fleece strips depending on model under the toe kick until it is flush with the appliance feet Push the toe kick into place in such a way that it is flush with the door front ...
Page 92: ...Sound emission tests 92 Remove the protective film from the provided insulating strip depending on model Push the insulating strip into the front top edge of the toe kick ...
Page 93: ......
Page 94: ......
Page 95: ......
Page 96: ...849 Australia Asia Oceania 61 3 9764 7880 Europe Africa Middle East 49 5241 89 66 877 International Service Contacts E mail service miele marine com Manufacturer Miele Cie KG Carl Miele Straße 29 33332 Gütersloh Germany 2018 03 20 M Nr 10 895 560 00 ...