


15
box next to it, and click “Remove”, then reboot the hub. On rare occasions, a test camera remains installed from
the testing done during manufacturing.
2. To add a camera type the camera MAC address into the box provided. (If your camera is powered on, you may
see it indicated as a choice in a pull down menu)
3. Select the camera or enter the camera MAC address into the box, name the camera, and click “Save”.
4. Click the “refresh” button every few seconds until the new MAC address appears in the list of active cameras.
5. Repeat the process for additional cameras.
4. When you have added all the cameras to the hub (up to a maximum of 4), reboot the hub by clicking on the
“Restart” button at the top of the screen, and following any prompts.
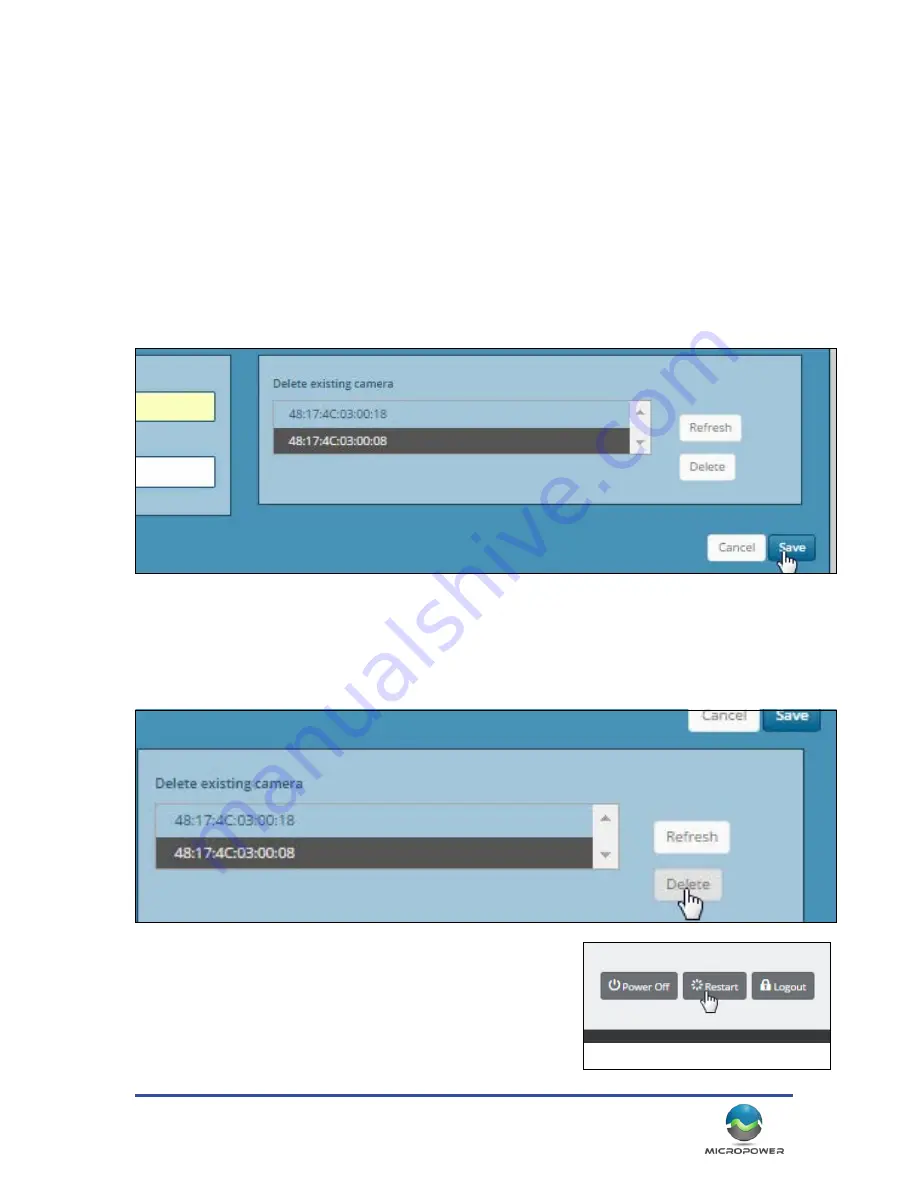
Removing Cameras
In some circumstance (such as moving a camera to another location on to a different hub, replacing a camera,
etc.…) you may need to “remove” a camera. To remove a camera from a hub, simply click on the camera you wish
to remove, and click on the “Delete” button. The camera will be removed from the system’s database, and may
then be replaced, or moved to another hub.
After successfully removing any cameras, you should reboot the hub by clickign on the “restart” button found at
the top of the screen.
Summary of Contents for SLV-C306-1011-IR
Page 11: ...11...
Page 23: ...23 Solar Bracket Mounting Configurations...
Page 24: ...MicroPower Technologies 1 877 536 0128 micropower com 24...
Page 32: ...MicroPower Technologies 1 877 536 0128 micropower com 32...
Page 33: ...33...
Page 34: ...MicroPower Technologies 1 877 536 0128 micropower com 34...