


MicroPower Technologies
1-877-536-0128 | micropower.com
14
Changing RF Channels
On the Solveil system, a hub will always default to the same radio channel (just as there is a default IP address)
thus channel selection is very important, particularly if there are multiple hub systems operating in the same
general area. Never run two Solveil systems on the same channels, within range of each other, or there will very
likely be significant loss of system performance.
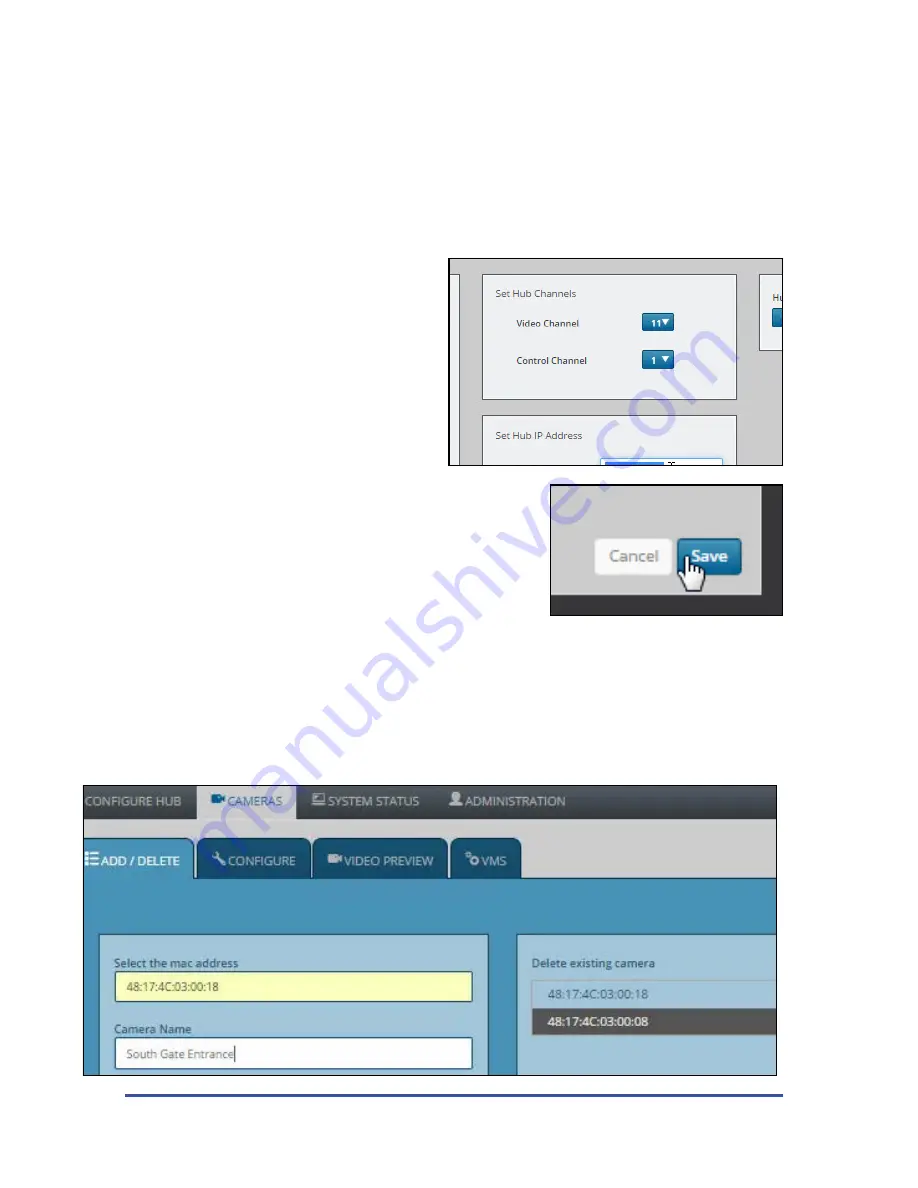
Video Channel:
Represents the 2.4GHz channel that the video is transmitted on, from the camera to the hub.
There are (3) choices, 2, 6, and 11. Try to choose a channel
that has the least amount of traffic present.
Control Channel:
Represents which small section of the
video channel is also used for the camera to communicate
with the hub, via 2-way communication.
Be sure to click “Save” when you have completed making
your channel selections.
Security Note:
The camera system does not communicate
using any form of WiFi, and that the video signals and
communication signals do not contain any IP addresses,
or network data. This provides an enhanced layer of security because the
system never transmits any network related data that could compromise
the security of the host network. All networking tasks, are handled
internally in the hub, and transmitted via the ethernet port, never via the
wireless network.
Adding Cameras
On MicroPower systems, individual cameras are never actually part of your computer network. Cameras are
identified to the hub by the MAC address that is assigned to the camera. This MAC address can be located on a
sticker that can be found on the exterior and the interior of the camera. Generally they will resemble the following
structure: “48:17:4C:02:xx:xx” (“xx:xx” will vary from camera to camera). Make a note of all of the camera MAC
addresses in a given system and where those cameras are installed.
1. When logged into the hub click on the “Cameras” tab, and then on “Add/Delete”, here you will see a list of
cameras that are currently added to the hub (click the “refresh” button to populate the list). The list should be
blank if you are setting up a hub for the first time. If the hub is new, and you see a camera already added, click the
Summary of Contents for SLV-C306-1011-IR
Page 11: ...11...
Page 23: ...23 Solar Bracket Mounting Configurations...
Page 24: ...MicroPower Technologies 1 877 536 0128 micropower com 24...
Page 32: ...MicroPower Technologies 1 877 536 0128 micropower com 32...
Page 33: ...33...
Page 34: ...MicroPower Technologies 1 877 536 0128 micropower com 34...