Lawn Tractor Rear Discharge
25
1. If the grass is very tall, it should be cut twice in a
WZHQW\IRXUKRXUSHULRG7KH´UVWWLPHZLWKWKHEODGHV
DWPD[LPXPKHLJKWSRVVLEO\UHGXFLQJWKHFXWWLQJZLGWK
and the second cut at the height wanted.
2. To keep your lawn nice, green and have a soft
appearance it should be cut regularly and without
GDPDJLQJWKHJUDVV
3. Cutting the grass when it is dry is always better.
4. During hot and dry periods, the grass should be cut a
OLWWOHKLJKHUWRSUHYHQWWKHJURXQGIURPGU\LQJRXW
5. The blade condition is critical to prevent yellowing of
grass. The blade needs to be in good condition and well
sharpened so that the grass is cut straight without any
ragged edges.
%HYHU\FDUHIXOZKHQPRZLQJQHDUEXVKHVRUNHUEVVLQFH
these could distort the horizontal position of the cutting
GHFNDQGGDPDJHLWVHGJHDVZHOODVWKHEODGHV
7KHHQJLQHPXVWUXQDWIXOOVSHHGERWKWRHQVXUHDVKDUS
cut of the grass and to get the necessary thrust to push
the cuttings through the collector channel.
7KHDSSHDUDQFHRIWKHODZQZLOOLPSURYHLI\RXDOWHUQDWH
the cutting in both directions.
7KHIUHTXHQF\RIPRZLQJVKRXOGEHLQUHODWLRQWRWKH
rate of growth of the grass, which should not be left to
JURZWRRPXFKEHWZHHQRQHFXWDQGWKHQH[W
,IWKHFROOHFWRUV\VWHPWHQGVWRJHWEORFNHGZLWKJUDVV
\RXVKRXOGUHGXFHWKHIRUZDUGVSHHGVLQFHWKLVPD\EH
WRRKLJKIRUWKHFRQGLWLRQRIWKHJUDVV,IWKHSUREOHP
persists, the probable causes are either badly sharpened
EODGHVRUGHIRUPHGZLQJV
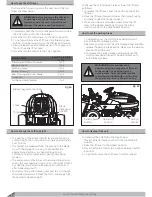
7KHORQJLWXGLQDOFXWLQFRPELQDWLRQZLWKWKHFURVVRQH
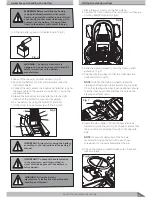
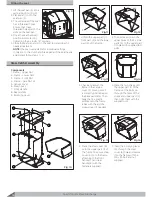
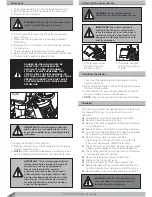
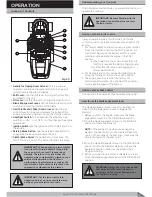
contributes to the better appearance of the lawn. (Fig 32)
,IWKHJUDVVFRQWDLQHULVJHWWLQJFORJJHGZHUHFRPPHQG
reducing the ground speed which can be too high
DFFRUGLQJWRWKHODZQFRQGLWLRQ,IWKHSUREOHPFDQQRWEH
VROYHGWKHUHDUHZURQJVKDUSHQHGEODGHVRUGHIRUPHG
SUR´OHRIWKHFXWWLQJHGJH
Keep the blade(s) sharpened. Worn blades will cause
the ends of the grass to turn yellow.
Do not cut or bag grass that is wet. Wet grass will
not discharge correctly. Let the grass dry before
cutting.
8VHWKHERWKVLGHRIWKHPRZHUKRXVLQJWRWULPQHDU
an object.
'LVFKDUJHWKHFXWJUDVVRQWRWKHPRZHGDUHD7KH
UHVXOWLVDPRUHHYHQGLVFKDUJHRIFXWJUDVV
:KHQ\RXPRZODUJHDUHDVZLWKVLGHGLVFKDUJH
PRZHUVWDUWE\WXUQLQJWRWKHULJKWVRWKDWWKHFXW
JUDVVZLOOGLVFKDUJHDZD\IURPVKUXEVIHQFHV
GULYHZD\VHWF$IWHURQHRUWZRURXQGVPRZLQWKH
RSSRVLWHGLUHFWLRQPDNLQJOHIWWXUQVXQWLO´QLVKHG
,IWKHJUDVVLVYHU\KLJKFXWWZRWLPHVWRGHFUHDVHWKH
ORDGRQWKHHQJLQH)LUVWFXWZLWKWKHPRZHUKRXVLQJ
LQWKHKLJKHVWSRVLWLRQDQGWKHQORZHUWKHPRZHU
housing for the second cut.
)RUEHWWHUHQJLQHSHUIRUPDQFHDQGDQHYHQGLVFKDUJH
of the cut grass, always operate the engine with the
throttle in FAST position.
When you use a bagger, operate the engine with the
WKURWWOHLQ)$67SRVLWLRQDQGWKHVKLIWOHYHULQ´UVWRU
second gear.
)RUEHWWHUFXWWLQJSHUIRUPDQFHDQGDTXDOLW\FXWPRZ
with the shift lever in one of the slower speeds.
$IWHUHDFKXVHFOHDQWKHERWWRPDQGWRSRIWKH
PRZHUKRXVLQJIRUEHWWHUSHUIRUPDQFH$OVRDFOHDQ
PRZHUKRXVLQJZLOOKHOSSUHYHQWD´UH
For a lawn to look better, check the cutting level of the
PRZHUKRXVLQJ
)RUWKHPRZHUKRXVLQJWRFXWOHYHOPDNHVXUHWKHW\UHV
KDYHWKHFRUUHFWDPRXQWRIDLUSUHVVXUH36,
(YHU\WLPH\RXXVHWKHXQLWFKHFNWKHEODGHV,IWKH
EODGHVDUHEHQWRUGDPDJHGLPPHGLDWHO\UHSODFHWKH
GDPDJHGEODGH&KHFNDQGPDNHVXUHWKDWWKHIDVWHQLQJ
nut which holds the blade is tight.
Mowing and Bagging Tips
Fig 32
How to obtain a good cut
How to mow slopes
Obstacles
Movement on the slope
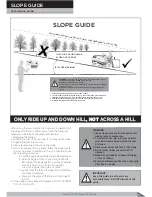
2QO\PRZLQJLQDQ\FDVHRQWKHPD[LPXPJUDGLHQWV
PD[ODZQVRQDVORSHKDYHWREHPRZHG
PRYLQJXSDQGGRZQDQGQHYHUDFURVVWKHPWDNLQJ
great care when changing direction that the highest
wheels do not hit obstacles (such as stones, branches,
URRWVHWFWKDWPD\FDXVHWKHPDFKLQHWRVOLGH
sideways, tip over or otherwise cause loss of control.
2. Be careful about any obstacles on the hillside (stone,
branch, roots etc.) that could cause to lose control
RYHUWKHPDFKLQHRULWVRYHUWXUQLQJ
:DWFKIRUKROHVUXWVRUEXPSV8QHYHQWHUUDLQFRXOG
RYHUWXUQWKHPDFKLQH7DOOJUDVVFDQKLGHREVWDFOHV
1. Be very careful when you change directions on a hill.
:KHQRQDVORSHRULQDWXUQRQDKLOOPRYHWKHWKURWWOH
control to the SLOW position to help prevent an
accident.
%HIRUH\RXULGHXSRUGRZQDKLOOPRYHWKHVKLIWOHYHU
to the slowest speed.
.HHSDOOPRYHPHQWRQWKHVORSHVVORZDQGJUDGXDO
'RQRWPDNHVXGGHQFKDQJHVLQVSHHGRUGLUHFWLRQ
8VHWKHWKJHDUDVDPD[LPXPRQO\ZKLOHZRUNLQJRQ
the slope.
7KHPDMRUIDFWRUVUHODWLQJWRORVV¨RI¨FRQWURODQGWLS¨RYHU
accidents are slopes and rough terrain. These can result
LQVHYHUHLQMXU\RUGHDWK$//VORSHVUHTXLUHH[WUDFDXWLRQ
NOTE:
If you cannot back up the slope or if you feel
uneasy on the slope, DO NOT MOW IT!
Summary of Contents for Gizmow T130
Page 12: ...KNOW YOUR PRODUCT Lawn Tractor Rear Discharge 12 Decals and Labels ...
Page 37: ...PARTS SCHEDULE Lawn Tractor Rear Discharge 37 T130 T140 T160 T180 Lawn Tractor Rear Discharge ...
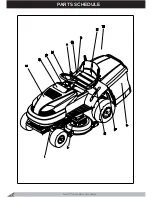
Page 38: ...PARTS SCHEDULE Lawn Tractor Rear Discharge 38 ...
Page 40: ...Lawn Tractor Rear Discharge 40 PARTS SCHEDULE T130 T160 T140 T180 LAWN TRACTOR 1A ...
Page 44: ...T130 T160 T140 T180 LAWN TRACTOR 1B PARTS SCHEDULE Lawn Tractor Rear Discharge 44 ...
Page 49: ...T130 T160 LAWN TRACTOR 1C Lawn Tractor Rear Discharge 49 PARTS SCHEDULE ...
Page 50: ...T140 T180 LAWN TRACTOR 1C PARTS SCHEDULE Lawn Tractor Rear Discharge 50 ...
Page 53: ...T130 T160 T140 T180 LAWN TRACTOR 1D Lawn Tractor Rear Discharge 53 PARTS SCHEDULE ...
Page 56: ...T130 T160 T140 T180 CUTTING DECK 2 PARTS SCHEDULE Lawn Tractor Rear Discharge 56 ...
Page 60: ...T130 T160 FRONT AXLE 7 PARTS SCHEDULE Lawn Tractor Rear Discharge 60 ...
Page 61: ...T140 T180 FRONT AXLE 7 Lawn Tractor Rear Discharge 61 PARTS SCHEDULE ...
Page 63: ...T130 T160 T140 T180 LIFTING LEVER 11 Lawn Tractor Rear Discharge 63 PARTS SCHEDULE ...
Page 65: ...T130 T160 T140 T180 HUB 14 Lawn Tractor Rear Discharge 65 PARTS SCHEDULE ...
Page 67: ...T130 T160 T140 T180 REAR AXLE 15A Lawn Tractor Rear Discharge 67 PARTS SCHEDULE ...
Page 69: ...T130 T160 T140 T180 REAR AXLE 15B Lawn Tractor Rear Discharge 69 PARTS SCHEDULE ...
Page 73: ...T130 T160 T140 T180 HOOD 24 Lawn Tractor Rear Discharge 73 PARTS SCHEDULE ...
Page 75: ...T130 T160 T140 T180 PANEL 25 Lawn Tractor Rear Discharge 75 PARTS SCHEDULE ...
Page 77: ...T130 T160 T140 T180 ELECTRICAL SYSTEM 27 Lawn Tractor Rear Discharge 77 PARTS SCHEDULE ...
Page 78: ...T130 T160 T140 T180 ELECTRICAL SYSTEM 27a PARTS SCHEDULE Lawn Tractor Rear Discharge 78 ...
Page 80: ...T130 T160 T140 T180 SEAT 32 PARTS SCHEDULE Lawn Tractor Rear Discharge 80 ...
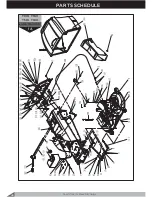
Page 82: ...T130 T160 T140 T180 BUNKER 34 PARTS SCHEDULE Lawn Tractor Rear Discharge 82 ...
Page 84: ...T130 T160 T140 T180 GEAR SHIFTING 35 PARTS SCHEDULE Lawn Tractor Rear Discharge 84 ...
Page 86: ...T130 T160 T140 T180 SEGMENT 36 PARTS SCHEDULE Lawn Tractor Rear Discharge 86 ...
Page 88: ...T130 T160 T140 T180 PLATE 37 PARTS SCHEDULE Lawn Tractor Rear Discharge 88 ...
Page 90: ...T130 T160 T140 T180 DECALS 38 PARTS SCHEDULE Lawn Tractor Rear Discharge 90 ...

