


Revision 21_Sep_2015
48
User Guide Version 2.60 I-button WHO 5th
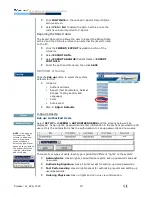
APPENDIX 16: Printer Ribbon/Paper Installation
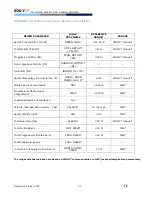
APPENDIX 17: Warranty
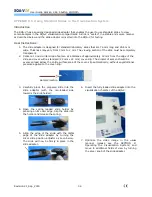
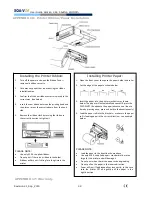
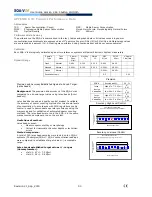
Installing the Printer Ribbon:
1.
Turn off the power and open the Ribbon Cover –
remove old ribbon cassette
2.
Cut away any paper that is obstructing the ribbon
installation area
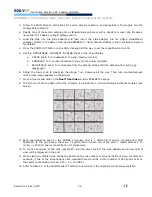
3.
Confirm that the new ribbon cassette is placed in the
correct way (see below)
4.
Insert the new ribbon between the printing head and
the platen – press the cassette down from the knob
side
5.
Remove the ribbon slack by turning the ribbon in
the correct direction to tighten it
PLEASE NOTE:
Use only M.E.S. supplied ribbons
Do not print if there is no ribbon in the holder
Ribbons will dry out if sitting for a long time in the
printer
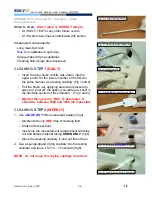
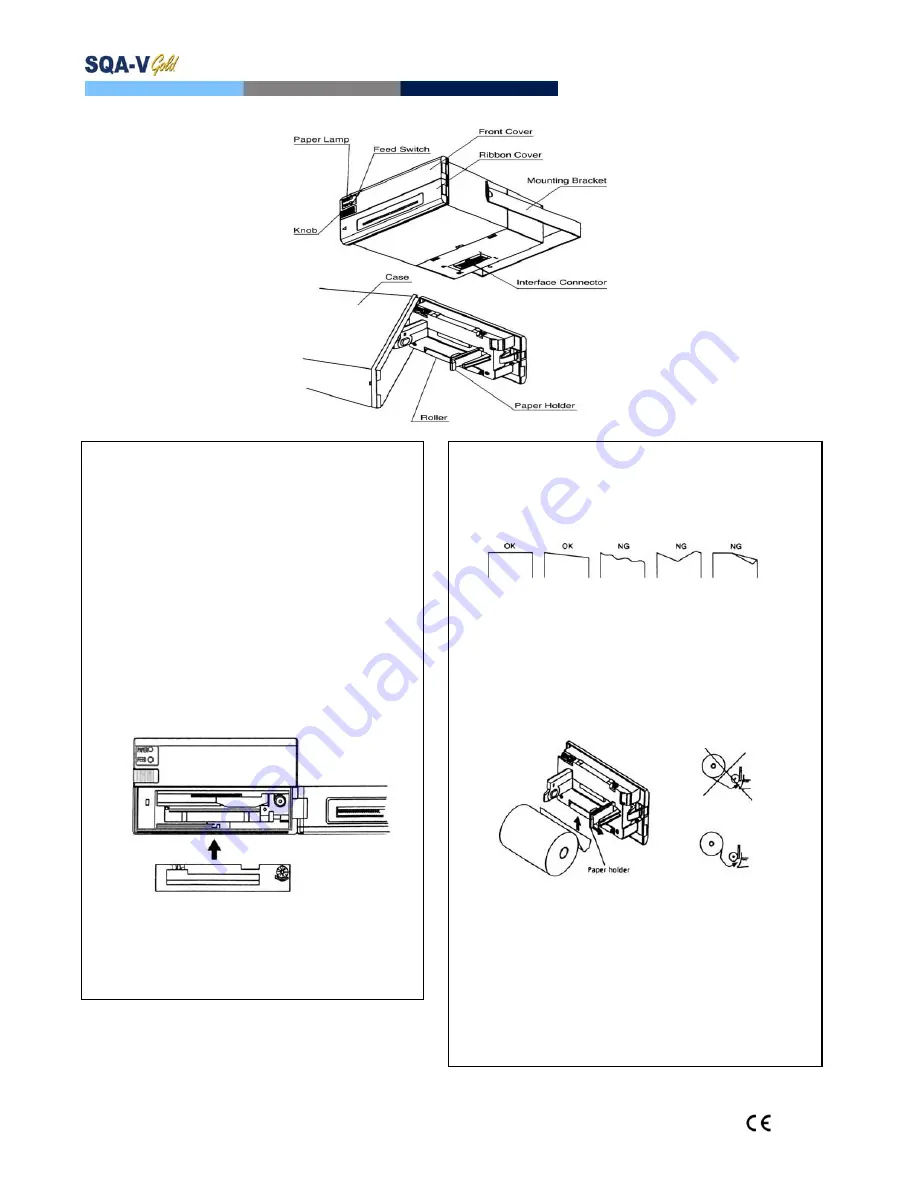
Installing Printer Paper:
1.
Open the front cover to expose the paper holder and roller
2.
Cut the edge of the paper as shown below
3.
Insert the paper into the printer mechanism as shown
below. The paper will automatically advance OR press the
FEED SWITCH to advance the paper (advance one line at a
time by pressing once; press and hold to feed continuously)
4.
Load the paper roll into the brackets – make sure the paper
roll is feeding paper in the correct direction – see example
below.
PLEASE NOTE:
Load the paper in the direction shown above
Use only M.E.S. supplied paper – standard rolls are too
large for this printer and will damage it
Do not print when there is no paper or during loading
Do not pull on the paper in the reverse direction
Paper will jam if fed diagonally or incorrectly, in this case
turn the printer OFF and gently pull the paper in the
right direction


