


TeraPac User Operation and Maintenance Guide
17
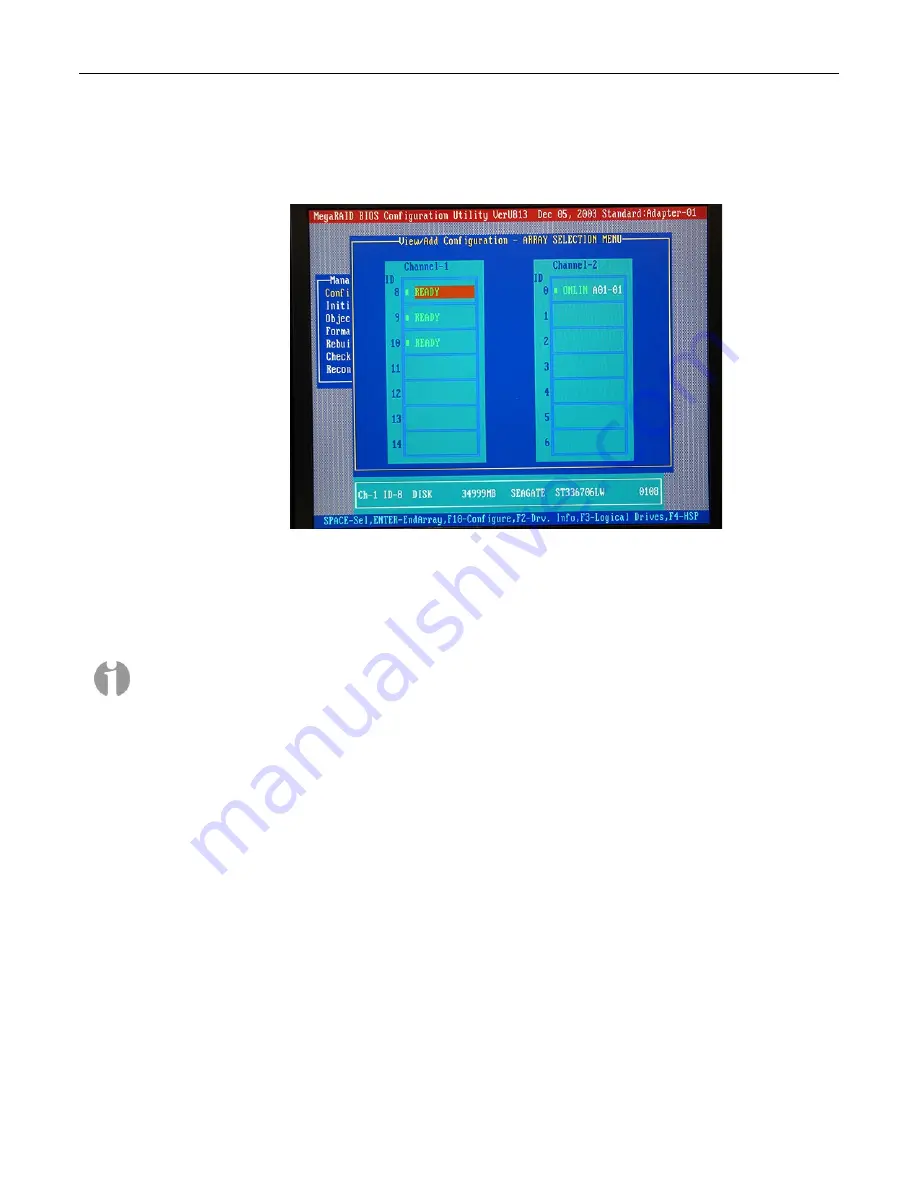
11) Observe that the status bar at the bottom of the screen indicates that the system is being
scanned for drives. When the scan has been performed, the results are displayed as shown in
Figure 4-5.
Figure 4-5
12) In this particular example configuration, the MegaRAID controller has detected the operating
system disc on Channel 2 on the right-hand side of the screen (the status of this disk is shown
as being
Online
). The controller has also found the three disks in our TeraPac on Channel 1 on
the left-hand side of the screen (the status of these disks is shown as being
Ready
).
Note:
Any disks in the main MaxPac system are assigned numbers from 0 through 7. By
comparison, the disks in the TeraPac are always numbered starting at 8. The minimum number of
disks in a TeraPac are three (because this is the smallest number that can support RAID 5), in
which case these would be numbered 8, 9, and 10. The maximum number of drives is eight, which
will be numbered from 8 to 15.
However, the display above shows only drives 0 through 6 on the right-hand side and drives 8
through 14 on the left-hand side. In the case of TeraPac units that do have a full complement of
eight disks, the “hidden” drive (number 15) can be seen by using the
Up/Down
arrow keys to scroll
through the drives to the bottom of the list, at which point the list will scroll up to reveal the hidden
drive.
13) Use the
Up/Down
arrow keys to highlight the first drive (drive 8 shown Red in Figure 4-5
above), then press the
<Space>
key to select this drive. Observe that the status of this drive is
changed to Online, it starts flashing.
14) Use the
Up/Down
arrow keys to highlight the next drive (drive 9 shown Red in Figure 4-6
below).


