15
3 Maintenance
Replacing a Disk
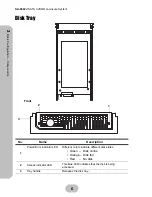
A disk failure is indicated when the LED at the front of the drive tray turns red .
Disks are hot swappable, which means that they can be inserted and removed while the
disk array system is powered on and operating.
Follow these instructions to replace a failed disk.
1
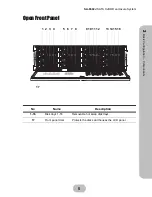
Unlock the front panel door, then pull it open.
2
Pull the tray handle away from the disk tray to release it; and pull the disk tray
out.
3
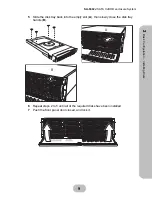
Remove the screws from the failed disk, then remove the disk from the disk tray.
4
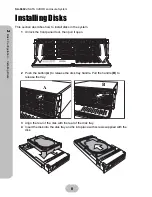
Align the rear of the new disk with the rear of the disk tray.
5
Insert the new disk into the disk tray.
6
Attach the disk to the disk tray with the screws that came with the disk.
7
Slide the disk tray back into the empty slot, then close the disk tray handle.
8
Push the front panel door closed, and lock it. (Reference Page 8 Installing Disks)
Note
The new disk must have the same or a greater capacity than the
faulty disk that was removed. If the disk capacity is smaller, the
audible alert sounds and the auto-rebuild operation doesn’t start.
For best performance, it is recommended that the new disk be
identical to the failed disk.
Summary of Contents for JanusRAID SA-6692J
Page 1: ...JanusRAID SA 6692J Hardware User Manual 42 30000 5067 SATA II JBOD enclosure Version 1 1...
Page 2: ......
Page 3: ...SA 6692J SATA II JBOD enclosure Hardware User Manual...
Page 4: ......
Page 6: ......
Page 12: ......
Page 28: ......
Page 30: ......

