


6
www.ls-electronic.de
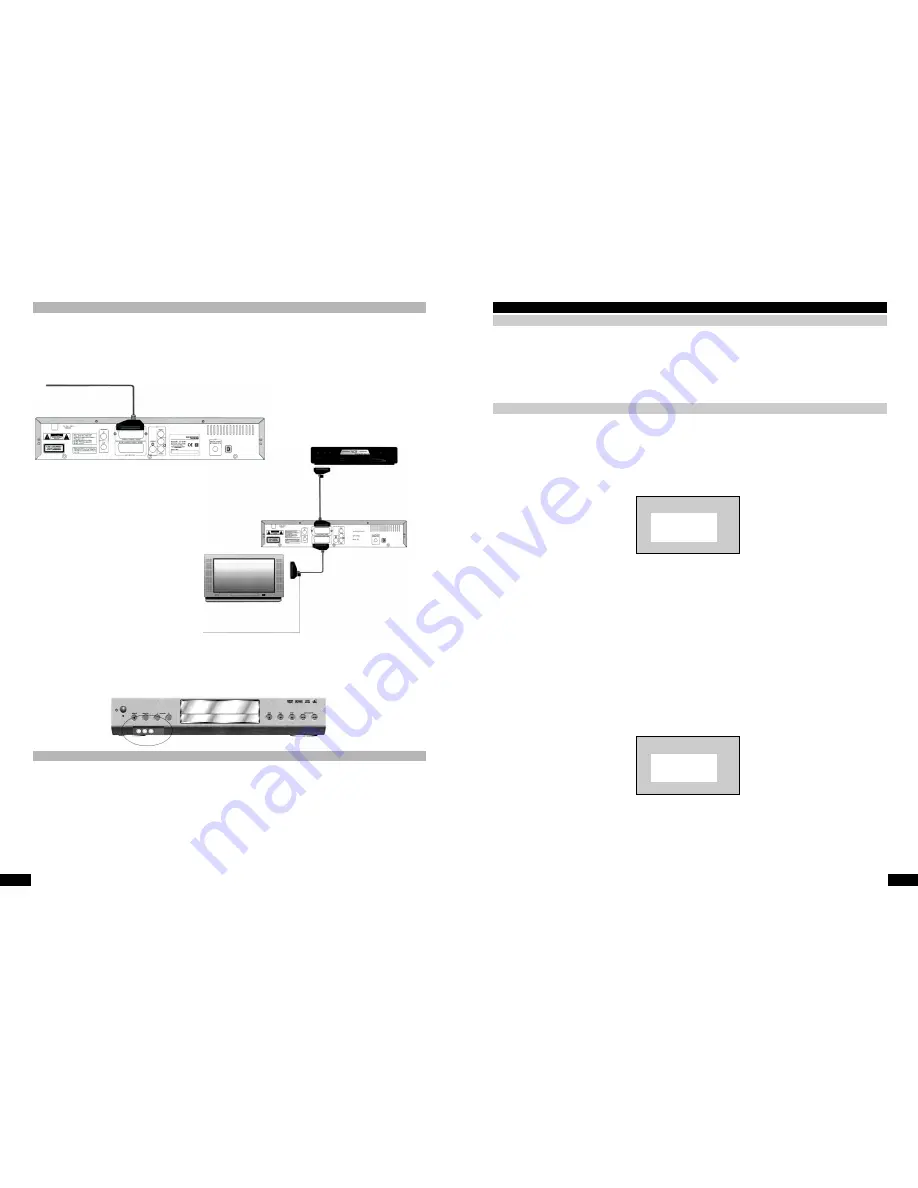
To the SCART socket Ext. 2
You can connect a video recorder, satellite receiver or a DVD player to the second SCART socket of the DVD Recorder.
You will then be able to record from these devices or simply make these devices start playing if you select the corresponding
channel on the DVD Recorder (here EXT 2) by pressing the c / - buttons (5). If you then press the monitor button (24),
the video signal will be sent from EXT 2 to EXT 1 and you will see the picture from the peripheral device displayed on your
television.
To the front video/audio RCA inputs
The front RCA inputs are well suited for connecting such devices as a video camera.
Use a suitable cable to connect your camera to the Cam1 connection (4) of the DVD Recorder. Use the c/- buttons to
select the appropriate channel (in this case CAM 1). If you have connected a television set to EXT 1, press the monitor button
so that the picture from the camera is displayed on the television.
Connecting peripheral devices
Analog receiver with Dolby Pro Logic decoder or a normal stereo sound system
Use an RCA cable to connect your stereo sound system to the analog audio output (17) (red and white jacks).
If you are operating the DVD Recorder with just a stereo sound system, set the analog output to stereo in the audio settings section
of the system menu.
If you have connected the DVD Recorder to a Dolby Surround system, set the analog output to the surround setting.
Dolby Digital system, AV receiver, digital 2-channel amplifier
To enjoy digital 5.1 sound, connect your Dolby Digital system to the digital output of the DVD Recorder.
Use a single RCA cable to connect the coaxial digital output (18) of the DVD Recorder to the coaxial digital input of your system.
Configure your system to use the coaxial digital input.
Connecting audio devices
SCART connection from Ext 2
to DVD, SAT,
video recorder peripheral devices
VCR, SAT, DVD player peripheral devices
SCART connection (Ext 1 DVD Recorder)
with SCART input of the TV
Signal can be sent from the
peripheral devices to the television
7
www.ls-electronic.de
Getting ready for use
Remote control
Open the battery compartment on the reverse side of the remote control by gently pressing down on the marked spot on the
battery compartment cover and then sliding the cover open in the direction of the arrow.
Insert two UM4 type-AAA batteries and make sure that the polarity is correct as indicated inside the battery compartment.
Connect the device to a 230V/50 Hz supply socket using the permanently attached mains power cable.
Switch on the device using the Power button (1). Switch channels on your television set so that it uses the input of the DVD
Recorder.
Installing for the first time
A menu will appear on the television screen when you switch on the Recorder for the first time. You can set the main system
settings here.
Follow the instructions provided on-screen.
Select the appropriate items using the navigation buttons
56
(20) and then confirm your choice with OK (23).
•
In the first menu, set the language for the on-screen menu of the DVD Recorder. Use the navigation buttons
56
(20)
to make your selection and then confirm your choice with the OK button (23).
NOTE
WHAT IS AN ON-SCREEN MENU
The on-screen menu (OSD) simplifies operation of the DVD Recorder. All the settings that you can change are
provided in your language on your television screen.
•
Now set the audio language (dubbing language). Confirm your selection with OK.
NOTE
WHAT IS AN AUDIO LANGUAGE
Generally, DVDs include various languages. So here you can set the default language in which you want the
DVD
to start playing.
•
Set the subtitles that you want. Confirm with OK.
Note
WHAT ARE SUBTITLES
Generally, DVDs offer various languages as subtitles. This is where you can choose the default language setting
for subtitles that you might want to have displayed.
•
You can set the TV display mode here. Confirm with OK.
NOTE
TV DISPLAY MODE
If you have a 16:9 television, select the 16:9 setting.
If you have a normal 4:3 television, then select:
•
4:3 letter box, i.e. in the case of 16:9 programmes, the picture is displayed in 16:9 and you see black
bars at the top and bottom edges of the screen.
•
4:3 Pan Scan, i.e. 16:9 programmes are increased to full-screen size, though in doing so the left and
right edges of the picture are cut off. Not supported by all DVDs.
Menu language
English
Espanol
Francais
Portuges
Italiano
Press OK to continie
TV shape
4:3 letter box
4:3 panscan
16:9
Press OK to continue


