7
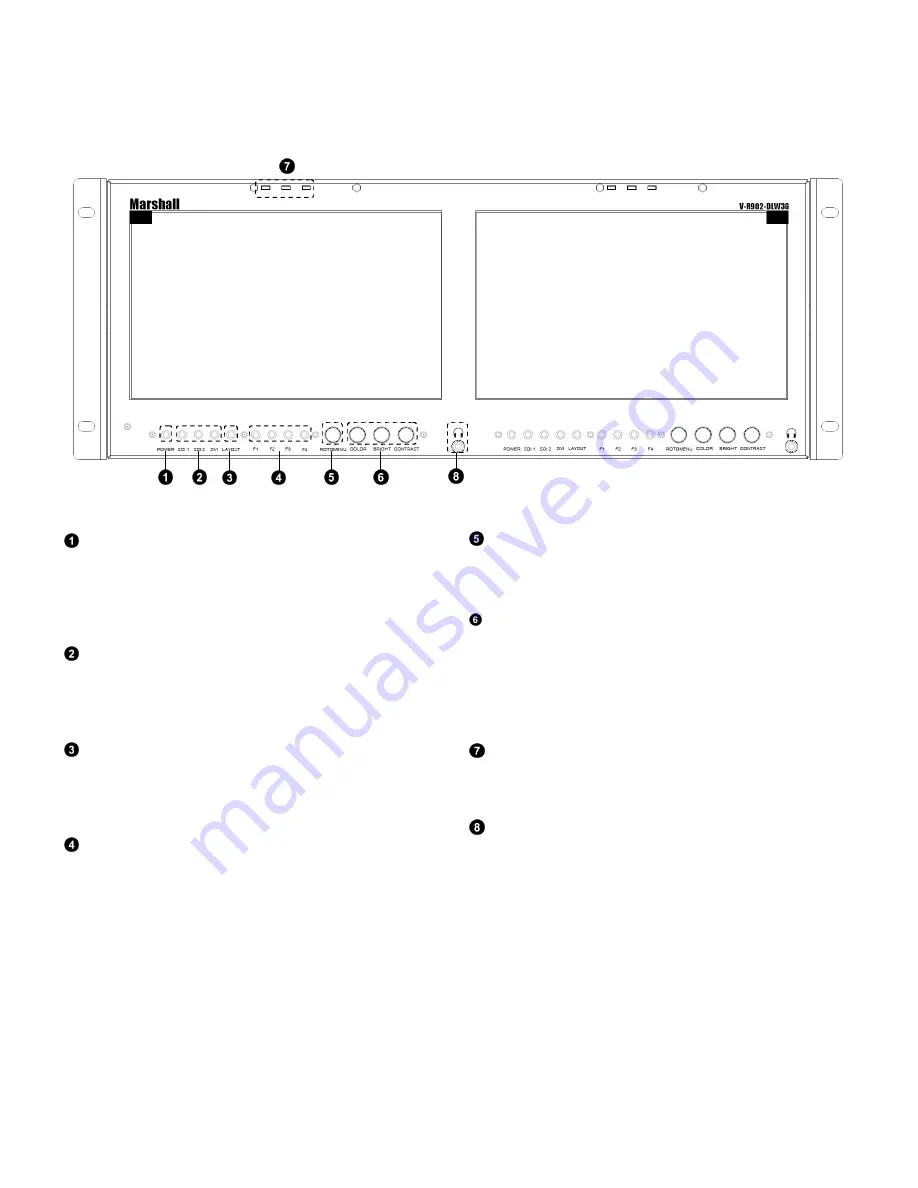
Top and Front Panel Features
Power Button
Use the power button to toggle between ON and STANDBY
modes. The LED on the POWER button will illuminate fully
when the unit is in STANDBY mode. The LED will dim when
the unit is ON.
Input Select Buttons (SDI 1, SDI 2, DVI)
Use the SDI 1, SDI2 and DVI buttons to select the
corresponding video input. Accepted video standards are
automatically detected.
Layout Button
Use the Layout button to switch between the four available
layouts on the monitor. See the Layouts section for more
information the available layouts.
User-Definable Function Buttons
Four user-definable function buttons can be used for direct
access to various settings. Functions are assigned using the on-
screen menu.
RotoMenu
™
Knob
The RotoMenu
™
knob allows for accessing and navigating the
main menu using only a single knob.
Image Adjustment Knobs
Use the image adjustment knobs to adjust color brightness,
color-saturation, tint, and contrast of the image. The status of
each image adjustment parameter is shown on the bottom left
of the screen, with values ranging from 0 to 100. Default value
is 50.
LED Tally
Three LED tally lights (yellow, red, green) are available above
the screen.
Headphone Output
The 1/8” jack on the monitor takes two channels of embedded
SDI audio and provides a Headphone audio signal. Volume can
be adjusted via the RotoMenu knob or in the Audio
Configuration submenu.
Summary of Contents for V-R902DLW
Page 2: ...2 Page intentionally left blank...
Page 4: ...4 Page intentionally left blank...
Page 6: ...6 Page intentionally left blank...
Page 30: ...30 Page intentionally left blank...
Page 32: ...32 Dimensions...
Page 33: ...33 Page intentionally left blank...


