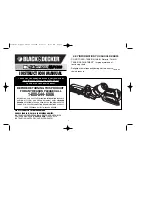
background image

 6

8

[6] DISASSEMBLY/ ASSEMBLY OF ARMATURE SECTION

R

epair

Fig. 21

Fig. 20L

Fig. 20R

Wrong

Correct

Fig. 22

Fig. 23

Ball bearing 6003LLB

O ring 16

Ring 17

Water pump pliers with which
the legs of 1R269 are clamped.

Note: O ring 16 has to be replaced with new one
          whenever Ball bearing 6003LLB is removed.

Note: Be careful not to scratch 
           its surface where Oil seal 22
           contacts.

Note: It is not necessary to remove Bearing box from Gear housing complete when replacing Armature.

1)  Separate Base from Motor section.   (Figs 2 to 5)
2) After Removing Depth guide from Motor housing complete, remove Carbon brush.
3) Separate Gear housing complete from Motor housing complete after removing M5x35 Pan head screws (4pcs.).
    (Figs. 9, 12, 14 and 15)
4) Remove Armature section upward from Gear housing complete while holding Gear housing complete with Armature 
    section positioned in Fig. 20L
    Note: Do not remove Armature section downward and horizontally from Gear housing complete (Fig. 20R).
              Because Gear oil remaining inside is drained out from Gear housing complete.
5) Remove Retaining ring S-17 using 1R291.   (Fig. 21)
6) Remove Ball bearing 6003LLB, O ring 16 and Ring 17 using 1R269 and water pump pliers.   (Fig. 22)
7) Bearing retainer can be removed from Armature.   (Fig. 23)

Gear oil

M5x18 Pan head screw 

M5x18 Pan head screw

Retaining ring S-17

1R291

1R269

Bearing retainer

DISASSEMBLING

Summary of Contents for 5477NB

Page 1: ...e may differ by country P 1 8 5477NB Hypoid Saw 185mm 7 1 4 Model 5477NB has been developed as the cost competitive successor tool of the current 5277NB No load speed rpm min 1 Saw blade mm Max cuttin...

Page 2: ...ase Removing Ball bearings Disassembling Assembling Retaining rings Disassembling Assembling Bearing retainers Put Lubricant oil VG220 or the following API American Petroleum Institute GL 4 vehicle ge...

Page 3: ...plate Bow stop ring E 12 Wrong The curved shape faces inside Curved Curved Outside Inside to Motor section Correct 3 DISASSEMBLY ASSEMBLY OF BASE cont DISASSEMBLING ASSEMBLING angular guide of Base M...

Page 4: ...Pan head screws 3pcs Fig 10 6 Put Gear housing complete onto the vessel for collecting lubricant oil with its Bearing assembly side down Hypoid gear 36 Flat washer 12 and Lubricant oil are fallen down...

Page 5: ...17 1 Clean the Gear room thoroughly before assembling the Gear section 2 Press fit Ball bearing 6003LLB into Gear housing complete and tighten Bearing retainer 23 36 with 1R316 by turning it clockwis...

Page 6: ...remove Carbon brush 3 Separate Gear housing complete from Motor housing complete after removing M5x35 Pan head screws 4pcs Figs 9 12 14 and 15 4 Remove Armature section upward from Gear housing comple...

Page 7: ...ETE 0 5mm deeper than the rim Rim Armature s Ball bearing 6003LLB is accepted by this rim Gear housing complete When assembling Oil seal 22 to Gear housing complete press fit it for 0 5mm deeper than...

Page 8: ...30 degrees as illustrated in Fig 28 Fig 28 70 degrees 40 degrees 30 degrees Lever plate Base Lever plate 11 ADJUSTMENT IN POSITION OF LEVER PLATE FOR ANGULAR GUIDE 10 ADJUSTMENT IN POSITION OF LEVER P...

Reviews: