Operation Manual touchTymp MI 26 and MI 36 Version
8511780 Rev. 4
46
30/06/2021
Figure 62
Figure 63
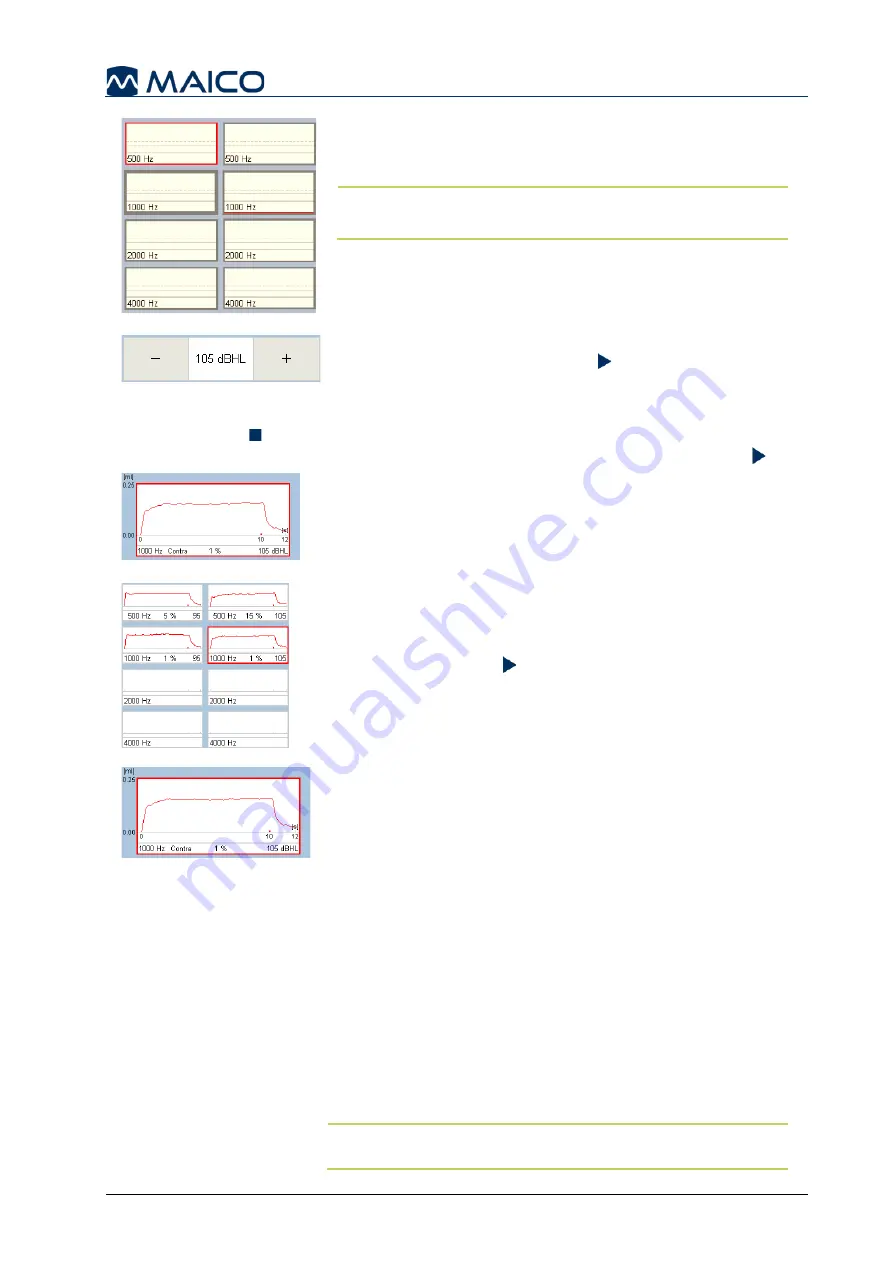
Select the stimulus by pressing the small box on the
right. A red or blue line will outline the selected box
based on which ear is selected (Figure 62).
NOTE:
1000 Hz is the default frequency when entering
the
Reflex Decay
test screen.
Press the
-
and
+
to change the presentation level of the
stimulus selected. When
a
+/-
is greyed out, the device
has reached the minimum or maximum level for the
stimulus and transducer selected (Figure 63).
Manual presentation is required within
Reflex Decay
measurements. Press the
Play
button or the
Probe
button to start the measurement.
When performing
Reflex Decay
testing it is possible to interrupt the measurement by
pressing the
Stop
icon, the
Probe
button or removing the probe from the ear (no seal
state). To restart the measurement insert the probe into the ear again and press
Play
.
Figure 64
Figure 65
The measurement values of the
Reflex Decay
test result
are displayed in the large window while the test is
performing and immediately duplicated in the small
window upon the completion of the test (Figure 64). To
continue on testing:
1. Select the next stimulus.
2. Confirm or set the level.
3. Press the Play button.
When testing is complete, previous measurements can be
displayed in the large window by selecting the small
stimulus box on the right side of the screen (Figure 65).
Figure 66
The measurement values are displayed simultaneously to
the ongoing test. Measured results are shown following
the measurement (Figure 66):
Y-Axis:
Displays the compliance scale to display the
deflection of the reflex (i.e. 0.00 ml - 0.25 ml). The
y-axis is static.
X-Axis:
Displays the time. This includes the time the
stimulus is active (i.e. 10 s), which is configured in the
settings, and the time of the active window (i.e. 12 s).
Status Bar:
The bottom block of the display provides
test information that includes:
o
Stimulus
: 1000 Hz Contra
o
Decay result
: 1 %
o
Intensity
: 105 dB HL
The small
red
/
blue
dash/tick moves along the 0.00 ml
line which corresponds to the stimulus presentation.
NOTE:
The direction of deflection can be modified in the in the
Settings
menu. See section 5.6.9.
Summary of Contents for touchTymp MI 26
Page 1: ...Operation Manual touchTymp MI 26 and MI 36 Version...
Page 2: ......


