background image

Owner’s Manual

Read your Owner’s Manual first for 

quick tips that make using your 

Magnavox product more enjoyable.

If you have read assistance, 

you may access our online help at 

www.magnavox.com/support

or call

1-866-341-3738

while with your product

(and Model / Serial number)

Lea primero el Manual del Propietario,

en donde encontrará consejos que

le ayudarán a disfrutar plenamente

de su producto Magnavox.

Si después de leerlo aún necesita ayuda,

consulte nuestro servicio de

asistencia en línea en 

www.magnavox.com/support

o llame al teléfono

1-866-341-3738

y tenga a mano el producto

(y número de model / serial)

© 2015 Funai Electric Co., Ltd. 
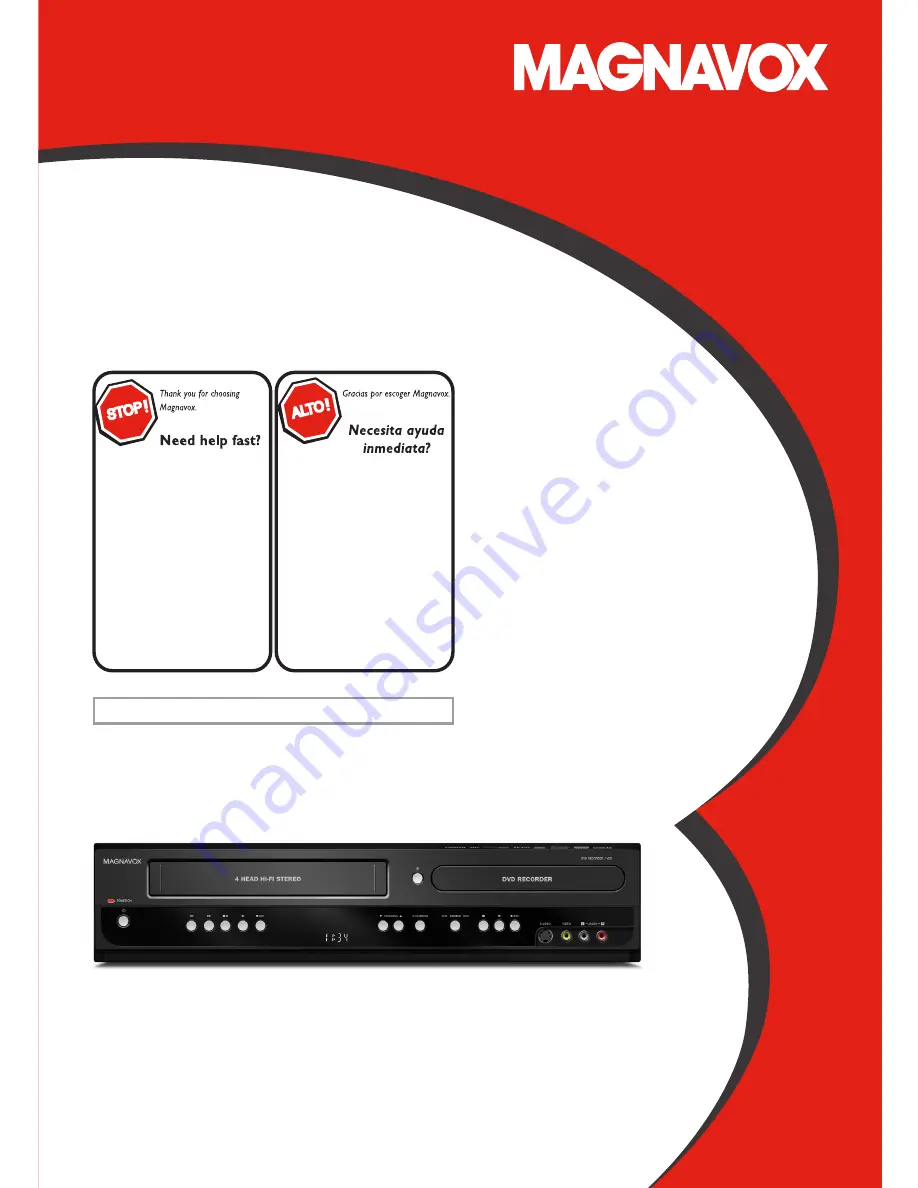
MDR161V

DVD Recorder/
 VCR with Line-in Recording (NO TUNER)

INSTRUCCIONES EN ESPAÑOL INCLUIDAS.

Summary of Contents for MDR161V

Page 1: ...ial number Lea primero el Manual del Propietario en donde encontrará consejos que le ayudarán a disfrutar plenamente de su producto Magnavox Si después de leerlo aún necesita ayuda consulte nuestro servicio de asistencia en línea en www magnavox com support o llame al teléfono 1 866 341 3738 y tenga a mano el producto y número de model serial 2015 Funai Electric Co Ltd MDR161V DVD Recorder VCR wit...

Page 2: ... CAUTION RISK OF ELECTRIC SHOCK DO NOT OPEN The exclamation point within an equilateral triangle is intended to alert the user to the presence of important operating and maintenance servicing instructions in the literature accompanying the appliance The lightning flash with arrowhead symbol within an equilateral triangle is intended to alert the user to the presence of uninsulated dangerous voltag...

Page 3: ...lds or in a place subject to dust or strong vibration Avoid a place with drastic temperature changes Install the unit in a horizontal and stable position Do not place anything directly on top or bottom of the unit Depending on your external devices noise or disturbance of the picture and or sound may be generated if the unit is placed too close to them In this case please ensure enough space betwe...

Page 4: ...ng 25 Auto Chapter Setting 25 Recording Audio Select XP 25 Setting Aspect Ratio for Video Mode Recording 26 Basic Recording One touch Timer Recording 26 Timer Recording 27 Hints for Timer Recording 30 Satellite Link 31 Settings for an External Device 32 Connection to an External Device 32 Setting the Video Input 32 Recording from an External Device 33 Bi directional Dubbing 33 Protecting a Disc 34...

Page 5: ...e Title Protection 53 Function Setup List of Settings 54 Setups 56 Playback 56 Display 58 Video 58 HDMI 59 Reset All 60 VCR Functions VCR Functions 60 Playback 60 Recording 61 One touch Timer Recording OTR 61 Index Search 62 Time Search 62 Other Operations 63 Others Troubleshooting 64 Language Code 68 Glossary 69 Specifications 70 Español Español 71 Discos Reproducibles 71 Códigos de Región 71 Dis...

Page 6: ...ecords Cleaning the disc lens If this unit still does not perform properly although you refer to the relevant sections and to Troubleshooting in this owner s manual the laser optical pickup unit may be dirty Consult your dealer or an Authorized Service Center for inspection and cleaning of the laser optical pickup unit Disc handling Handle the discs so that fingerprints and dust do not adhere to t...

Page 7: ...e and the HDMI Logo are trademarks or registered trademarks of HDMI Licensing LLC in the United States and other countries is a trademark of DVD Format Logo Licensing Corporation 2015 Funai Electric Co Ltd All rights reserved No part of this manual may be reproduced copied transmitted disseminated transcribed downloaded or stored in any storage medium in any form or for any purpose without the exp...

Page 8: ...t the end of the disc space if you set this in the main menu Playback Theater surround sound in your home When connecting the unit to an amplifier or a decoder which is compatible with Dolby Digital you can experience the theater surround sound from discs with surround sound system Quick search for what you would like to watch You can easily find the part you would like to watch using the search f...

Page 9: ... on this unit Symbol Description For Recording Playing and Editing Description refers to DVD RW VR mode Description refers to DVD RW Video mode Description refers to DVD R Video mode For Recording and Playing Description refers to VHS tapes Use only cassettes marked VHS For Playback only Description refers to DVD video Description refers to audio CD Description refers to CD RW R and DVD RW R with ...

Page 10: ...the VCR output mode is selected 13 D DUBBING button DVD VCR Press to start VCR to DVD DVD to VCR duplication which you set in the main menu 14 TRACKING L K buttons VCR Press to adjust the tracking during cassette tape playback or slow motion While playback is in still mode you can adjust the picture to remove vertical blur 15 Display DVD VCR Refer to Front Panel Display p 14 16 Infrared sensor win...

Page 11: ...ernal device with an RCA audio cable 7 S VIDEO IN jack L1 Use to connect the S video output of an external device with an S video cable 8 COMPONENT VIDEO OUT jacks Use to connect the component video inputs of a TV monitor with a component video cable 9 S VIDEO OUT jack Use to connect the S video input of a TV monitor AV receiver or other device with an S video cable 10 COAXIAL DIGITAL AUDIO OUT ja...

Page 12: ...red sensor window of the unit Remote controls for different devices can interfere with each other Avoid using remote controls for other devices located close to the unit Replace the batteries when you notice a fall off in the operating range of the remote control The maximum operable ranges from the unit are as follows Line of sight approx 23 feet 7m Either side of the center approx 16 feet 5m wit...

Page 13: ...ER button DVD VCR Press to display the timer programming list 21 TITLE button DVD Press to display the title list During DVD playback press and hold for more than 3 seconds to switch the progressive scanning mode to the interlace mode 22 CursorK L 0 1buttons DVD VCR Press to select items or settings 23 RETURN button DVD VCR Press to return to the previously displayed menu screen 24 DVD button Pres...

Page 14: ...ars when the timer recording is proceeding for VCR Appears when VCR is in timer recording standby mode Flashes when a program cannot be performed for some reason DVD Appears when this unit is in DVD output mode Appears when the timer recording is proceeding for DVD Appears when DVD is in timer recording standby mode Flashes when a program cannot be performed for some reason DB Appears during VCR t...

Page 15: ...cable Note s Required cables and connecting methods differ depending on the external tuner For more information please contact your external tuner provider With this setup You can record any unscrambled channel by selecting the channel on the external tuner When using the external tuner connect the unscrambled cable signal to the external tuner and then send the output cable signal from the unit t...

Page 16: ...at comprises data encryption and authentication of the connected AV device This unit supports HDCP Please read the operating instructions of your display device or AV amplifier for more information Notes for HDMI Connection Because HDMI is an evolving technology it is possible that some devices with an HDMI input may not operate properly with this unit When using an HDCP incompatible display devic...

Page 17: ...e Supplied cables used in this connection are as follows RCA audio cable L R x 1 Please purchase the rest of the necessary cables at your local store Connecting to a TV with Audio Video Input Jacks AUDIO IN L R VIDEO IN L R IN AUDIO OUT IN VIDEO OUT Rear of this unit RCA audio cable RCA video cable Supplied cables used in this connection are as follows RCA audio cable L R x 1 RCA video cable x 1 ...

Page 18: ...r of this unit RCA audio cable RCA audio cable RCA video cable RCA video cable RF modulator VHF UHF antenna cableTV company or Set channel 3 or 4 Set channel 3 or 4 RF coaxial cable RF coaxial cable RF coaxial cable ANT IN ANT OUT external tuner Supplied cables used in this connection are as follows RCA audio cable L R x 1 RCA video cable x 1 Please purchase the rest of the necessary cables at you...

Page 19: ...PCM 2channel PCM Stream Actual Output Cables not included Please purchase the rest of the necessary cables at your local store Note s The audio source on a disc in a Dolby Digital multi channel surround format cannot be recorded as digital sound by an MD or DAT deck By connecting this unit to a Dolby Digital decoder you can enjoy high quality Dolby Digital multi channel surround sound similar to m...

Page 20: ... above are successful 1 After you have made all the necessary connections press y to turn On the unit 2 Turn On your TV If connected to your VCR make sure it is switched Off or to standby mode before proceeding 3 Press on the TV s remote control then press channel down button repeatedly until the Initial Setup menu is displayed Initial Setup Select the language for Setup display OSD Language Engli...

Page 21: ...ected external input channel 4 Indicates the recording mode and possible recording time left 5 Indicates the operation status 6 Each icon means Search Audio Subtitle Angle Repeat Marker Noise Reduction Zoom 7 Indicates the current title number total number of titles the current chapter number total number of chapters and time lapse of the current title playback total duration of the title VCR Info...

Page 22: ... Screen Display OSD screen 3 Video To configure the video setting 4 Recording To configure the unit for disc recording 5 Clock To set the clock on the unit 6 HDMI To configure the HDMI connection setting 7 Reset All To reset the unit to the factory default settings DVD Menu DISC Playback Mode DVD Menu DVD RW DVD Menu Format Finalize Disc Protect OFF ON Delete All Playlists 2 3 4 1 2 3 4 4 DISC Pla...

Page 23: ...e If you switch component during playback the playback will stop How to Insert a Disc Cassette Tape How to Insert a Disc 1 Press DVD 2 Press A to open the disc tray 3 Place a disc on the disc tray with its label side facing up Align the disc to the disc tray guide 4 Press A to close the disc tray It may take a while to load the disc To eject the disc Press A to open the disc tray then remove the d...

Page 24: ...The built in calendar can be set for any year in the range of 2014 up to 2064 Recording Information on DVD Recording Before you make a recording read the following information Recordable Discs This unit can record to DVD RW and DVD R DVD R can be recorded only once whereas DVD RW can be recorded and erased multiple times Logos Attributes 8cm 12cm single sided single layer disc Approx max recording...

Page 25: ...PRM compatible DVD RW formatted in VR mode and CPRM recordings are only playable on DVD players that are specifically compatible with CPRM Making discs playable on other DVD players Finalization For DVD RW R it is necessary to finalize the disc after recording in order to make them playable on other DVD players Refer to pages 35 When a video mode disc is finalized the title menu will be created Th...

Page 26: ...ded with the aspect ratio of the program being broadcast regardless of the Aspect Ratio Video mode setting Basic Recording One touch Timer Recording Follow the steps to record TV programs from an external tuner This unit is not equipped with a tuner it cannot receive TV broadcasts without an external tuner or such devices 1 Press DVD then insert a recordable disc For recordable discs refer to Reco...

Page 27: ... standby mode to use the unit continuously Timer Recording You can program the unit to record up to 12 programs within a month in advance Daily or weekly program recordings are also available Before recording make sure Set the clock before setting a timer programming Insert a recordable disc with enough recordable space or a cassette tape with an erase protection tab Note s If you have not yet set...

Page 28: ... 00AM SP Auto recording mode select DVD only When Auto is selected as a recording mode the unit calculates how much time is available on the disc and selects the best recording mode available automatically to complete recording the program Date APR 17 REC To Mode DVD Auto 1 00 Start End L1 L2 L1 1 00AM 12 00AM Auto Auto is only available for one program in the timer program list The recording may ...

Page 29: ...it 6 Press TIMER SET to return to the timer standby mode Note s Press TIMER to check the timer recording in progress While the timer recording is proceeding that program will be highlighted in red In this case you cannot select any other program If the timer program did not complete correctly an error number appears in the timer programming list Timer Programming 1 1 FRI APR 17 11 00PM Date Start ...

Page 30: ...earlier and the ending time is later than the current time the recording will start right after you press TIMER SET in step 9 on page 28 The timer recording cannot be performed for DVD and VCR at the same time If you set 2 programmings with the same channel and time in both devices the program which is set first will have priority Press TIMER SET for timer recording will appear on the TV screen 5 ...

Page 31: ...ls 8 Press OK To Standby Mode will be highlighted 9 Press OK again Satellite Link To Standby Mode 5 00PM DVD SP Start Mode DVD VCR The unit will then turn Off automatically as it goes into satellite link standby mode To cancel the satellite link function while in satellite link standby mode Press TIMER SET to turn On the unit To cancel the satellite link function while the satellite link recording...

Page 32: ...CA audio cable to L2 IN or or L1 S video cable RCA video cable RCA audio cable or L2 Supplied cables used in this connection are as follows RCA audio cable L R x 1 RCA video cable x 1 Please purchase the rest of the necessary cables at your local store 1 Press SETUP then use K L to select General Setting then press OK General Setting menu will appear 2 Use K L to select Video then press OK The sub...

Page 33: ...le to complete 4 6 For VCR For DVD 4 6 Bi directional Dubbing You can copy the contents of a DVD to a cassette tape or do vice versa This function is only available when the contents are not copy protected Before you start refer to page 24 for the list of compatible discs Notes for dubbing The dubbing direction setting in the Dubbing Mode menu is always reset to VCR DVD whenever you switch the uni...

Page 34: ...nput select should be set to the appropriate external input channel Notes for VCR to DVD duplication After starting VCR to DVD duplication the picture may be distorted because of the auto tracking function This is not a malfunction Play the tape until the picture is stabilized then set the starting point where you would like to start recording and start VCR to DVD duplication This unit will automa...

Page 35: ...s No Finalizing will start Finalizing 90 To cancel finalizing DVD RW only To cancel finalizing in step 4 press C then select Yes using K L then press OK Finalizing is cancelled and the unit will be in stop mode Finalizing 5 Yes No Do you want to cancel If appears when pressing C you cannot cancel finalizing because the finalizing is in progress Finalizing will continue if you select No then press ...

Page 36: ...io CD layer cannot be heard Note s In some cases discs other than the ones shown above may not be playable on this unit Color Systems DVD is recorded in different color systems throughout the world The most common color system is NTSC which is used primarily in the United States and Canada This unit uses NTSC DVDs you play must be recorded in the NTSC system You cannot play DVDs recorded in other ...

Page 37: ...tomatically 1 Press DVD then insert a playable disc For playable discs refer to Playable Discs and Files p 36 Refer to How to Insert a Disc p 23 It may take a while to load the disc 2 Press TITLE The title list will appear Press DISC MENU to switch Original Playlist if necessary To exit the title list press C To resume the title list press TITLE 3 Use K L 0 1 to select a desired title then press O...

Page 38: ...an recognize are audio CD 99 tracks CD RW R 999 files 255 folders DVD RW R 999 files 255 folders Letters of a file folder name overflowing the given space will be displayed as Unrecognizable characters will be replaced with asterisks If there are no files in the folder No Files will be displayed It is recommended that files to be viewed on this unit are recorded under the following specifications ...

Page 39: ...ials during Playback You can skip TV commercials to enjoy the recorded programs without interruption 1 During playback press CM SKIP Normal playback will start at 30 seconds ahead from the point you press CM SKIP Every time you press CM SKIP the searching point will be extended by 30 seconds ahead You can press CM SKIP up to 6 times 180 seconds e g Press CM SKIP once B CM SKIP 30 sec forwarding 30...

Page 40: ...te s Forward reverse speed will be indicated with icons as follows forward approx speed 1 16x 1 8x 1 3x reverse approx speed 1 16x 1 8x 1 4x Zoom 1 During playback press DISPLAY to call up the display menu 2 Use 0 1 to select to display the zoom menu e g DVD video 1 5 1 5 DVD 0 01 00 1 23 45 Video 3 Use K L to select a desired zoom factor to zoom then press OK 1 5 1 5 DVD 1 2 1 5 2 0 0 01 00 1 23 ...

Page 41: ...o call up the display menu If the display menu is already shown skip to step 2 2 Use 0 1 to select to display the selection menu 1 5 1 5 DVD 0 01 00 1 23 45 Video 3 Use K L to select a desired repeat type then press OK The selected repeat playback will start e g DVD video OFF Title Chapter A B e g audio CD OFF Track All A B e g JPEG files OFF Title Chapter A B Title The current title will be playe...

Page 42: ...me then press OK 4 Press SETUP to exit Note s Large size JPEG files take a few moments to be displayed Program Playback You can program the disc to play in your desired order 1 Press SETUP 2 Use K L to select DISC Playback Mode then press OK DISC Playback Mode menu will appear 3 Use K L to select Program Play then press OK 4 Use K L to select a desired track then press OK or B DISC Playback Mode P...

Page 43: ...r Press 1 to move to the number next to for chapter Use K L or the Number buttons to enter a desired chapter number to search then press OK After the search playback will start automatically Note s In the search mode display the total number of each search content title chapter time is shown after a slash 1 5 1 5 0 01 00 1 23 45 DVD Video total number of titles total time of the title total number...

Page 44: ...nguage code appears in the subtitle menu refer to Language Code p 68 Switching Audio Sound Track When playing a DVD video recorded with two or more sound tracks these are often in different languages you can switch them during playback When playing audio CD you can switch L R stereo L left or R right 1 During playback press DISPLAY to call up the display menu then proceed to step 2 or press AUDIO ...

Page 45: ...ss OK Note s does not appear on the TV screen if the Angle Icon is set to OFF in the Playback menu Refer to page 57 Reducing Block Noise This function reduces noise in the playback picture 1 During playback press DISPLAY to call up the display menu 2 Use 0 1 to select to display the selection menu e g DVD video 1 5 1 5 DVD 0 01 00 1 23 45 Video 3 Use K L to select a desired option then press OK 1 ...

Page 46: ... Deleting All Playlists Refer to page 48 Deleting Titles Refer to page 49 Deleting Part of a Title Refer to page 49 Putting Names on Titles Refer to page 50 Setting Chapter Marks Refer to page 51 Setting or Clearing All Chapter Marks at Once Refer to page 52 Dividing a Title DVD RW only Refer to page 52 Combining Titles Refer to page 53 Setting or Releasing the Title Protection Refer to page 53 Po...

Page 47: ...de or VR mode then press OK 6 Press SETUP to exit 7 Insert a brand new disc Formatting 90 Formatting will start 8 Formatting is complete 100 is indicated Reformatting a Disc Manually If you are using a DVD RW you can format the disc by performing Format You can format a DVD RW for either video mode recording or VR mode recording Note s The recording format setting is effective only for DVD RW You ...

Page 48: ...title is added to playlist 5 Press RETURN or C to exit Data will be written onto the disc momentarily This operation may take a while to complete Deleting All Playlists Playlist A playlist can be deleted if it is no longer needed Note s Deleting a playlist will not increase the available recording time on the disc 1 Press DVD then SETUP The main menu will appear 2 Use K L to select DVD Menu then p...

Page 49: ... This operation may take a while to complete Editing Discs Deleting Part of a Title You can delete a specific part of a title Even when parts of a title are deleted from the playlist the original title will remain as it is Note s When a scene is deleted from an original the playlist related to the original will be deleted You cannot select Scene Delete if the number of chapter marks in the origina...

Page 50: ...elete Are you sure Yes No APR 16 15 1 00AM L1 LP 1 PL 1 50 00 The selected part of the title is deleted 8 Press RETURN then RETURN or C to exit Data will be written onto the disc momentarily This operation may take a while to complete Putting Names on Titles You can put title names on the titles and change the names from this menu 1 Follow steps 1 to 3 in Deleting Titles p 49 to display Edit menu ...

Page 51: ...The maximum number of chapters for each DVD VR mode DVD 999 chapters per entire original and playlist Besides the above mentioned it is not likely to be able to add according to recorded time and number of chapters 1 Follow steps 1 to 3 in Deleting Titles p 49 to display the Edit menu 2 Use K L to select Chapter Mark then press OK The submenu will appear 3 Use H G E D B and F to find the point whe...

Page 52: ...ss OK Chapter marks are added If you select OFF in step 3 all of the chapter marks are erased 5 Press RETURN then RETURN or C to exit Data will be written onto the disc momentarily This operation may take a while to complete Dividing a Title Playlist You can divide one title into two new titles Note s You cannot divide a title on the disc when the number of recording titles reaches the maximum of ...

Page 53: ... 15 12 00AM L1 LP 12 00AM 2 30 00 APR 16 15 L1 LP 5 Press RETURN or C to exit Data will be written onto the disc momentarily This operation may take a while to complete Setting or Releasing the Title Protection Playlist To prevent the accidental editing or erasing of the titles you can protect them in the Edit menu You can cancel the title protection feature after it is applied 1 Follow steps 1 to...

Page 54: ...h is output from the digital audio output jack Disc Menu Language English French Spanish Other Set the language for disc menu language Audio Language Original English French Spanish Other Set the language for audio Subtitle Language OFF English French Spanish Other Set the language for subtitles Angle Icon ON OFF Set whether or not to display the angle icon Still Mode Auto Field Frame Set the type...

Page 55: ...Digital Set the recording audio type Only when the rec mode is set to XP Auto Finalize Page 35 Disc Full ON OFF Set the unit to finalize the disc automatically End of Timer Rec ON OFF Aspect Ratio Video mode Page 26 Auto 4 3 16 9 Set an aspect ratio for video mode recording Dubbing Mode Pages 33 34 VCR DVD DVD VCR Set the dubbing direction Clock Page 24 Clock Setting Set the clock HDMI Page 59 For...

Page 56: ...set Record the password in case you forget it If there is a DVD in the unit when you set up the parental lock press A to activate the parental lock level A A password has not been set Use K L to select Yes Use the Number buttons to enter a new password except for 4737 then press OK Change Password Yes No Password Input Yes Your setting will be activated B A password has been set Use the Number but...

Page 57: ...nguage Original English French Spanish Other Your setting will be activated When Original is selected the audio language will be in the disc s default language 5 Subtitle Language Default OFF Set the subtitle language Use K L to select an item then press OK Subtitle Language OFF English French Spanish Other Your setting will be activated If Others is selected for 3 to 5 press the 4 digit code usin...

Page 58: ...ideo then press OK 3 Use K L to select an item then press OK Progressive TV Aspect Select Video 1 2 3 The submenu will appear 4 Refer to the following instructions 1 to 2 and configure the settings For 3 refer to Setting the Video Input p 32 5 When you are finished with these settings press SETUP to exit 1 Progressive Default OFF This unit is compatible with the progressive scan system This featur...

Page 59: ...y color 3 Use K L to select an item then press OK Format HDMI Audio RGB Range 1 2 3 4 When you are finished with the setting press SETUP to exit 1 Format Default RGB You can select the color space for HDMI output Set the appropriate color space for your display device Use K L to select an item then press OK When the connected device is not compatible with Y Cb Cr the HDMI signal is output as RGB r...

Page 60: ...Only the audio video playback is available with these connections Under the condition listed below the playback image cannot be viewed Use the standard video connection in such case during DVD recording HDMI video resolution cannot be changed when the unit is in VCR mode Playback 1 Press VCR then insert a prerecorded tape Refer to How to Insert a Cassette Tape p 23 2 Press B to start playback 3 Pr...

Page 61: ...to Insert a Cassette Tape p 23 2 Select the recording mode using REC MODE Refer to Notes for VCR to DVD duplication p 34 and Recording p 61 3 Press SOURCE to select the appropriate external input position L1 L2 to which your external tuner is connected 4 Press REC to begin the one touch timer recording You can select a fixed recording time by pressing REC repeatedly 0 30 1 00 Normal recording 7 30...

Page 62: ...ilable when the unit is connected through the VIDEO OUT jack Time Search This feature allows you to go to a specific point on a cassette tape by entering the exact amount of time you would like to skip in order to reach the point 1 Press VCR then press SEARCH repeatedly to call up the TIME SEARCH menu 2 Using the Number buttons enter your desired time to skip within 30 seconds The maximum time you...

Page 63: ...ess D Press D or E repeatedly to select a desired speed Automatic rewind When a cassette tape is played or fast forwarded to its end the cassette tape will rewind to the beginning stop and eject itself When you playback a cassette tape recorded in Hi Fi stereo Press AUDIO on the remote control to select Hi Fi or MONO for playback sound mode If you have connected a stereo TV to this unit select HIF...

Page 64: ...splay is shown or while the screen saver is active the audio is muted The remote control does not function Batteries are weak There are obstacles between the remote control and the unit The remote control is too far from the unit There are no batteries in the remote control Check if the unit is turned On Check if you are pointing the remote control at the recorder and NOT the TV If you have a plas...

Page 65: ...y certain discs such as CD ROMs p 36 The region code on the DVD video does not match the unit p 36 Moisture has condensed inside the unit Remove the disc and leave the unit turned On for about 2 hours until the moisture evaporates p 3 If the disc was recorded on another recorder the unit cannot play the disc if it was not finalized Discs recorded on this unit cannot be played on other DVD players ...

Page 66: ... press OK After that press A to take out the disc The disc which was cancelled during the repairing process MAY NOT work VCR Picture noise appears Head cleaning for VCR may be necessary Refer to Auto head cleaning p 6 Adjust tracking control for better picture by pressing TRACKINGK L while you are playing a cassette tape The cassette tape does not play No cassette tape is inserted Recording does n...

Page 67: ...cted and not recordable You are trying to record onto a protected disc which is set in the DVD Menu Release the disc protect setting in the DVD Menu page 53 Recording Error Disc is full No area for new recording You are trying to record onto a disc which has no space for recording Insert a recordable disc with enough recording space Recording Error You cannot record more than 99 titles on one disc...

Page 68: ...5765 Kazakh 5757 Kinyarwanda 6469 Kirghiz 5771 Kirundi 6460 Korean 5761 Kurdish 5767 Laothian 5861 Latin 5847 Latvian Lettish 5868 Lingala 5860 Lithuanian 5866 Macedonian 5957 Malagasy 5953 Malay 5965 Malayalam 5958 Maltese 5966 Maori 5955 Marathi 5964 Moldavian 5961 Mongolian 5960 Nauru 6047 Nepali 6051 Norwegian 6061 Occitan 6149 Oriya 6164 Oromo Afan 6159 Panjabi 6247 Pashto Pushto 6265 Persian...

Page 69: ...les on this unit PCM pulse code modulation The most common system of encoding digital audio found on CD and DAT Excellent quality but requires a lot of data compared to formats such as Dolby Digital and MPEG audio For compatibility with digital audio recorders CD MD and DAT and AV amplifiers with digital inputs this unit can convert Dolby Digital and MPEG audio to PCM See also Digital Audio Progre...

Page 70: ...ion format 48 kHz Dolby Digital Terminals Front Audio input RCA jack x 2 2V rms input impedance more than 22kΩ Video input RCA jack x 1 1Vp p 75Ω S video input Mini DIN 4 pin x 1 Y 1Vp p 75Ω C 286mVp p 75Ω Rear Audio input RCA jack x 2 2V rms input impedance more than 22kΩ Audio output RCA jack x 4 2V rms output impedance more than 1kΩ Video input RCA jack x 1 1Vp p 75Ω Video output RCA jack x 1 1...

Page 71: ...en ser grabados y borrados muchas veces En este aparato los discos DVD RW R serán grabados automáticamente en el modo DVD VR Logotipos Atributos Disco de 8 cm 12 cm un solo lado una sola capa Tiempo de grabación máx aprox modo SLP 360 minutos 4 7 GB para 12 cm 108 minutos 1 4 GB para 8 cm DVD RW DVD R Los siguientes discos se recomiendan para obtener una buena calidad de grabación y han sido compr...

Page 72: ...este aparato No incline el conector para introducirlo en la toma HDMI y compruebe que el tipo de toma corresponde con el tipo de conector cable HDMI Modo HDMI y señales efectivas de salida Presione HDMI para seleccionar el modo de salida HDMI Cada vez que se presiona HDMI el modo de salida varía como sigue Pantalla del panel frontal Señal de salida de video Progresivo de 480 Presione HDMI Progresi...

Page 73: ... consulte la página 71 2 Para seleccionar un modo de grabación presione REC MODE Buena Deficiente Discode8cm Discode12cm Calidad del video y el sonido Modo de grabación Tiempo de grabación XP 1Hr SP 2Hr LP 4Hr EP 6Hr SLP 8Hr 18 min 36 min 72 min 108 min 144 min 60 min 120 min 240 min 360 min 480 min 3 Presione SOURCE para seleccionar la posición adecuada de la entrada externa L1 L2 a la cual está ...

Page 74: ...para configurar una programación del temporizador Aparecerá en el pantalla del panel frontal SP 2h00m Fcha ABR 17 L1 L2 L1 DVD Empieza Termina GRAB a Modo SP Configure la fecha SP 1h00m Fcha ABR 17 L1 L2 Empieza Termina GRAB a Modo SP 12 00AM 1 00AM L1 DVD Seleccione un medio de grabación DVD o VCR SP 1h00m Fcha ABR 17 L1 L2 Empieza Termina GRAB a Modo 12 00AM 1 00AM L1 DVD SP Seleccione un modo d...

Page 75: ...ty does not apply a to damage caused by accident abuse misuse neglect misapplication or non supplied product b to damage caused by service performed by anyone other than company approved Authorized Service Location c to a product or a part that has been modified without written company per mission or d if any serial number has been removed or defaced or e product accessories or consumables sold AS...

Reviews: