18
19
Archive function
You will see the "
Archive
" button in various me-
nus and screens (e.g. titling, color box).
Clicking on this button opens a screen in which
there are four buttons: "
Load
", "
Save
", "
Delete
",
and "
Cancel
".
Clicking on "
Load
" displays a list of the titles,
effects, or settings that have previously been
saved. You can then directly select or scroll to an
entry in this list and confirm.
A click on "
Save
" displays the same list. There
are now two possible courses of action:
1.
You can click on the gray rectangle directly be-
low the list so that the keyboard is called up and
you can type in a name, after which you click
on "
Ok
" in the keyboard and in the text archive
field. This creates a new archive entry.
2.
You can select an entry from the list and then
click on the gray rectangle in which the name of
the selected entry is now visible. Now you can
use the keyboard field to overwrite this name
with another name of your choice. This differs
from the first option in that here you not only
change the name, but you also overwrite the
entry itself, so that the original entry is perma-
nently deleted.
If you click on "
Delete
", a list of the saved entries
is displayed in which you can select an entry to
delete and confirm with "
Ok
".
Clicking on "
Cancel
" exits the window without
making any changes.
With the help of archiving you can save fre-
quently used standard text and reuse the text at
any time in any of the projects.
Image Pool
An additional function is the Image Pool. This is
a ‘global’ area for storing graphics; this means
that the image can also be exchanged between
different program packages and projects or sa-
ved directly from your footage.
The main program and almost all supplemental
programs use the Image Pool. In this way, gra-
phics brought into the system by one program
can automatically be used by all other programs.
The Image Pool is used in many areas of the
system, e.g. titling, when creating new scenes,
in the edit screen or in conjunction with DVD-
Arabesk.
If you select the scene "
Pattern
" in the menu
"
New
", the option "
Select Pattern
" appears to
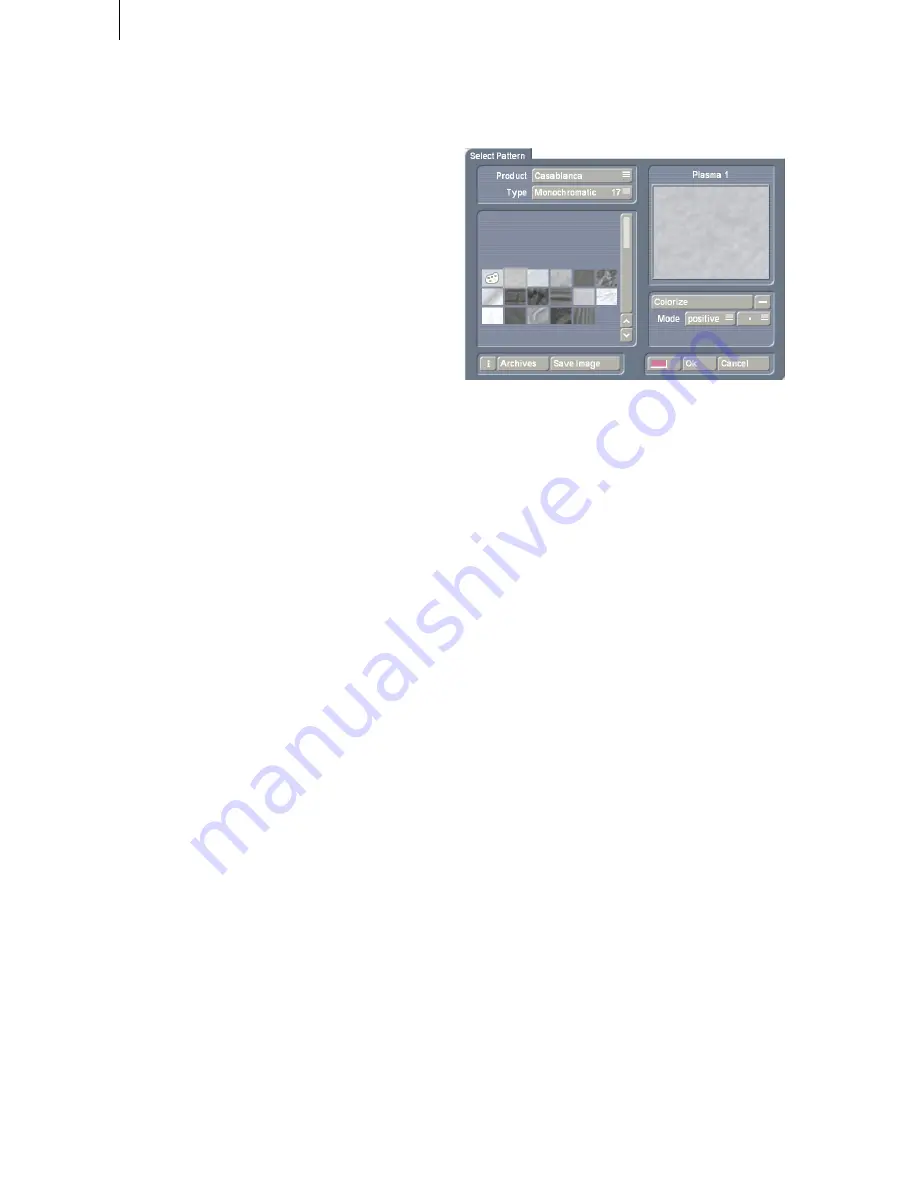
the right. You can click on that to open the Select
pattern screen which offers you a number of pat-
terns to choose from.
In the area to the above-left you see the
selection button "
Product
" offering you a list
of the main program "
SMART EDIT
", "
DVD
Arabesk
" (if it is installed), different additional
programs and the option „
Custom Images
“.
The next selection button "
Type
" offers you up
to four different types of graphics:
-
Masks
Masks are used principally by programs such as
Liquid Images
and
Video SpiceRack
.
The masks are gray pictures whose form is used
by the programs to specify the course of effects.
But the masks can also be used for other purpo-
ses. For example, they can be colored and used
to achieve variety in backgrounds for titling.
-
Monochrome
Monochrome (gray) patterns (also called "
tex-
tures
") are listed here. These can be colored
and used as background elsewhere. Because
the patterns are usually smaller than the screen,
they are automatically tiled on the screen, until
the desired surface is completely covered.
-
Color
The multi-colored patterns are used in the same
way as the monochrome patterns. No further co-
loring is possible as the patterns already contain
color.
-
Pictures
Complex pictures can be found in this catego-
ry, (e.g. you see here the maps of the program
„
Columbus
“ (if it is installed) or the background
pictures for DVD Arabesk). Although they are in-
Summary of Contents for SMART EDIT 5
Page 1: ...User manual SMART EDIT 5 2nd edition ...
Page 100: ...274 06 06 ...


