Application Note #428
5
Lutron Technical Support Center
1.800.523.9466
®
Changing Wallstation Button Columns
Note:
Some wallstation models ship from Lutron with certain buttons disabled (i.e. European style
wallstations with spaces between the buttons). If buttons are disabled on a wallstation, they must
first be enabled before they can be added to new columns. Please see section
D
“Enabling or
disabling a button, backlight LED, and/or status LED” on page 6.
Functionality:
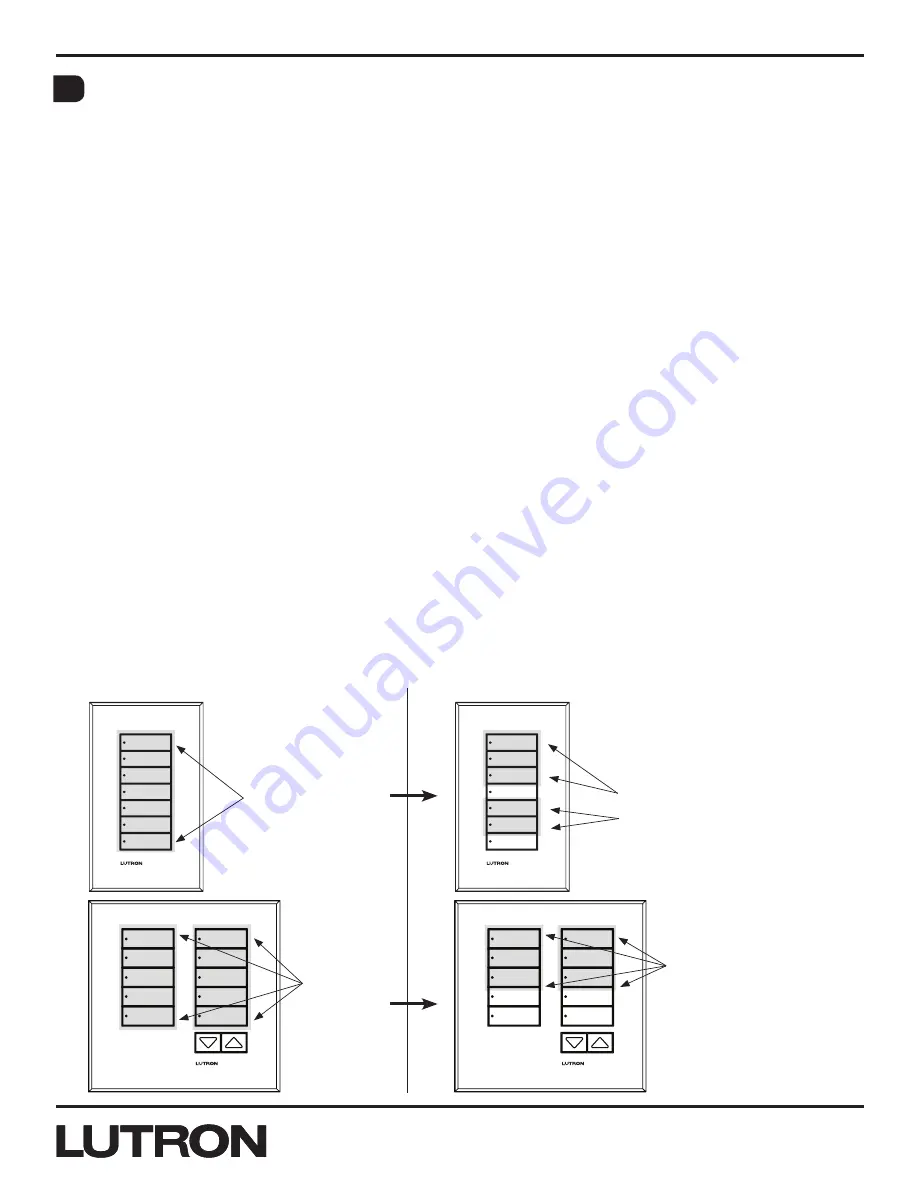
To change the number of buttons in a column:
1. Hold down the top and bottom buttons of the new column you wish to create for 30 seconds.
(If creating a one button column, hold down the appropriate button for 60 seconds)
2. Once the hold time elapses, the status LEDs of the newly created column will blink
simultaneously. This puts the newly created column into APM.
3. To exit APM, hold the top and bottom buttons of the new column for 3 seconds (if it is a 1B
column, hold the single button for 10 seconds).
4. Once the hold time elapses, the wallstation will return to Normal Mode.
To create more than one column on a wallstation:
• Up to four separate and independently functioning columns on a wallstation can be created by
using the same steps above but with unused buttons.
• Wallstation columns cannot overlap.
• Each column created can be programmed with its own column type, be associated to different
areas or devices, etc. as if it were its own individual wallstation.
• A wallstation can be divided into no more than four columns. One button (1B) columns are allowed.
Ex.
A 10 button (10B) wallstation can be modified to have two 5 button (5B) columns; One column
can be a scene type that is associated to Area 1 of a GrAFIk Eye
R
QS control unit and the other
can be a shade type associated to a group of Lutron
R
Sivoia
R
QS shades/draperies.
Note:
Custom engraving, faceplates, and button kits are available for single column wallstations as well
as for dual and multi column wallstations (for both North American and European wallstations).
Group 1
Group 2
Group 3
Open
Close
Preset
Group 1
Group 2
Group 3
Open
Close
Preset
Before
Before: 1 column
with 7 buttons
Before: 2
columns,
each with
5 buttons
After: 2
columns, each
with 3 buttons
After: 2 columns,
one with three
buttons, one
with two buttons
After
C


