69
SONAR OPERATION - General
To view the sonar data, press the SONAR key at the bottom of the unit. A
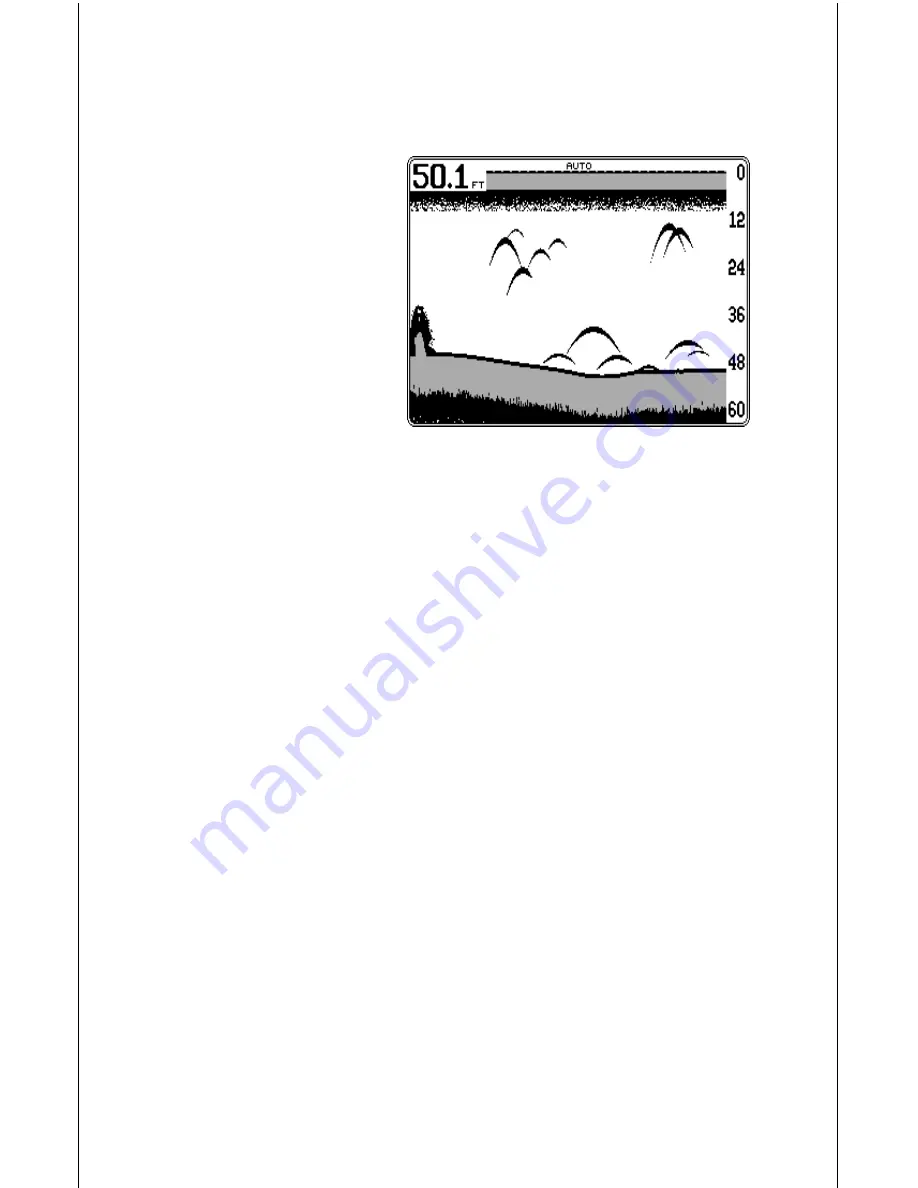
screen similar to the one below appears. This is a full-screen sonar display.
The sonar data scrolls from right
to left. The unit is in the auto-
matic mode, shown at the top
of the screen by the word
“AUTO”. The automatic feature
keeps the bottom displayed at
all times, changing the range
and sensitivity levels as re-
quired. The digital depth dis-
play is in the upper left corner of
the screen. This shows a con-
tinuous display of the current
bottom depth.
On the right side of the screen, scale numbers show the relative depth of
targets and the current depth range. In this example, the range is 0 - 60 feet.
Grayline shows the relative target strength, including the bottom. A wide
gray line indicates a hard bottom, whereas a narrow gray line designates
a soft bottom.
Try using the sonar in the automatic mode at first. As you become familiar
with the information shown on the screen, try adjusting some of the
features such as zoom, upper and lower limits, sensitivity, and more. You’ll
soon find the sonar features of the GlobalMap 2000 outshine most of the
competition’s most expensive units.
Note: This unit stores all changes in memory. You can, if necessary, preset
the sonar. This is a menu feature that resets the sonar to the factory
defaults. See the “Sonar Preset” section for more information.
SONAR KEY
The Sonar key switches the unit from mapping to sonar or a split-screen
sonar/navigation unit. Pressing the SONAR key for the first time shows the
full-screen sonar. Press it again and the split screen zoom display appears.
All echoes on the left side of the screen are the same as the ones on the
bottom half of the right side, enlarged to twice their normal size. Press the
SONAR key again and the screen changes to a sonar display on the left
side of the screen and navigation data boxes on the right. Press the
SONAR key one more time to return to the full-screen sonar display.


