


42
2.
If not check the power output of power adapter using
multimeter,It should 24VDC.
3.
Check the input AC power supply it should be 110 VAC or 230
VAC.
11. Cloud Connector does not get online:
This can be due to following failures:
1.
Power supply - check and perform step 8 discussed .
2.
Provisioning Error and Network Error: Check provisioning of
device and SIM Status as discussed in step 1&2
12. Viewing and emailing debug logs
you are unable to troubleshoot the device even after above discussed
scenarios and suggestions. you can connect the debug port to your
computer and capture the logs and sent it to LogicLadder support team.
Follow these steps to capture debug logs:
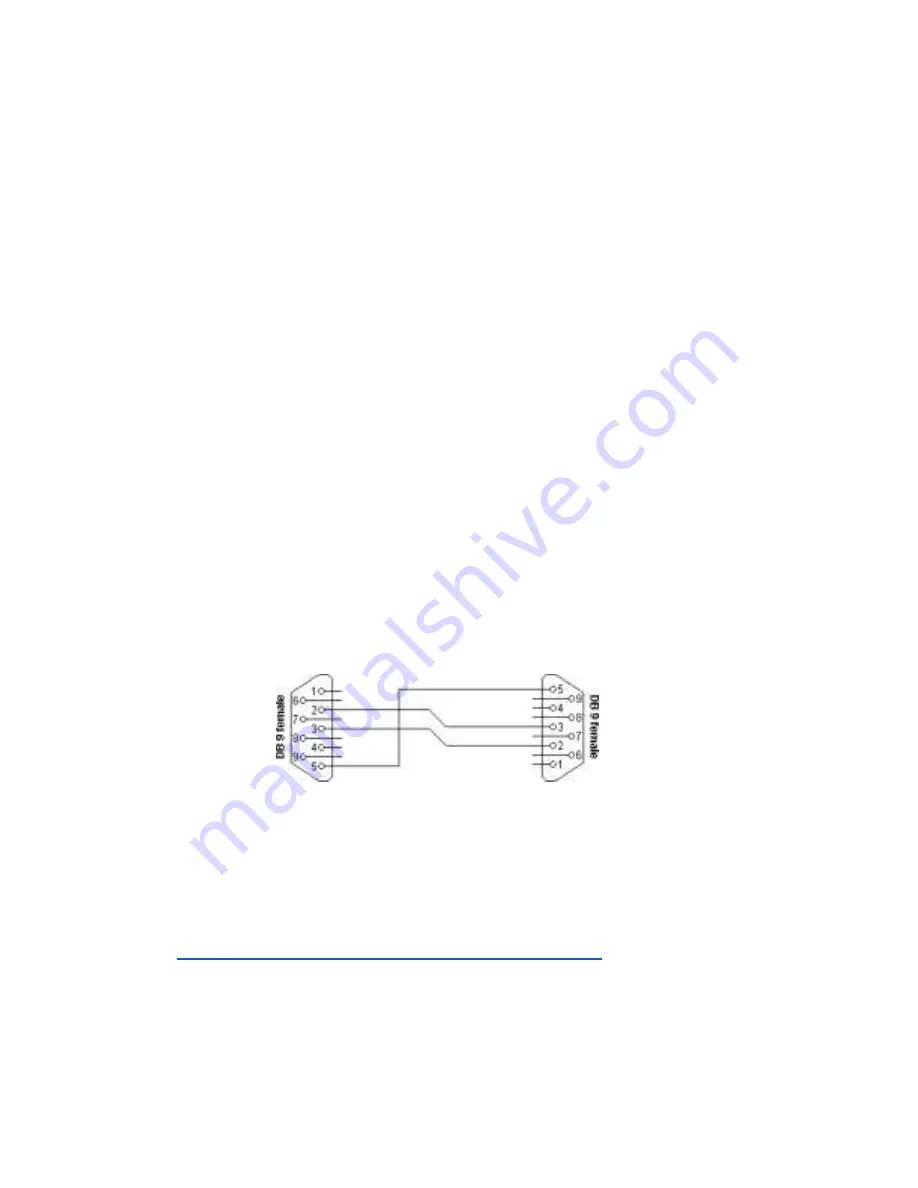
1.
You will require a 3 wire cross cable with DB9 female to female
connector:
2.
Connect the serial cable to the device debug port on one end and
the second end to your computer's serial port. Use a USB to serial
RS 232 converter if your computer does not have a serial DB9
port.
3.
Download hyperterminal and install it on your computer from
https://www.hilgraeve.com/hyperterminal-trial
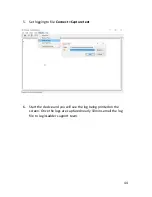
4.
Set the following settings on the hyperterminal and connect:
●
Select right communication Port number
(COM1,COM2..etc.)
Summary of Contents for EnergyLogicIQ
Page 1: ...2018 LogicLadder Instruction Manual EnergyLogicIQ Generator Monitoring System Version 12 2017...
Page 2: ......
Page 16: ...11...
Page 17: ...12 7 EnergyLogicIQ IoT Cloud Connector A Top View B Top Side View...
Page 18: ...13 C Left Side View D Bottom Side View...
Page 24: ...19 7 8 Connecting Generator On Off Signal and Run Hours...
Page 38: ...33 2 Setup communication parameter...
Page 40: ...35 10 2 Scenario 2 1 Generator 2 Tanks 10 3 Scenario 3 2 Generator 2 Tanks Internal Tanks...
Page 41: ...36 10 4 Scenario 4 2 Generator 3 Tanks 10 5 Scenario 5 2 Generator External Tanks...
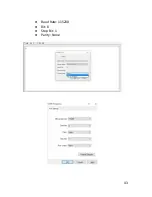
Page 48: ...43 Baud Rate 115200 Bit 8 Stop Bit 1 Parity None...
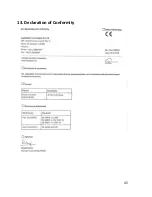
Page 50: ...45 13 Declaration of Conformity...
Page 51: ...46...
Page 52: ...47...
Page 54: ......


