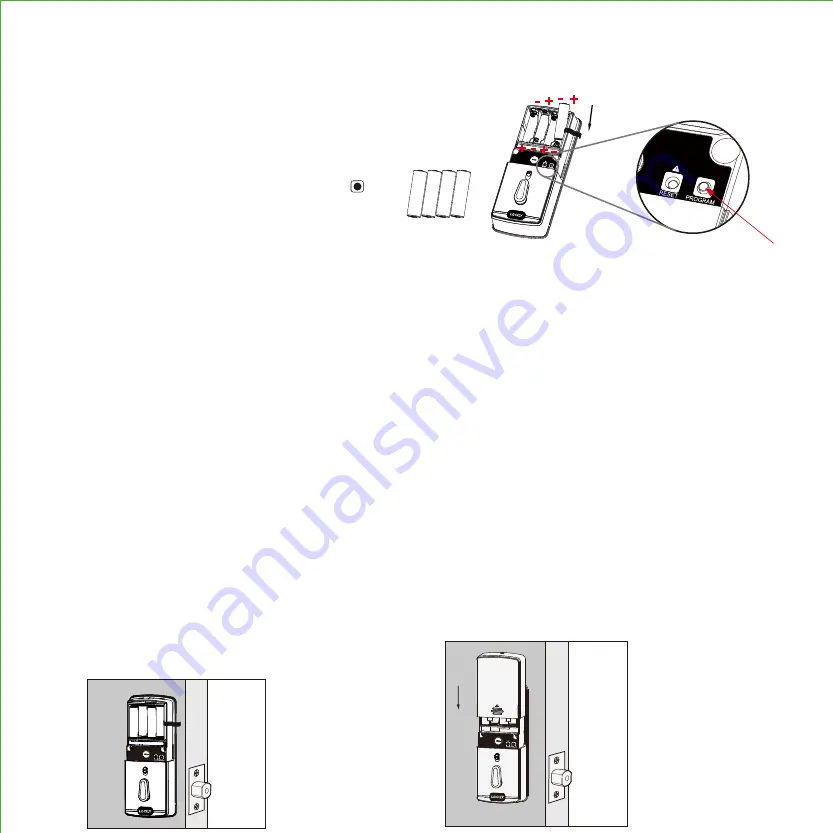
7.1:
While the door is open and deadbolt is
extended,
place the ribbon inside the
compartment and insert only 3 batteries
at
the bottom layer with correct polarities.
Ensure the bolt is
FULLY EXTENDED
7.2
Press and hold the program button
before inserting the 4th battery. The lock will
automatically do a self-check.
RELEASE
the
program button. The lock information wil
l
be
shown on the touchscreen
.
The self-check
process is very important to ensure the
installation is done properly.
After the lock finished the self-check, do the 2-steps below to ensure your lock is properly installed:
STEP 7. INSTALLING BATTERIES
1.
Manually lock and unlock your door by
using
the thumb turn and the key to
make sure the
deadbolt moves smoothly.
If you feel that there
is a tight tension
while you are turning, it means
that the
lock may have not been installed
straight.
Go back to Step 2 and re-install
the
lock.
IMPORTANT: If your lock is not properly installed,
it will open and close repeatedly at times and/
or it will reduce battery life.
7.3:
After you checked that the lock manually
lock and unlock properly and deadbolt moves
smoothly, continue to install the last 4 batteries
on the top layer of the battery compartment.
2.
Swipe
your hand across the
touch
screen
keypad,
the lock will close.
If
the deadbolt
bounces and
unlocks
automatically
,
it means
that your lock was
installed incorrectly.
Go back
Step 2
to
make sure
your lock was installed with
the
(a)
deadbolt
extended
and (b) the
torque
blade was inserted
vertically
while
the deadbolt
was extended.
7.4:
Install the Battery Cover (I) and secure with
screw.
PRESS & HOLD
1 2 3
4
5 6
7
8
5 6 7 8
Summary of Contents for DEADBOLT EDITION PGD1128
Page 1: ...DEADBOLT EDITION SMART LOCK VIDEO DOORBELL INSTALLATION MANUAL VISION ...
Page 4: ......
Page 26: ...IMPGD1128FPW20200428 We re here to help help lockly com https lockly com help VISION ...
Page 27: ......
Page 28: ...http lockly com help VISION For the latest version of this manual please visit the link below ...


