


23
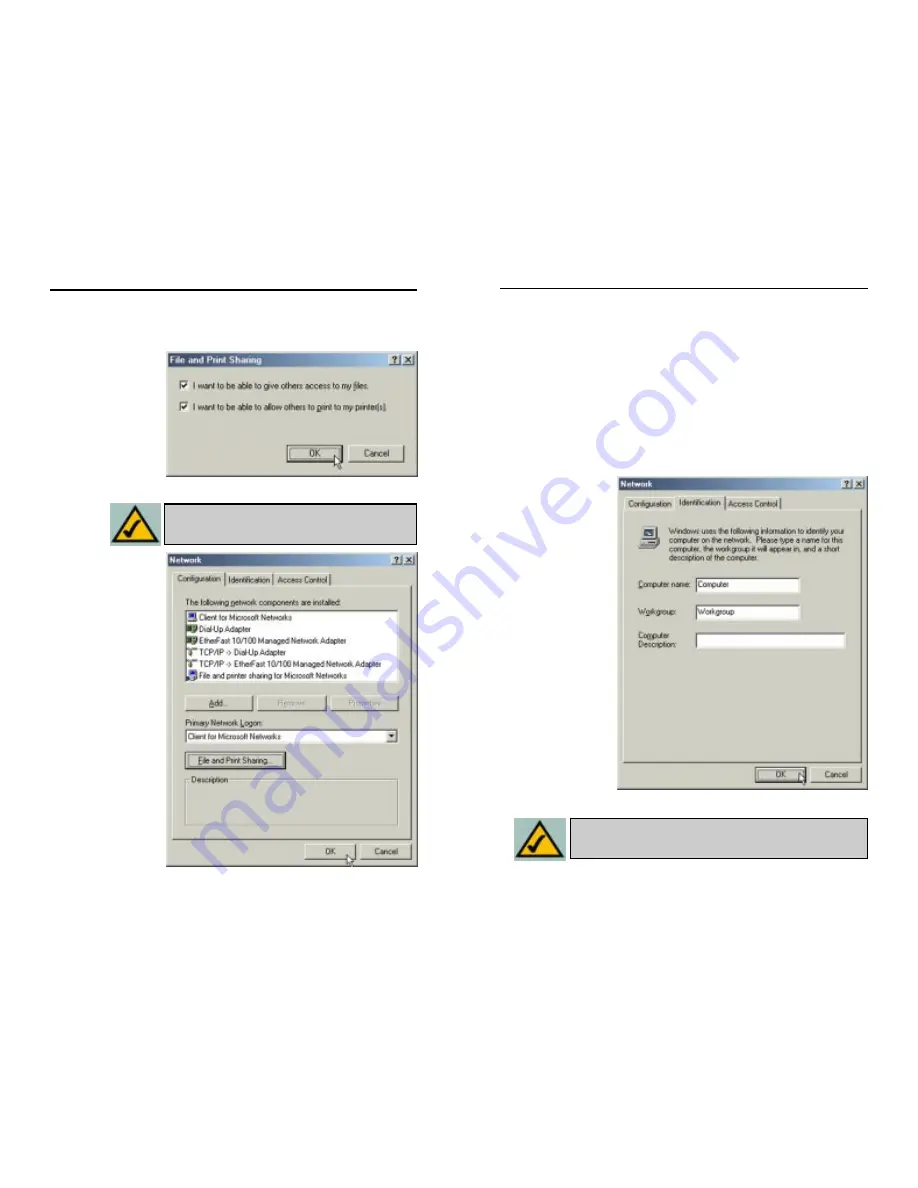
6. After ensuring that all of the listed network components are installed on
your system, select Client for Microsoft Networks from the Primary
Network Logon pull-down menu.
7. Click on the Identification tab, shown in Figure 6-8. Type the name of your
computer in the Computer Name box. Choose a name that is unique from
the other computer names on the network.
8. Type
the
name of your workgroup in the Workgroup box. The Workgroup
name should be the same Workgroup Name in use by all of the other PCs
on the network. Use the same Workgroup Name that is in use on your other
computers for ease of use.
8a. (Optional) Enter a
description of
your computer in
the
Computer
Description
box.
This box may be left
blank.
Note:
Your Computer Name and Workgroup Name must both be fewer
than 15 characters, and should only consist of numbers and letters.
Instant EtherFast
®
Series
Figure 6-8
4. If you'd like others to be able to access the files on your PC's hard drive,
select I want to be able to give others access to my files from the File and
Print Sharing screen shown in Figure 6-6.
If you'd like to
share your printer
with other users on
the network, select
I want to be able
to allow others to
print to my print-
er(s) from the File
and Print Sharing
screen shown in
Figure 6-6.
5. Click the OK but-
ton. File and
Printer Sharing for
Microsoft Networks
should now appear
in the list of
installed compo-
nents, as shown in
Figure 6-7.
Note:
If you do not enable File and Printer Sharing, your PC
will be invisible on the network, inaccessible by anyone.
24
Figure 6-6
Figure 6-7
EtherFast
®
10/100 Managed Network Adapter


