10/81
b.
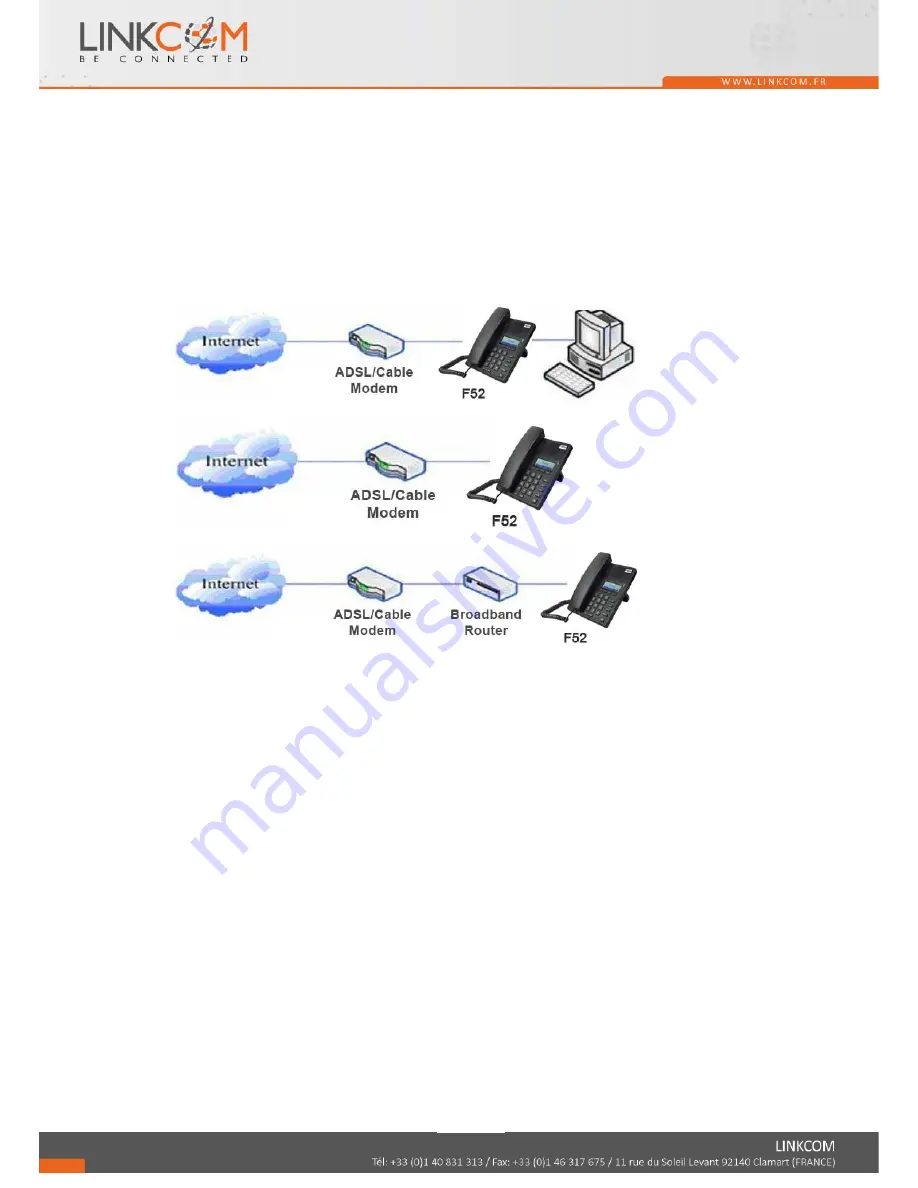
Direct
network
connection—Use
this
method
if
you
have
a
single
Ethernet
port
which
is
already
in
use.
Disconnect
the
Ethernet
cable
from
the
Ethernet
port
and
attach
it
to
the
WAN
port
on
the
back
of
the
phone.
Then
use
the
Ethernet
cable
in
the
package
to
connect
the
LAN
port
on
the
back
of
the
phone
to
the
other
device.
The
IP
Phone
now
shares
a
network
connection.
c.
Access
by
router
connection—Connect
one
end
of
the
network
cable
to
the
IP
340P’s
WAN
port
the
other
end
is
connected
to
your
broadband
router’s
LAN
port,
so
that
the
completion
of
the
network
hardware
connections.
In
most
cases,
you
must
configure
your
network
settings
to
DHCP
mode.
2.
Connect
the
handset
to
the
handset
jack
using
the
handset
cable
in
the
package.
3.
Connect
the
power
supply
to
the
DC
port
on
the
back
of
the
phone.
Connect
the
power
supply
to
a
standard
power
outlet.
Note
that
the
power
supply
will
not
be
needed
if
your
network
provides
Power
over
Ethernet
(PoE).
4.
The
phone’s
LCD
screen
displays
“INITIALIZING”.
Later,
a
ready
screen
displays
the
date,
time
and
current
network
mode.
If
your
LCD
screen
displays
different
information
from
the
above,
more
information
may
need
to
be
entered.
Please
refer
to
the
next
section.
If
your
phone
registers
into
your
IP
telephony
Server,
it
is
ready
to
use.
If
not,
continue
to
read
for
more
configuration
information.
2.2
Network
Settings
DHCP
is
supported
by
default.
This
allows
the
phone
to
receive
an
IP
address
and
other
network
‐
related
settings
(Netmask,
IP
gateway,
DNS
server)
from
the
DHCP
server.
If
no
DHCP
server
is
available,
the
network
connection
settings
must
be
changed.
Follow
the
instructions
below
to
change
to
either
PPPoE
or
static
IP.
Summary of Contents for IP 340P
Page 41: ...41 81...
Page 62: ...62 81...