6. Software Control – Lightware Device Controller
MX2-HDMI20 series – User's Manual
45
Applied firmware package: v1.7.0 | LDC software: v2.5.1b5
Port Tiles
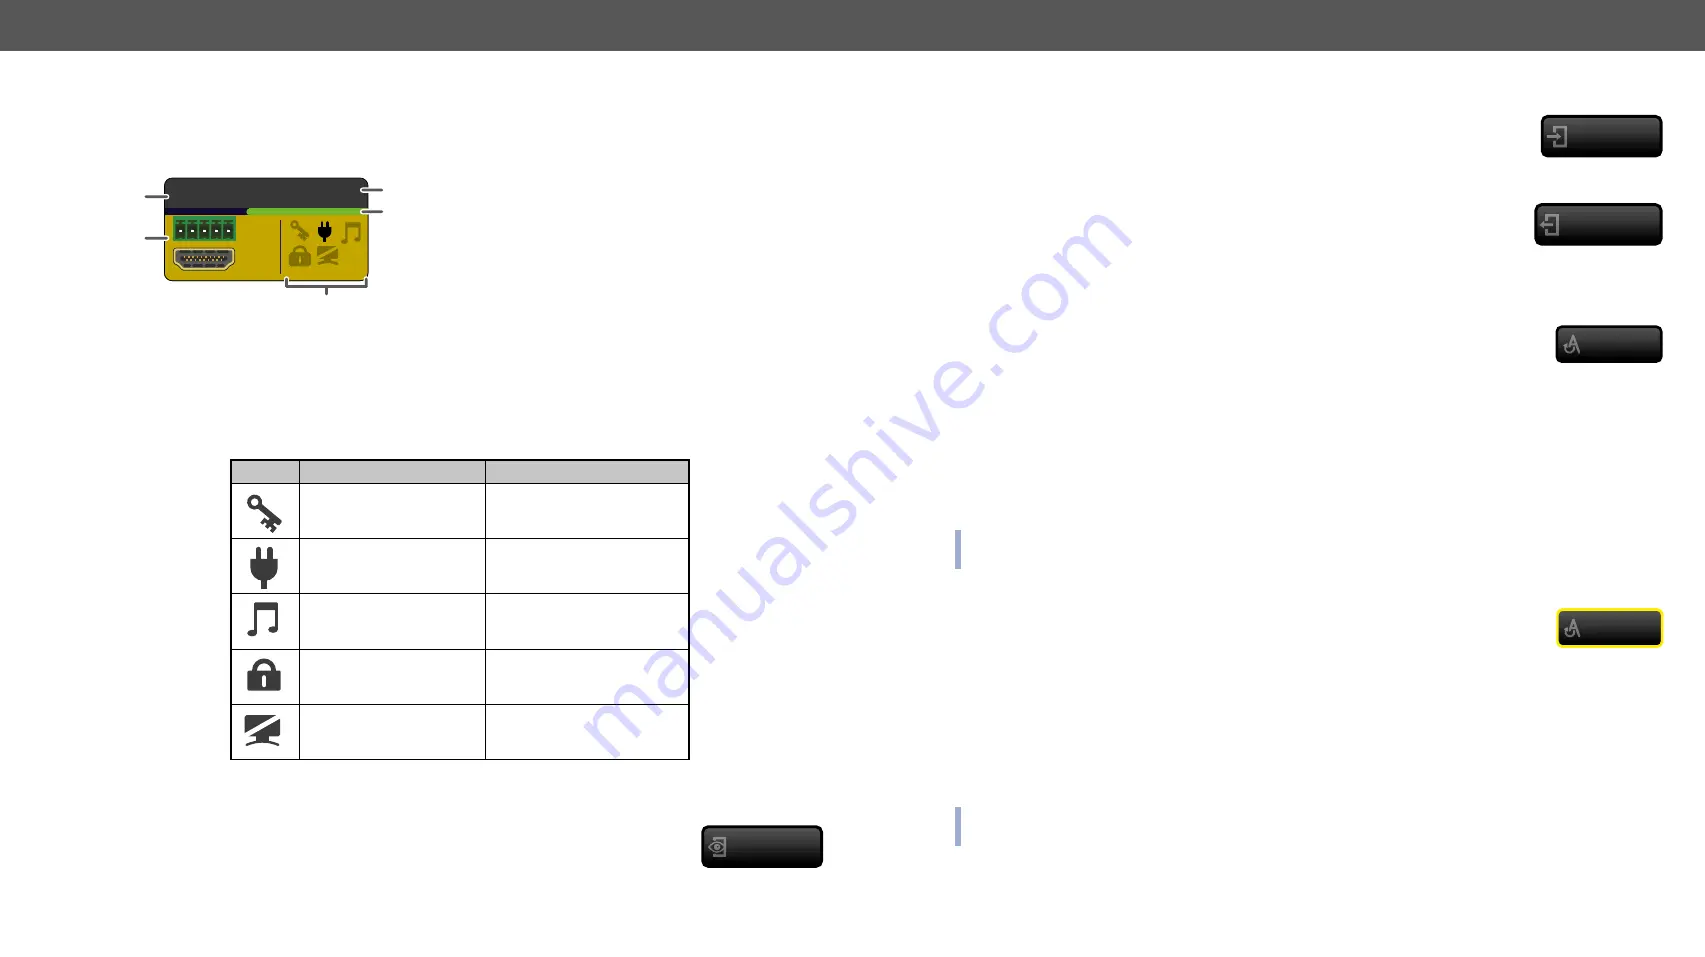
The colors of the port tiles and the displayed icons represent different states and information about the
selected port:
State Indicators
Following icons display different states of the input/output ports/signal:
Icon
Icon is grey
Icon is black
A
Signal is
not
encrypted
with HDCP
Signal is encrypted with
HDCP
Source/sink is
not
connected
Source/sink is connected
(+5V / Hotplug detected)
Audio is
not
embedded
in the video stream
Audio is embedded
in the video stream
A
Port is unlocked
Port is locked
A
Port is unmuted
Port is muted
Display Modes
View Mode
This mode was designed to display the crosspoint state of a selected and its connected
port(s). Crosspoint settings cannot be changed in View mode but port settings are
available.
Input1
I1
1
2
5
4
3
1
Port name
2
Background color:
grey
: not connected
yellow
: selected
white
: connected
3
Port number
4
Signal present indicator:
green
: present
grey
: not present
5
State indicators
View mode
Input Switch Mode
The mode can also be named as ‘Input priority-mode’: an input port has to be selected
at first then the connected output ports are shown. Thus, the output ports connected to
the input port can be changed.
Output Switch Mode
This mode can also be named as ‘Output priority-mode': an output port has to be
selected at first then connected input port is shown. Thus, the output port connected
to the input port can be changed.
Switching Operations
Take Mode
If the Autotake button is outlined with black color Take mode is active. In Take mode
any crosspoint change – (dis)connecting ports to/from the previously selected port – is
executed only after pressing the Take button. Following steps describe the process of the
switching:
Step 1.
Press the desired
Input switch
or
Output switch
button to select the switching mode.
Step 2.
Select the desired port; it will be highlighted with yellow color and displayed also on the port bar on
the right.
Step 3.
Connected ports are highlighted with white color and displayed also on the port bar on the right.
Step 4.
Create the desired crosspoint settings by (de)selecting the ports; they will start to blink.
Step 5.
Press the
Take
button to execute changes or
Cancel
to discard.
INFO: Take mode remains active until it is switched off. Selecting another view mode or menu item does
not change the Take/Autotake mode state.
Autotake Mode
If the Autotake button is outlined with yellow color Autotake mode is active. In this mode,
any crosspoint change – (dis)connecting ports to/from the previously selected port –
is executed immediately after pressing the port button. Following steps describe the
process of the switching:
Step 1.
Press the desired
Input switch
or
Output switch
button to select switching mode.
Step 2.
Select the desired port; it will be highlighted with yellow color and displayed also on the port bar on
the right.
Step 3.
Connected ports are highlighted with white color and displayed also on the port bar on the right.
Step 4.
Create the desired crosspoint settings by (de)selecting the ports; the changes are executed
immediately.
INFO: Autotake mode remains active until it is switched off. Selecting another view mode or menu item
does not change the Take/Autotake mode state.
#take #autotake
Input switch
Output switch
Autotake
Autotake


