14
Wiring Preparation
WARNING:
Please read this section thoroughly
before attempting to install wiring to this unit.
Be sure that the unit is not connected to any AC
utility power source before installing any wiring
to this unit. This UPS should be installed by a
qualified / certified electrician.
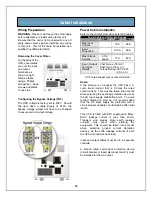
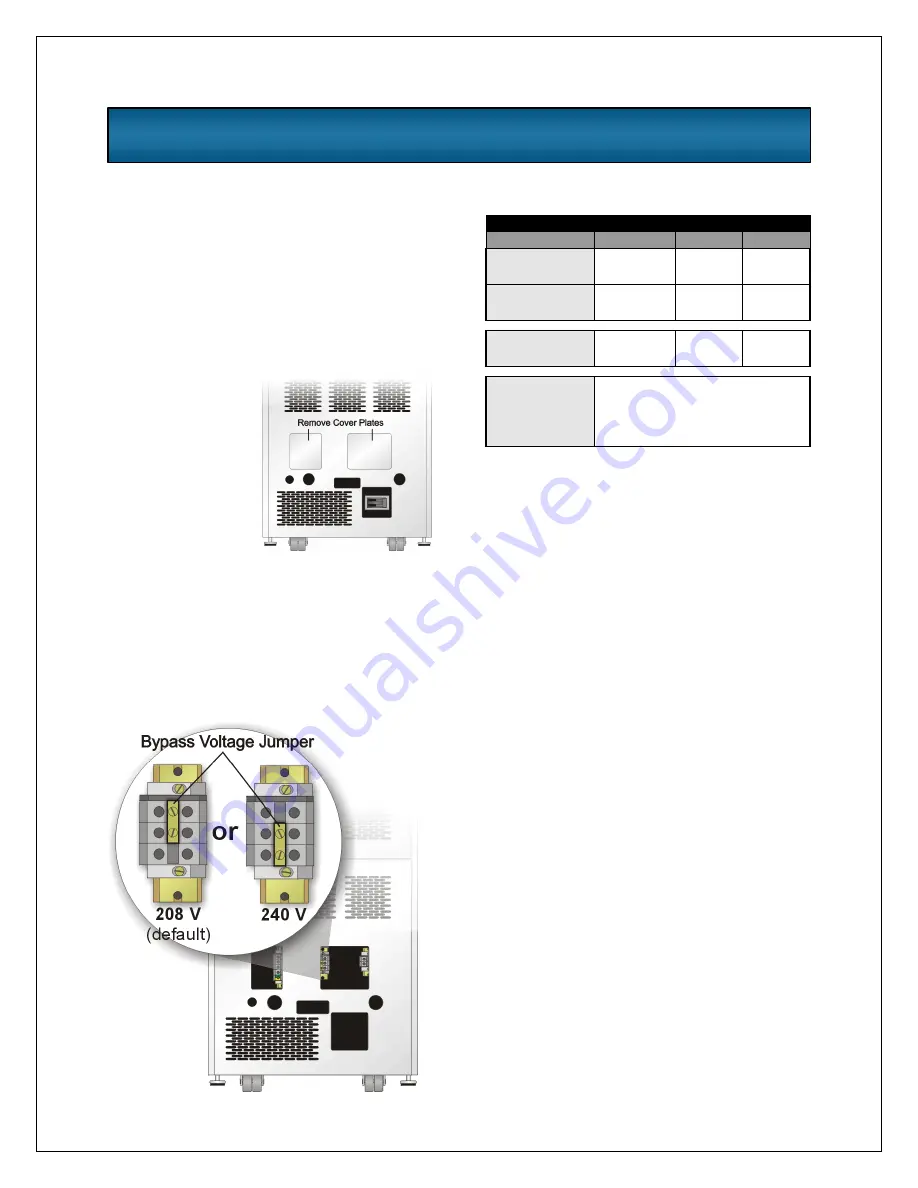
Removing the Cover Plates
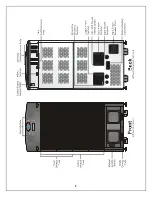
On the back of the
UPS, cover plates
are over the input
and output
terminals, as
shown on right.
Remove these
using a Phillips
screwdriver. Keep
screws and plates
to one side.
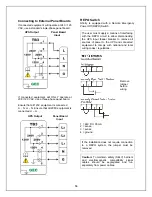
Configuring the Bypass Voltage (TB2)
The UPS voltage is factory set to 208V. Should
the user have a utility supply of 240V, the
bypass voltage jumper will have to be changed
to ensure correct output voltage.
Power Cable Installation
Refer to the charts below when selecting cables:
Power Cable and Protection Ratings
120V
208V
240V
Max Input
Current
79 A
69 A
Input
Protection
100 A
90 A
Max Output
Current
67A /
phase
77 A
67 A
2 AWG max (35 mm²)
6 AWG min (16 mm²)
Input / Output
Terminal
Details
Torque Rating: 22-26 in/lb
(2.5-3 nm)
90°C rated copper wire is recommended
Notes:
If the start-up is on bypass the UPS has a 3-
cycle inrush current that is 6 times the rated
output current. This must be taken into account
when selecting the overload protection device at
the AC input supply distribution point. To avoid
random tripping on start up, it is recommended
that the AC input supply be protected with a
circuit breaker capable of withstanding this initial
inrush.
This UPS is fitted with EMI suppression filters.
Earth leakage current is less than 40mA.
Transient and steady state earth leakage
currents may occur when starting the
equipment. This should be taken into account
when selecting ground current detection
devices, as the earth leakage currents of both
the UPS and load will be carried.
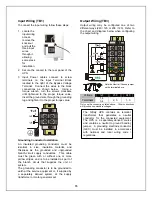
Input and output cables must be run in separate
conduits.
A branch rated overcurrent protection device
(circuit breaker or fused disconnect switch) must
be installed for the AC output.
Cable Installation
Summary of Contents for 12 bay
Page 1: ...User Manual English 208 V 240 V 60Hz 4 to 16 kVA Power System...
Page 2: ......
Page 4: ...2 Glossary of Symbols...
Page 5: ...3 Introduction General Description Modes of Operation Major Components...
Page 7: ...5...
Page 12: ...10 Installation Preparation Unloading Cable Installation Communications...
Page 20: ...18 Operating Instructions Controls and Indicators Operating Procedures Main Menu...
Page 33: ...31 Troubleshooting Alarm Messages Module LED Indication Module Replacement...
Page 38: ...36 Maintenance Proper Care Scheduled Maintenance Replacing Fan Filters...
Page 40: ...38 Reference Specifications Battery Run Times Warranty Technical Support...


