37
When the Supervisor Password is set, the new item
User Access Level
and
Password Check
will be
added in the menu. You can make further settings of access right in the
User Access Level
item. Setting
options:
No Access
,
View Only
,
Limited
and
Full Access
. The Password Check item is used to specify
the type of BIOS password protection that is implemented. Settings are described below:
A password prompt appears every time when the Notebook is powered on or when end users
try to run Setup.
Always
The password prompt appears only when end users try to run Setup.
Setup
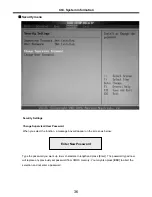
To clear a set password, just press [
Enter
] when you are prompted to enter the password. A message
box will show up confirming the password will be disabled. Once the password is disabled, the system
will boot and you can enter Setup without entering any password.
Note
About Supervisor Password and User Password
Supervisor Password allows the user to enter and change the settings of the setup menu; User Password
only allows the user to enter the setup menu, but do not have the right to make changes.
Ch3. System information
Summary of Contents for K1
Page 1: ...0 Service Manual K1 LG Electronics ...
Page 18: ...17 System Block Diagram Ch3 System information ...
Page 58: ...57 3 Remove HDD using a tag Ch5 Removing and replacing a part ...
Page 59: ...58 Ch5 Removing and replacing a part ...
Page 61: ...60 3 Remove the Memory Ch5 Removing and replacing a part ...
Page 67: ...66 Ch5 Removing and replacing a part ...
Page 69: ...68 3 Disconnect the Connector 4 Remove the Retainer Ch5 Removing and replacing a part ...
Page 73: ...72 2 Disconnect the LVDS Inverter Cable Ch5 Removing and replacing a part ...
Page 74: ...73 3 Remove the Display Module Ch5 Removing and replacing a part ...
Page 77: ...76 4 Remove the Keydeck 5 Disconnect the Touchpad Connector Ch5 Removing and replacing a part ...
Page 78: ...77 6 Disconnect the Power Cable then remove the Keydeck Ch5 Removing and replacing a part ...
Page 81: ...80 4 Disconnect the MDC Cable Ch5 Removing and replacing a part ...
Page 83: ...82 7 Remove the USB Board Ch5 Removing and replacing a part ...
Page 90: ...K1 Buffalo EXPLODED VIEW 2 NHDDB NCVRH NSCRF NSCRF NSCRF NSCRF NBRKB ...

