


Installation
22
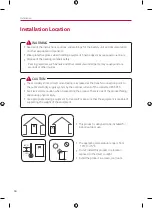
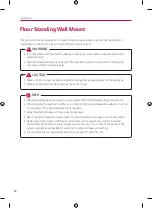
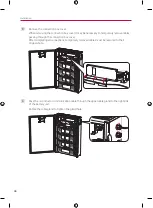
Floor Standing Wall Mount
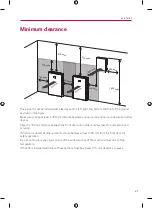
This product must be installed on the wall considering appropriate environments described in
"Installation Location". Be sure to follow this instructions exactly.
y
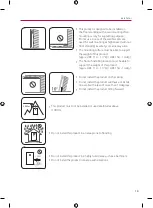
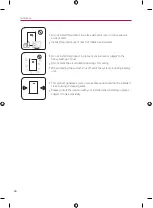
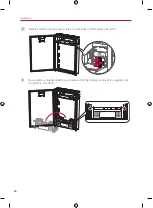
It is important to ensure that the drilling locations are not located on any electrical wiring
within the wall.
y
Align both bracket positions correctly. If the bracket positions are not correct, the battery
unit may not be mounted properly.
WARNING
y
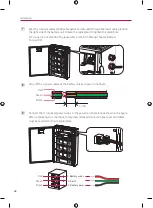
Make sure the screws, anchors and additional supports are appropriate for the wall type.
y
Make sure the pilot hole size matches the anchor type.
CAUTION
y
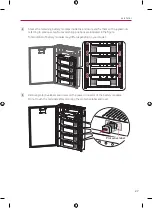
When attaching the wall bracket to a wall, adjust the horizontal level using inclinometer.
y
When indicate the position to drill you can refer to the Quick Installation Guide which is true
to scale print of the actual wall bracket if required.
y
Quick Installation Guide is in the accessory package.
y
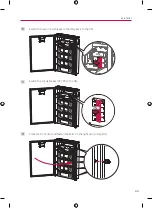
Before fixing the bracket screws, check the horizontal level once again using inclinometer.
y
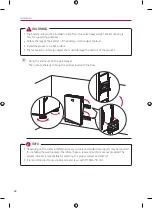
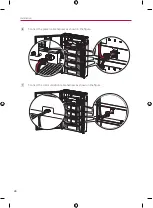
Depending on the surface, different screws and anchors may be required for installing
the wall bracket. Therefore, these screws and anchors are not content of the product. The
system installer is responsible for selecting the proper screws and anchors.
y
It is recommended to use stainless steel screws with TX M8 x 50 mm.
INFO
Summary of Contents for BUEL011HBC1
Page 46: ...Appendix 46 Wiring Diagram BUEL011HBC1 Pack 3 BCU Enclosure BUEL015HBC1 Pack 4 BCU Enclosure ...
Page 47: ...Appendix 47 ...
Page 48: ......
Page 93: ...Anhang 45 Elektroschaltplan BUEL011HBC1 Paket 3 BCU Gehäuse BUEL015HBC1 Paket 4 BCU Gehäuse ...
Page 94: ......
Page 140: ......


