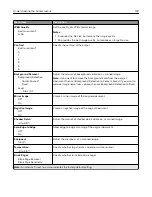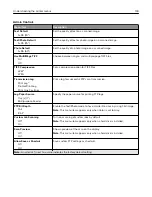
Menu item
Description
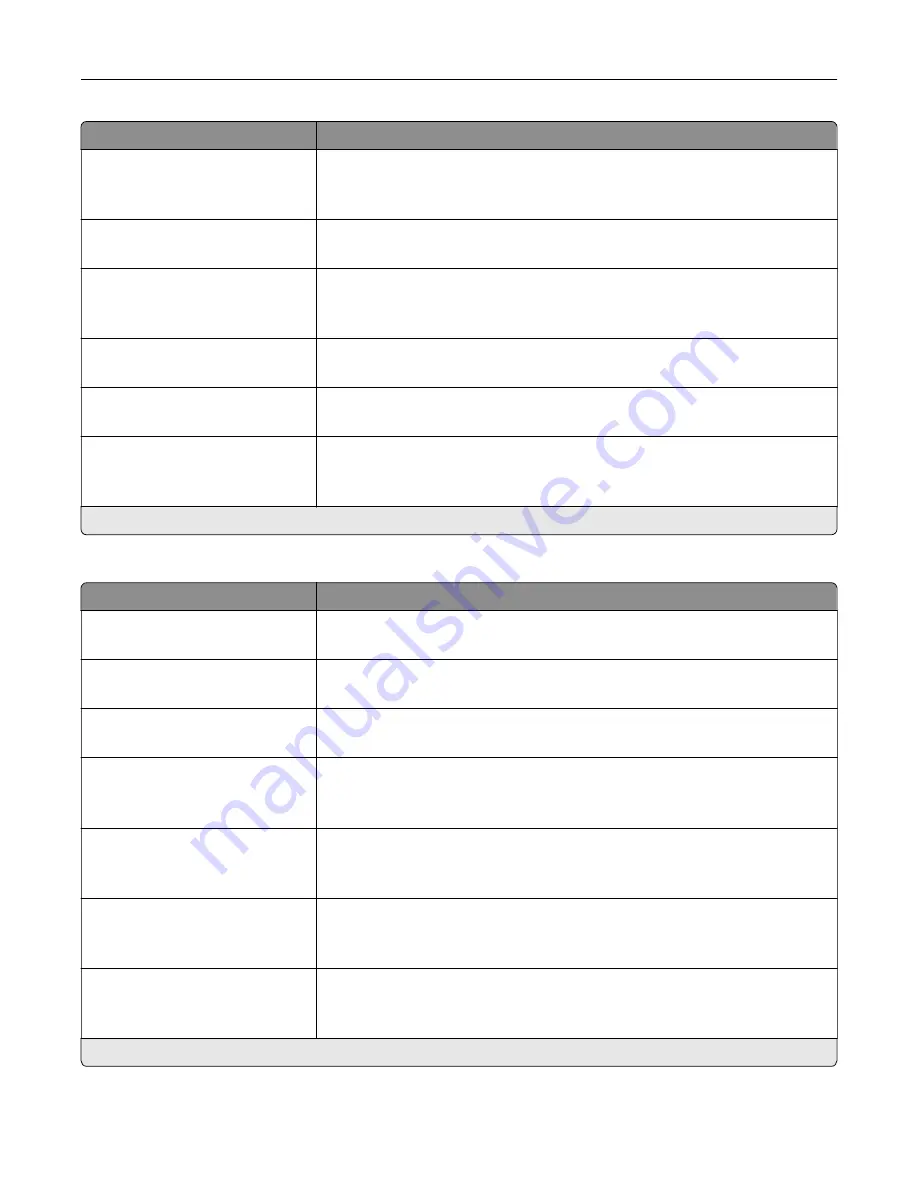
Negative Image
Off*
On
Create a negative image of the original document.
Shadow Detail
‑
4 to 4 (0*)
Adjust the amount of shadow detail visible on a scanned image.
Scan Edge to Edge
Off*
On
Allow edge
‑
to
‑
edge scanning of the original document.
Sharpness
1–5 (3*)
Adjust the sharpness of a scanned image.
Temperature
‑
4 to 4 (0*)
Specify whether to generate a cooler or warmer output.
Blank Pages
Blank Page Removal
Blank Page Sensitivity
Specify whether to include blank pages.
Note:
An asterisk (*) next to a value indicates the factory default setting.
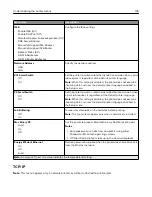
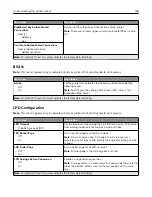
Admin Controls
Menu item
Description
Text Default
5–95 (75*)
Set the quality of text on a scanned image.
Text/Photo Default
5–95 (75*)
Set the quality of text or photo on a scanned image.
Photo Default
5–95 (75*)
Set the quality of a photo on a scanned image.
Use Multi
‑
Page TIFF
On*
Off
Choose between single- and multiple
‑
page TIFF files.
TIFF Compression
LZW*
JPEG
Set the compression for TIFF files.
Scan Bit Depth
1 bit
8 bit*
Enable the Text/Photo mode to have smaller file sizes by using 1
‑
bit image.
Note:
This menu item appears only when Color is set to Gray.
Custom Job Scanning
Off*
On
Turn on scanning of custom jobs by default.
Note:
This menu item appears only when a hard disk is installed.
Note:
An asterisk (*) next to a value indicates the factory default setting.
Understanding the printer menus
138
Summary of Contents for XC2235
Page 16: ...2 Locate the serial number at the left side of the printer Learning about the printer 16 ...
Page 185: ...6 Insert the new waste toner bottle 7 Insert the right side cover Maintaining the printer 185 ...
Page 188: ...4 Remove the waste toner bottle 5 Remove the toner cartridges Maintaining the printer 188 ...
Page 192: ...11 Insert the waste toner bottle 12 Insert the right side cover Maintaining the printer 192 ...
Page 207: ...4 Close doors A and B Clearing jams 207 ...
Page 263: ...Upgrading and migrating 263 ...


