


4-19
4.4.10
4.4.10
4.4.10
4.4.10
Flatbed
Flatbed
Flatbed
Flatbed Optical Chassis Removal
Optical Chassis Removal
Optical Chassis Removal
Optical Chassis Removal
1.
Remove the Document cover. (See subsection 4.4.3)
2.
Remove the ADF unit. (See subsection 4.4.5 and subsection 4.4.6)
3.
Remove the upper housing. (See subsection 4.5.7)
4.
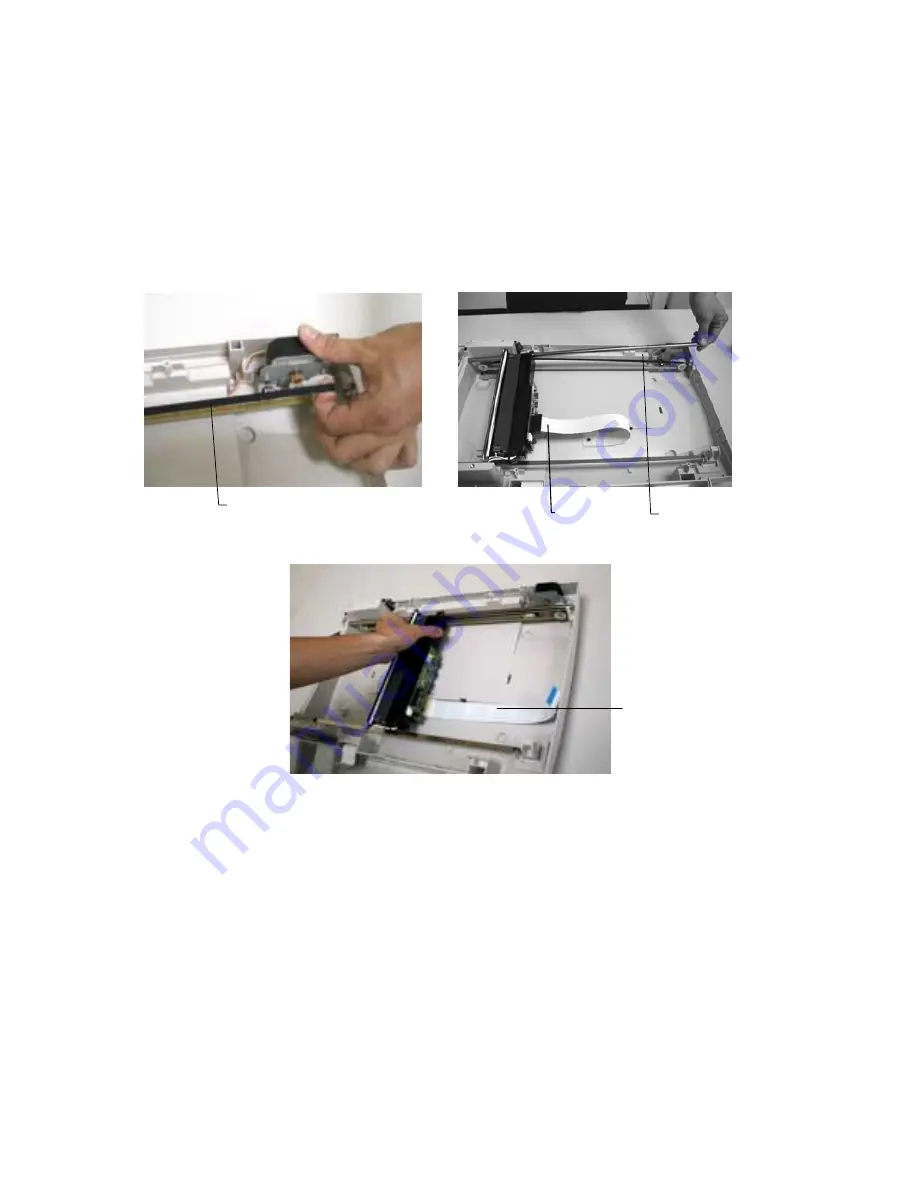
Loosen the belt from the wheel. (See following figure.)
5.
Remove the sliding rod and the flat cable. (See following figure.)
6.
Take out the flatbed optical chassis.
Figure 4.21 Flatbed Optical Chassis Removal
Figure 4.21 Flatbed Optical Chassis Removal
Figure 4.21 Flatbed Optical Chassis Removal
Figure 4.21 Flatbed Optical Chassis Removal
To install the optical chassis properly, please follow the reverse order of removal procedure.
Notes:
Notes:
Notes:
Notes:
1.
The correct direction of CCD flat cable is as shown in Figure 4.20 with the text face up.
2.
Please install the belt with the groove marks on the back of the belt.
3.
After the belt is installed, make sure the belt’s tension is fully carried by the tension spring.
Sliding Rod
Belt
Flat cable
Flat Cable
with the text
face up
Summary of Contents for OptraImage 443
Page 1: ...OptraImage 443 Service Manual Doc No 253 0017 01 Rev 1 01 Lexmark International Inc...
Page 4: ......
Page 20: ......
Page 75: ...5 3...
Page 76: ...Lexmark Internal Use Only 5 4...
Page 77: ...5 5...
Page 78: ......


