


4026-0XX
Diagnostic Aids 3-12
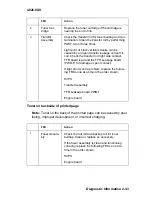
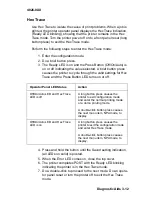
Hex Trace
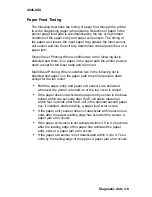
Use Hex Trace to isolate the cause of print problems. When a job is
printed, the printer operator panel displays the Hex Trace indication,
(Ready LED blinking), showing that the printer remains in the Hex
Trace mode. Turn the printer power off or do a front panel reset (long
button press) to exit the Hex Trace mode.
Perform the following steps to enter the Hex Trace mode:
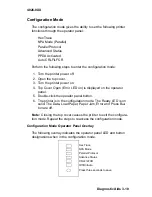
1. Enter the configuration mode.
2. Do a brief button press.
3. The Ready LED is on and the Press Button (Off/On/Auto) is
on or off indicating the value selected. A brief button press
causes the printer to cycle through the valid settings for Hex
Trace and the Press Button LED turns on or off.
4. Press and hold the button until the Saved setting indication,
(all LEDs on solid) is posted.
5. When the Error LED comes on, close the top cover.
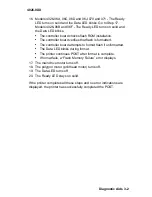
6. The printer completes POST with the Ready LED blinking
indicating the printer is in the Hex Trace mode.
7. Do a double-click to proceed to the next mode. Do an opera-
tor panel reset or turn the printer off to exit the Hex Trace
mode.
Operator Panel LED Status
Action
Off/On/Auto LED and Hex Trace
LED is off
A long button press causes the
printer to exit configuration mode
and enter the normal printing mode
or a demo printing mode.
A double-click button press causes
the next menu item, NPA mode, to
display
Off/On/Auto LED and Hex Trace
LED is on
A long button press causes the
printer to exit the configuration mode
and enter Hex Trace mode.
A double-click button press causes
the next menu item, NPA mode, to
display.
Summary of Contents for Optra E
Page 8: ...viii Service Manual 4026 0XX ...
Page 15: ...Notices and Safety Information xv 4026 0XX Japanese Laser Notice Chinese Laser Notice ...
Page 72: ...4026 0XX 3 5 ...
Page 74: ...4026 0XX 3 7 ...
Page 101: ...4026 0XX Connector Locations 5 6 ...
Page 105: ...4026 0XX Connector Locations 5 10 ...
Page 108: ...4026 0XX 6 2 Assembly 1 Covers ...
Page 110: ...4026 0XX 6 4 Assembly 1 Covers continued ...
Page 112: ...4026 0XX 6 6 Assembly 2 Frame ...
Page 114: ...4026 0XX 6 8 Assembly 2 Frame continued ...
Page 116: ...4026 0XX 6 10 Assembly 2 Frame continued ...
Page 118: ...4026 0XX 6 12 Assembly 3 Printhead ...
Page 120: ...4026 0XX 6 14 Assembly 4 Paper Feed Input Tray ...
Page 122: ...4026 0XX 6 16 Assembly 5 Paper Feed Frame ...
Page 124: ...4026 0XX 6 18 Assembly 6 Fuser ...
Page 126: ...4026 0XX 6 20 Assembly 6 Fuser continued ...
Page 128: ...4026 0XX 6 22 Assembly 7 Electronics ...
Page 130: ...4026 0XX 6 24 Assembly 7 Electronics continued ...
Page 132: ...4026 0XX 6 26 Assembly 8 Transfer Assembly ...
Page 134: ...4026 0XX 6 28 Assembly 9 Option Second Paper Drawer ...
Page 136: ...4026 0XX 6 30 Assembly 9 Option Second Paper Drawer continued ...
Page 138: ...4026 0XX 6 32 Assembly 9 Option Second Paper Drawer continued ...