•
Flex, fan, and align the paper edges before loading.
•
Do not use paper that has been cut or trimmed by hand.
•
Do not mix paper sizes, weights, or types in the same tray.
•
Make sure that the paper size and type are set correctly on the computer or printer control panel.
•
Store paper according to manufacturer recommendations.
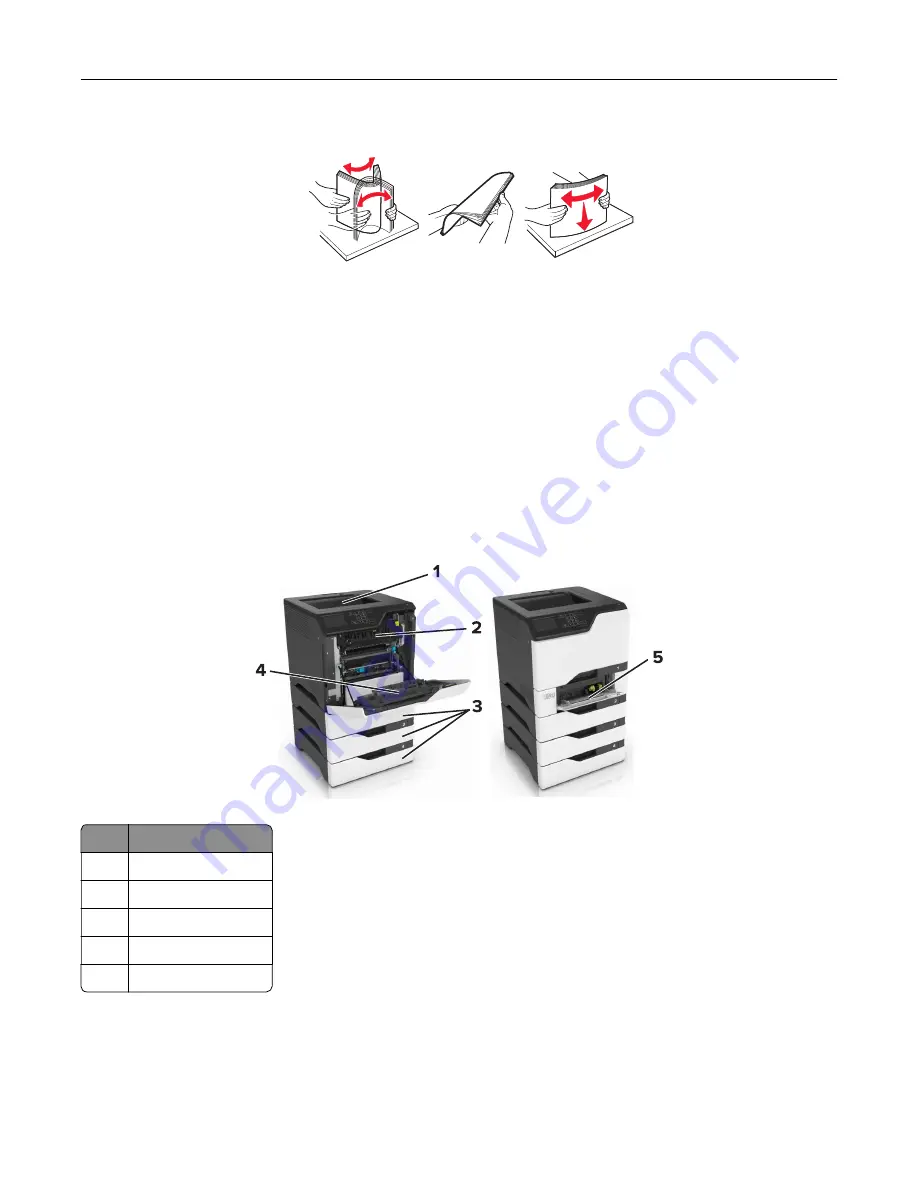
Identifying jam locations
Notes:
•
When Jam Assist is set to On, the printer flushes blank pages or pages with partial prints after a jammed
page has been cleared. Check your printed output for blank pages.
•
When Jam Recovery is set to On or Auto, the printer reprints jammed pages.
Jam locations
1
Standard bin
2
Fuser
3
Trays
4
Duplex unit
5
Multipurpose feeder
Clearing jams
65
Summary of Contents for CS720 Series
Page 41: ...2 Remove the waste toner bottle 3 Remove the imaging kit Maintaining the printer 41...
Page 43: ...8 Insert the black toner cartridge 9 Insert the imaging kit Maintaining the printer 43...
Page 45: ...2 Remove the waste toner bottle 3 Remove the imaging kit Maintaining the printer 45...
Page 47: ...8 Insert the toner cartridges 9 Insert the new imaging kit Maintaining the printer 47...
Page 53: ...3 Remove the pick roller 4 Unpack the new pick roller Maintaining the printer 53...
Page 110: ...5 ISP extended cable 4 Install the ISP into its housing Upgrading and migrating 110...
Page 111: ...5 Attach the housing to the controller board access cover Upgrading and migrating 111...
Page 117: ...5 Open door B 6 Open door C Upgrading and migrating 117...


