


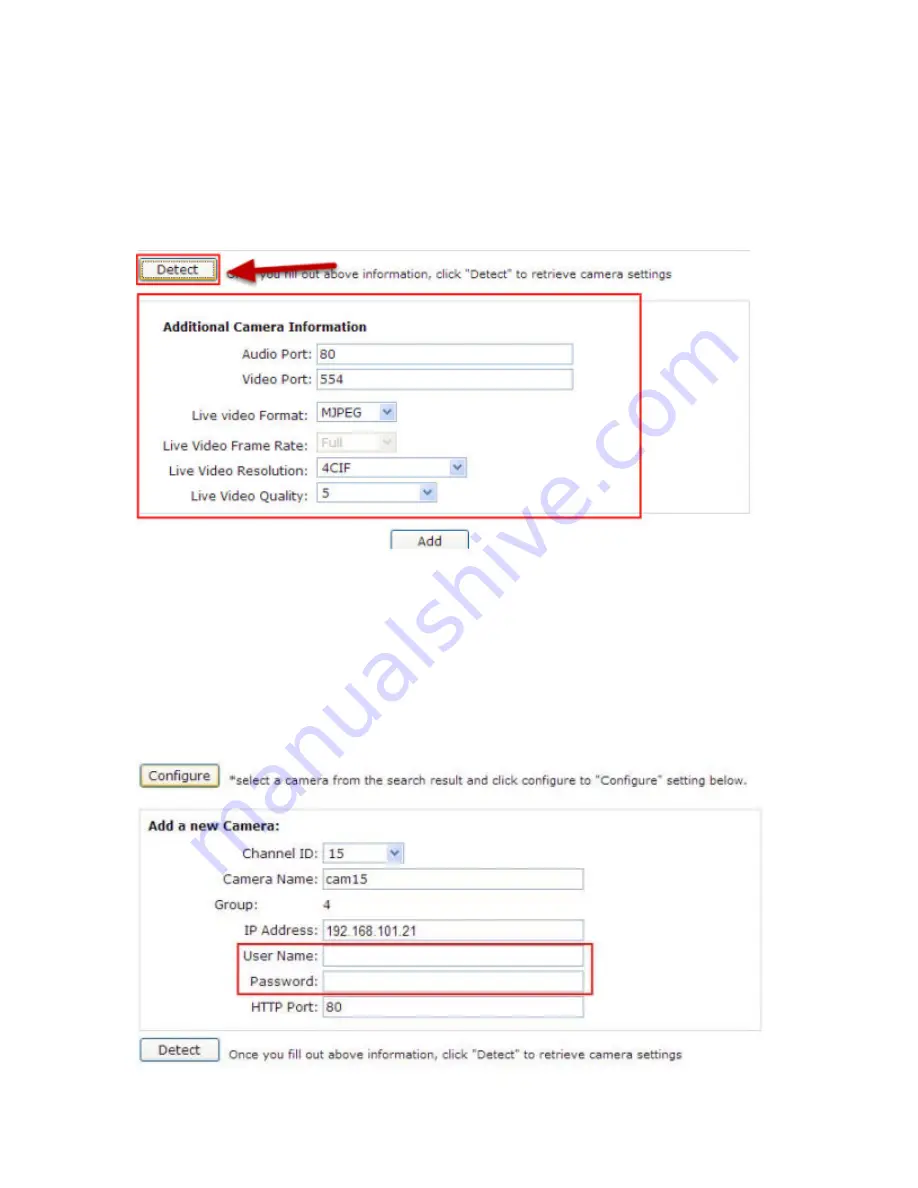
Its corresponding information should be displayed in the “Camera
Information” section. Enter its username and password and select the
channel ID and name the camera.
Click on “Detect” to establish connection between the recorder and the
camera. If connection establishes successfully, camera’s detailed
information should be polled and displayed as below.
Adjust its video format, frame rate, resolution or bitrate...etc if you
wish and then click “Add” to finish adding the camera
Add a camera manually
Summary of Contents for NVR-0432
Page 2: ......
Page 5: ...System Overview Front View Rear View ...
Page 6: ...LED Definition ...
Page 9: ...Push the tray door back to the case to secure it ...
Page 11: ...To begin launch the Deivce Search utility from the CD and proceed with the installation ...
Page 27: ...Only PTZ capable cameras will be listed in the drop down menu ...
Page 36: ...Next hold the mouse left button and draw a square on the video to specify the zoom in area ...
Page 40: ...Type in the IP address of the NVR in the address bar ...
Page 41: ...You should be prompted to enter the username and password to access the NVR ...
Page 42: ...Upon successful login you should see the live view video of the first channel ...
Page 43: ...Click on the Channel drop down menu to select other cameras ...
Page 47: ...Press the button highlighted above to go back to the browser ...
Page 48: ...Type in the IP address of the NVR in the address bar ...
Page 49: ...You should be prompted to enter its username and password for access ...
Page 58: ...You may click Update to update the list to display the most recent results ...
Page 65: ...Locate the exported AVI file and click open normally under C ExportFolder ...


